ACE models, you either love them or hate them, over the last couple of years I have become an admirer of this firms products. They offer a range of limited production run kits, which frequently means a lot of flash and fit issues with limited instructions which cover what goes where, mostly, but does little to cover off the assembly sequence. This means a bit more thinking and effort is required in order to complete the models. I have made nearly 20 of their BMP kits now and so feel sufficiently experienced in their construction to offer some advice to the as yet uninitiated, that's not to say I do it with any degree of finesse as I mass produce to meet the needs of a large Soviet force.

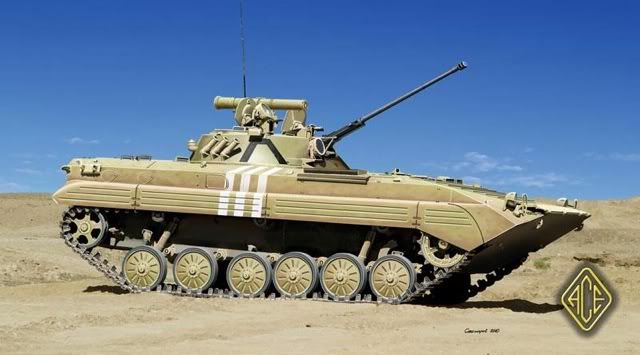
The BMP 2 entered service with Soviet Army in the early 80s and by the late 80's they had probably replaced the BMP 1 in the forward deployed groups of forces. The principal changes associated with the BMP 2 were a two man turret, 30mm canon AT4/5/6 launcher capable of being fired from under armour and a corresponding reduction in the amount of troops carried. In order to accommodate the extra weight and still swim additional buoyancy was required that accounts for the more boxy shape on those equipped with track guards. The Vehicle can be used from the 1980s to the present day and has seen active service all over the globe, so a very versatile addition to the collection.

Basic Assembly Issues
The difficult bits in assembling this model is the hull assembly and the track assembly around the front sprocket.
The first is managed by spending an amount of effort preparing the hull sides and base with a file or sanding stick to ensure the hull sides and hull base fit well together. The return roller holes toward the upper edge of the hull side should be drilled if needed before assembly. I generally get the base of the hull sides attached and leave this to dry before attempting to resolve any miss allignment of the angle of the hull base bow and the hull sides. If the hull rear is fitted at this time getting the sides vertical is easier. With the base of the hull sides secured clamps can be used to ensure that the hull front bonds well or you can sit and hold it. This is a bigger problem on the BMP 1 kits I have had than the BMP 2 kits.

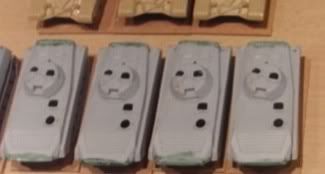
I then attack the tracks before adding the hull top. I add the road wheels and return rollers to the hull sides and assemble the front sprocket but don't add to the hull as shown in the picture above, which was taken before I had developed a process to reduce the pain of adding the tracks. In order to resolve track fit over the front sprocket the easiest method I have tried is as follows:
- Remove front sprocket teeth, over that part of the arc that will be covered by track links.
- Remove guide horns on underside of track links, going over sprocket
- Clean front and rear of track link
- Assemble
- Attach to hull
- on the lower portions of the track removing the inside guide horns can ease track alignment if your road wheels are not straight
- Assemble remainder of track, file and fill where required
I then fit the hull top which never quite meets between the front and the rear, I tend to leave the gap at the rear, the better option is probably the front as the splash plate will cover any mess left from filling and filling. Paying plenty of attention to fit and fileing to achieve it pays a dividend. The remainder of the assembly is quite straight forward but continuing to check fit before assembly remains the watch word.
The major omission from the vehicles is representation of the firing ports which I have personally not rectified but would be relatively straight forward to produce from Foil or plastic sheet. I Have batch assembled upto 4 vehicles at a time and oddly this can be more efficient as it is best to wait for the bonds to cure on the hull assembly before completing the tracks and hull top fit, as well as the waits for filler to cure when fitting the hull tops.
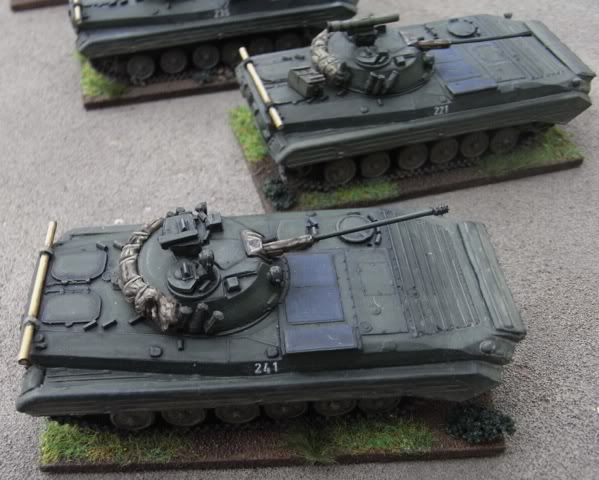
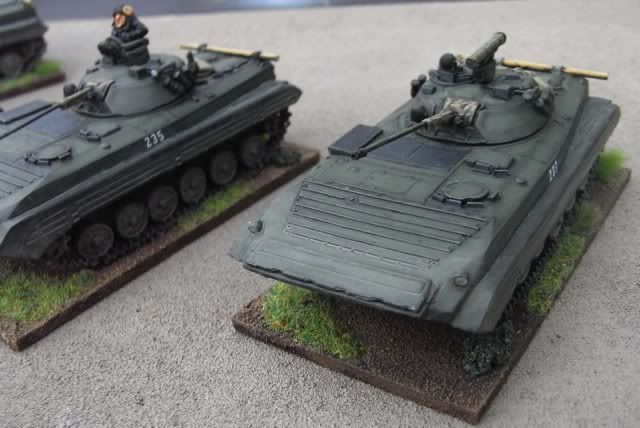
Having endured the pain, the BMP 2 is really a very good model compared to some of their earlier offerings, the final result is always very worth while and beats resin versions by a mile.
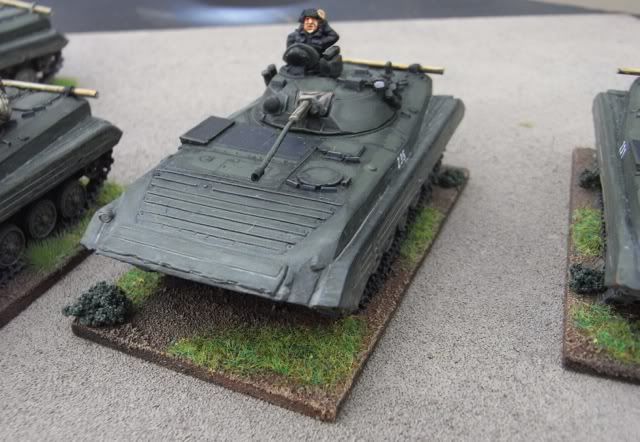
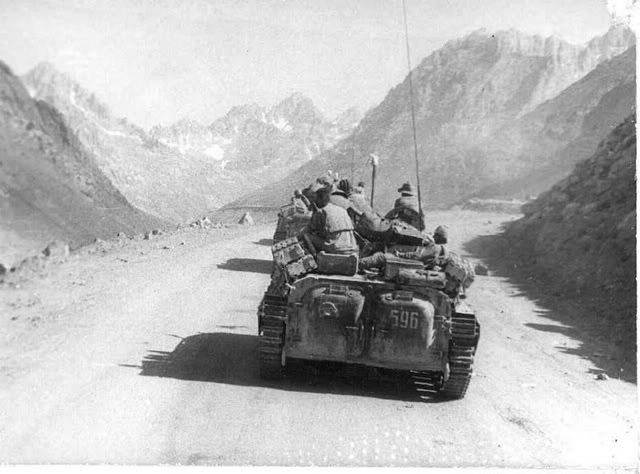
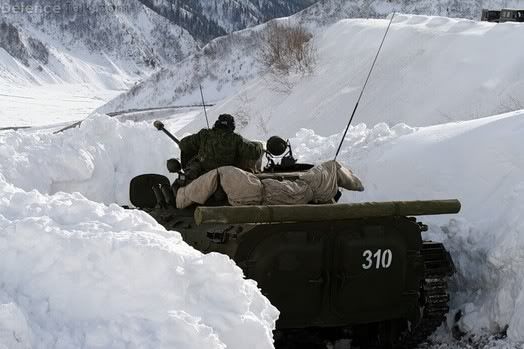
Stowage on Soviet vehicles is always an interesting question, as the soviet soldier was given little equipment and therefore little gets strapped on the outside, although they do have the odd habit of putting the crew on the outside.

Pictures from Afghanistan, Chechnya and Georgia give a slightly different view to that seen of vehicles in Europe and I have opted for something in between. I have seen one immage of a cam net on top of the tarpaulin secured to the hull side but have not represented that.

The elements I chose to represent are as follows:

Pictures from Afghanistan, Chechnya and Georgia give a slightly different view to that seen of vehicles in Europe and I have opted for something in between. I have seen one immage of a cam net on top of the tarpaulin secured to the hull side but have not represented that.
The elements I chose to represent are as follows:
- The unditching beam that appears in a lot of picture, I made mine from plastic rod with green stuff securing straps. The key thing to note here is that the beam needs to be longer than the track width.
- Some hessian wrapped cam nets/tarpaulins around the turret were added made from rolled green stuff before being marked with a wet knife.
- The occasional box tarpaulin was placed on the back deck, this is impossible to do with out obscuring the upper hatches or optics but assume like many British vehicles that the upper hatches were not routinely used.
- I only included launch tubes on half the vehicles but added the rest of the launcher on all
Painting and Decals
The vehicles are painted in Vajello Rusian Green like all my soviet equipment. The Decals are a white numbering set produced by QRF for there 15mm vehicles. The AT 4/5/6 launch tubes are painted in Vajello Russian Uniform, the Tarpaulins and Canvas elements are Vajello english uniform, washed in Devlin Mud and highlighted in Vajello Khaki mixed with buff. Deck grills are Vajello black grey, straps Vajello Grey Green. Weathering is done with washes of Vajello Khaki and Khaki Grey.

ACE have re released this model with considerable improvements a review of the latest product can be found here
Other Resources:
ACE BMP 2D Review on the way models
Henk of Holland Ace Modern Soviet Vehicles
ACE BMP 1A1 OST KG Wings Review
ACE BMP 2 Review on the way models
ACE BMP2, ACE Models page
Military Photos BMP 2
Prime Portal BMP2 Walk around
Military Vehicle Photos BMP 2
Review - Model 1/72, ACE Re Release
Great review Andy. Lovely work on those vehicles.
ReplyDeleteExcellent review :) I just bought 2 of them. Ace is sorta mind numing to build, however I always like the end result. Do you still have a copy of the plans?
ReplyDeleteLater
Larry
Question, do you wash the hull armor any color after you paint it with the Valleo green?
ReplyDeleteBadab black then paint in the panels with original colour, weathering done with khaki washes in both khaki and khaki grey
Delete