Welcome to Cold War Gamer, a blog I am using to record my Cold War wargaming projects. These range from fictitious Cold War hot projects to historical conflicts that took place around the globe throughout the Cold War era, all modelled and gamed in 20mm. The blog includes links to various resources useful to the Cold War Gamer.

My current projects include: Central Front; British & Soviet. South African Border War; Angolans and South Africans. Soviet Afghan War; Soviets and Afghans

Sunday 23 September 2018

Review Book - Red Armour an Examination of the Soviet Mobile Force Concept, R Simpkin, 1984


So this was the summer reading, all part of a project called Deep Battle that I have yet to really start writing about or indeed executing but have been researching since about 2015. Over a wet week in Wales I have been ploughing my way through the 12 essays in this book by Brigadier Richard Simpkin who wrote a series of books on military manoeuvre warfare theory in the mid to late 80s and participated in the wide ranging discussion that went on at that time within NATO with regard to managing the Soviet threat.  Of the essays I am interested in I have now read most of them 2-3 times.  The ideas are complex and Simpkin is rarely an easy read.  Working at it in order to understand what he is saying can be very rewarding. 

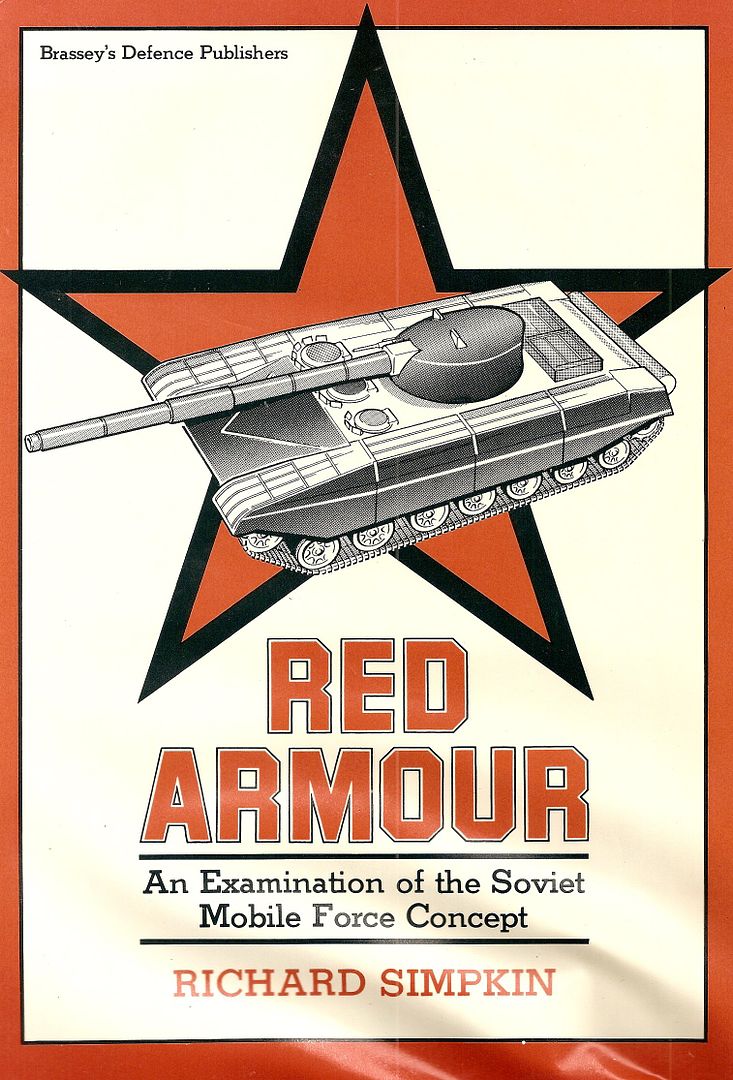
Red Armour, an examination of the Soviet Mobile Force concepts does pretty much what it says on the tin in that it provides, in its 12 essays, a thought provoking and revealing analysis of Soviet Operational doctrine.  Unlike the Race to the Swift which looks at a variety of maneuver warfare concepts and extrapolates these into the future. This collection of his work focuses on Soviet operational concepts as they had evolved by the height of the Cold War in 1982-83.

The Three parts of the book cover, resources procedures and concepts and each part contains four essays which  discuss at varying levels of detail the following topics:

Part 1 Resources
  • Manpower
  • Philosophy
  • Technology
  • Ground
Part 2 Procedures
  • Control and Support
  • Movement and Deployment
  • Obstacle Crossing
  • Parameters of Tank Force operations
Part 3 Concepts
  • The deep battle
  • The tank force concept
  • Soviet mobile operations
  • The NATO centre
For me the nuggets are in part 2 and 3 which focuses on the procedures and the concepts and illustrates the Soviet thinking by contrasting it to NATOs more positional approaches.


In Part 2 I found the particular essays on; Control and Support, Movement and Deployment and Obstacle Crossing the most useful as they really start to drive at the how at the operational level. examples of points of interest include the Soviet use of Primary routes at high traffic densities whilst holding secondary routes in reserve and clear of significant traffic to enable the flexibility to restructure the order of march accelerating assets and units as needed, this together with the the ability to line switch elements between axis of advance provides the conditions for achieving surprise.  Whilst Simpkin challenges the Soviets ability to achieve the levels of flexibility the approaches could deliver and highlights the tactical risks this exposes them to, I am not clear that he considers these objections in the light of Soviet control approaches which include dedicated movement control organisations deployed along routes at relatively high densities in comparison to Western Armies.

In Part 3 his summary of the deep battle discussion he provides one of the most succinct descriptions of both the theory and the terms that I have come across and his articulation of Soviet Mobile Operations in contrast to the more positional and ground focused doctrines of NATO really start to drive home the key differences between the two.  This starts to highlight what the Soviets focus on in terms of objectives - the enemy rather than the ground, and whilst I have read this in many books the way he contrasts this with the ground focused objectives of NATO doctrines really drives the point home.


His treatment of the principal periods of the Cold War and how the Soviets shifted from the use of Nuclear weapons to provide the conditions for maneuver to the need to exploit strategic surprise in the later period to a similar effect is thought provoking and credibly illustrates the potential impacts that could be achieved even in the absence of Nuclear weapons.  He reasonably challenges the effectiveness of interchangeability of resources in a non nuclear phase although he does not explore the increased scale of indirect fire assets or their increasing effectiveness as the book was written in 1983 and pre dates a number of these changes.

From the Wargames perspective what this all enables is the development of the framework of operational concepts that you need to develop in order to set tactical scenarios in the operational context.  In replicating historical battles in other periods this context is provided by the historical events, in gaming the Cold War, you need an operational and strategic picture to set the action against in order to create realistic scenarios, this is particularly true when dealing with the Soviet Union.  

The driver for this is the subject of Red Armour the Soviet Unions thinking at the operational level. Understanding their focus on the operational rather than the tactical is critical to understanding how they would deal with different situations and the forces that would be brought to bear. In short why NATOs tactical and equipment superiority would be nullified by one of the more sophisticated approaches to maneuver warfare available.  Translating that to table-top games is a challenge all of its own.

I snapped up my copy of Red Armour for £40 about a year ago and at that price I think its a worthwhile addition to the collection if you have an interest in developing table top scenarios in the wider operational context, if you are looking for the detail of what the Soviets did rather than the thinking behind it that can be accessed more cheaply and effectively elsewhere. Current prices on Amazon are running at £200 plus and at that price I would be inclined to leave it on the shelf.


AFM Volume 2, Part 2, A Treatise on Soviet Operational Art, 1991


Monday 2 April 2018

Review - Book, AFM Volume 2, Part 2, A Treatise on Soviet Operational Art


This was a truly great find by Andy Miles who kindly posted it onto the Red Storm Rising facebook page.  It's not quite the British equivalent to the FM 100 series, it was written in 1991 from the perspective of understanding Soviet Operational Art as the British along with most Western Nations had given this particular subject a stiff ignoring for most of the Cold War. As the author puts it, the Western Nations experience of operations during WW2 was at a different order of Magnitude to the Soviet and points out that whilst the Western allies deployed some 3 Army Groups comprising 91 Divisions on a front of 400 km, in 1944 the Red Army had 10 fronts with 57 Armies and over 560 Divisions and Corps deployed on a frontage of 3200 km.

AFM Volume 2 was produced in 3 parts and whilst this review focuses on Part 2, I will look to pick up on parts 1 and 3 at a later date, for completeness the parts are:
So what's different between this and the FM 100 series, its based on a similar variety of sources including the Vorisilov Lectures, which it contextualises against a late 80s Force structure and is fundamentally focused on the conduct of operations at Army and Front level, and the general Force Composition and task orginisation required to deliver that. I think it does this well focusing on the Soviet Approaches to Offensive and Defensive Operations, it also provides a variety of commentary on effectiveness and some interesting discussion around both drivers for change and the future, which is where it differentiates itself from the FM 100 series.

Equipment and Organisation is considered at a high level and with only sufficient detail to facilitate the main discussion and demonstrate the mapping between doctrine technology and force structures, which frankly the Soviets were masters of.


 It  broadly follows the structure of the Vorisilov Lectures material and includes a deal of informed comment, the main chapters cover:
  • Equipment and Organisation
  • Operational Planning, Context and Concepts
  • Strategic and Operational Marches
  • Offensive Operations
  • Operations in the Enemys Depth
  • Defensive Operations
  • Combat Support
  • Air Operations
  • Amphibious Operations
  • Logistics
  • Command Control and Communications
Annexes include High level org charts and Broad equipment TOEs for Divisions, Armies and Fronts both within and outside of the Western Group of Forces

This is a book that you can either read or dip into, having said that the approach to dipping into it is likly to be go read the whole section on offensive opps and related elements on combat support. The Upside over reading the Vorisilov Lecture material is that the hard work of placing it in the context of the late 80s has been done and this work draws on wider material as well.


The author CJ Dick of the Soviet Studies Research Centre understands his subject well and attempts to explain the Soviet concepts as they stand rather than trying to equate Soviet military thought to  western ideas, an approach taken in a number of the US manuals which generates some very confusing discussions on echelonment and reserves amoungst others. These subjects are covered with far more clarity in this volume.

I particularly like the categorisation of the Cold War period into a number of Eras based on the prevailing doctrine and the discussion around its impact on force structures and organisation. These are articulated as:
  • The Nuclear Era. Doctrine and force structures dominated by the concept of Combat under nuclear conditions
  • The Era of a Conventional Phase. This period was dominated by the impact of two ideas.  The first was driven by the NATO's adoption of flexible response, which would lead to a Conventional Phase at the start of any war and if surprise could be achieved and Soviet Operational art delivered offered the potential of a conventional victory. The other was the vulnerability of tank heavy formations in conventional war demonstrated during the 1973 Yom Kippur War. 
  • The Era of Conventional War. The result of the INF treaty and the failure by both the Warsaw Pact and NATO to upgrade their nuclear capabilities, lead to a belief in the increasing likelihood of an extended conventional phase or the possibility of a wholly conventional war
This is then neatly mapped to the evolution of the organisations and structures that occured over this period.  The rate of change that was feasible for an organisation the size of the Soviet Army also receives some attention. All of this starts to provide a degree of clarity to the variation in content of key sources on the organisations and structures employed within the WGF at different points in time.

Looking at the diagrams and discussion it seems clear that this work fundamentally underpins The Genforce Mobile Force Handbooks written in 1997 as OPFOR guides which provide excellent commentary on what was essentially Soviet organisation and practice but which because they are OPFOR guides I have always had concerns over how they were adapted and how representative they were of what was rather than what was aspired to.


Some of the organisational structures proposed in both this and AFM volume 2 part 3, Soviet Tactics are quite different from what is discussed elsewhere and I have yet to digest what that means and how or whether to reflect it into my current projects. 

As well as this post I have updated the Post on free resources on Soviet Organisation and Doctrine.  All up an excellent find, resource and for free well worth a read. I have a physical copy of the Vorisilov Lectures Operational Art and would love to find a physical copy of this to add to the collection but so far have looked without success. An excellent perspective on Soviet Operational Art

References:

Red Banner The Soviet Military System in Peace and War, C Donnelley, (1988) @ amazon
AFM Volume 2, Part 2, A Treatise on Soviet Operational Art
AFM Volume 2, Part 3, Soviet Tactics
Voroshilov Academy Lectures
Review-Web Resources, The Essentials of Cold War Soviet Doctrine and Organisation for Free
Genforce Handbook, Mobile Force Part 1, Operational Art and Tactical Doctrine, 1997
Genforce Handbook, Mobile Force Part 2, Tables of Organisation and Equipment, 1997


Sunday 25 March 2018

Review Models - 1/72 S&S Kraz Truck


First post for over a year I think, nothing earth shattering, a review of S&S's Kraz 255.  The 7.5 ton Kraz 214 and 255 trucks provided extreme off-road logistic capacity to the Soviet and Warsaw Pact forces from 1959 through to the end of the Cold War.  The Kraz 214 was produced between 1959 - 1963 and the Kraz 255 entered mass production in 1967 and remained in production until 1994. The Trucks are visually similar, so models in 1/72 can be broadly used to represent either. 


The vehicle provided the platform for a range of variants which included; the TMM vehicle launched bridge from 1974, The carriage and launch vehicle for the PMP ribbon bridge, and the carriage vehicle for the BMK-T bridging boat, together with a number of engineering earth moving and construction variants.  I am using them to provide the transport capability in the Headquaters of my MRR Engineering Company.


The S&S Model is a robust but effective war-games model and is cast in resin and white metal. It can be purchased with or with out the canvas tilt and I have both versions, it cost at the time of posting £11.50 which included P&P.  The models I received were cleanly cast with limited holes and flash.


Other manufactures produce versions of this vehicle notably Armory and Armada but both these manufacturers produce for the modelling fraternity with associated complexity and price.  The model whilst cleverly constructed would provide challenging to convert as the chasis is effectively a component of the truck body so would need to be replaced in order to produce either a TMM or PMP variant. 


After some minimal clean up construction was straight forward and completed quickly with no significant issues, the only thing that slows you down is the amount of time it takes for the super glue to set.  Images of the vehicle show little in the way of stowage so I have left the model in its original state.


I have painted the vehicle in line with my other Soviet equipment in green, although I have been working on evolving my style
  • The Vehicle underside is sprayed in NATO Black XF- 69 before being fixed to the base
  • The vehicle is given an overall coat of Tamiya XF-13 JA Green, and is then oversprayed with NATO Black XF-69 to create an overall dark green colour.
  • The panels were then sprayed with JA Green.
  • The Tilt was painted with Olive Drab XF-62, the areas between the tilt supports were oversprayed wit Nato Black and the ridge was over sprayed with Olive Drab. The whole activity was a bit iterative until the required effect was achieved.
  • The detail was then picked out with a pin wash using Humbrol Black Wash.

  • The wheels were painted with Vallejo Black grey 70852 and then washed with a mix of Vallejo Khaki Grey 70880 and Buff 70976, before being dry brushed with Vallejo Black grey
  • Windows were painted with Vallejo Black Grey
  • The lights front and back were painted with Vallejo Flat Red 70957, Light Orange 70911 and Sky Grey 70989.
  • The doors then received a coat of clear before decals were applied with micro sol then the whole vehicle was sealed with a coat of Tamiya Matt clear.
  • A small amount of chipping was carried out on selected areas of the vehicle using Vallejo Black Grey, Mahogany sand 70846 and Sky Grey
  • The vehicle was then weathered using an overspray of Tamiya XF-59 Desert Yellow.


The truck has been based on laser cut MDF base supplied by East Riding Miniatures,  being a bit of a beast this is 6 cm x 13 cm in order to accommodate the size of the vehicle. These are covered in a mix of sand and white glue before painting.  The base is painted with Citadel Gorthor Brown and dry brushed with Vallejo Desert Yellow 70977.  Once dry a range of basing materials have been used to create the vegetation on the base.


All up a great little model that provides a useful addition to my Cold War Collection and provides a degree of variety in the truck options otherwise available for a Cold War Soviet Army.


References:

Thursday 6 April 2017

ORBAT - MRR & TRR part 3a, Engineer Company


Soviet Engineer units deployed a range of engineer equipment that provided high levels of automation in support of standard field engineering tasks.  The Regimental Engineer Company included sufficient equipment to replicate the range of engineering support available at higher levels for all engineer tasks less amphibious bridging and river crossing capabilities.  This provided the supported MRR or TRR with significant organic engineer capability in support of the primary mission.  As in all Soviet combat support functions additional resources could be task organised from higher formation for specific missions as required.

I first wrote on the Soviet MRR Engineer Company a few years ago at the time I was focused on the task organised groups that the engineers form to support the regiment and did not spend much time trying to unravel the organisational knot caused by disparities in the organisational structure discussed in FM100-2-3 and Isbey's Weapons and Tactics of the Soviet Union.  Since then other sources have come to light and in addition a number of new models have been released allowing for better representation of the unit in 1/72 scale. So I thought it would be worth worth revisiting with more focus on the organisation and equipment of the company. 


Like all supporting arms the engineer assets available to a combined arms commander include:
  • The organic assets associated with the unit or formations
  • Attached assets provided by higher commanders dependent on mission and priority. These can be provided for general support or to achieve specific tasks.
Similar to the allocation of artillery assets the need for centralised or decentralised control depends on the specific operation and phasing:

Centralised control is prefered during
  • Preparation of an offensive
  • Construction of fortifications and minefields 
  • During river crossings operations
Decentralised control is prefered at the start of the offensive or in going over to the defensive. Engineer planning and advice is delivered by the Chief of Engineer Services at each level of command.

The basic goals of Soviet engineer support is to;
  • Create conditions for more effective application of the means of attack, 
  • Support the unhindered movement of friendly forces in the vicinity of the enemy 
  • Affect maneuver on the battlefield 
  • Provide defence for friendly forces from the destructive means of the enemy
and the Engineer tasks that derive from these goals are:
  • Reconnaissance of the enemy and the terrain
  • Preparation and maintenance of routes of movement and maneuver
  • Demolitions work and the construction of obstacles
  • Fortification and camouflage of positions and areas
  • Exploration for sources of water and its supply and purification
  • Measures to camouflage troop movements and operations
  • Engineer actions to eliminate the effects of nuclear attacks

Engineers are supported in the delivery of these tasks by Motor Rifle and Tank troops as required.   Not surprisingly with the Soviet army the organisation and structure of the organisation directly maps to the doctrinal tasks and goals it is set to deliver.  At Regimental level that leaves us with an Engineer company as outlined below.


This organisation is derived from a review of a number of sources;
  • FM 100-2-3 provides the main components of the structure 
  • Weapons and tactics of the Soviet Union together with Soviet Combat Engineer Support a research paper by Major J Parr written in 1978 provide the detail of the allocation of equipment to the sections and platoons as well as the view that the technical construction platoon could be replaced by two sapper platoond
  • L Graus paper Instant Russian Obstacles, FMSO, 1996 provided the view that the UMZ was deployed at regimental level. Currently I believe the UMZ was deployed in the early 1980s and I have assumed that organisational change was adopted from introduction into service.
There are a variety of conflicts amoungst the sources around the detail of the equipment holdings and the precise structure. This interpretation adapts the FM 100-2-3 view, a number of other interpretations would be equally valid.


The organisational structure shown allows the company to support the standard Soviet Engineer task groupings through which Engineers in the Soviet army delivered support to the Combined Arms Force. Composition of the main groupings are covered in the post MRR & TRR part 3 Engineers.  In outline the groupings and tasks are as follows:
  • Inzhenernoe Razvedyvatel'nyi Dozor Engineer Reconnaissance Patrol, this may be grouped with other recce units such as Chemical or Regimental or operate independently, they report on the state of roads bridges and obstacles and can work in coordination with or independently of MSDs.


  • Otriad Razvevedki i Razgrazhdeniia Reconnaissance/Obstacle Clearing Detachment, these groupings are used primarily to clear obstacles on route to enemy objectives, I assume these are formed by Combat Troops equipped with Mine ploughs and rollers and potentially supported by Sapper platoons
  • Otryad Oberspecheniya Dvizheniya Movement Support Detachments, facilitate the maneuver of the first echelon in attack, withdrawal and advance. They will normally operate in front of the main body clearing obstacles and improving routes.  They may include security elements from combat or recconnaissance units 
  • Podvizhnyy Otryad Zagrazhedni Mobile Obstacle Detachments, composed primarily of engineer troops they can be reinforced by other units including mine laying aviation assets.  They are configured to rapidly deploy mines, conduct extensive demolitions and deploy and develop obstacles to movement using construction equipment. 
Company HQ & Services


The Company HQ and Services platoon is equipped with 3 Command Vehicles a UAZ 469, BRDM2 and a BTR 60 and a fleet of 8 or 9 trucks for carrying the engineer stores of the regiment, Trucks would either be the 7.5 ton Kraz or the 5 ton Ural and the stores carried were primarily;
  • Mine ploughs, 
  • Mine rollers, 
  • MTU dozer blades
  • Water purification kit. 
  • Stores for Bridging
It is not clear if mine ploughs could be fitted by the tank crews or would need the support of an engineer section.

I have represented the unit with a BRDM 2 and 3 Kraz Trucks. I decided to use the Kraz trucks primarily to differentiate the engineers from the artillery units in my collection.  The Mine rollers and ploughs are represented as separate models which can be attached to any vehicle and the MTU dozer blades I model as permanent attachments to one tank in the tank battalion.

Sapper Platoons


The sapper platoons each consist of 3 sections with each section mounted in a BTR 60 or a truck. Sections are capable of undertaking a variety of tasks including;
  • Demolitions and Cratering
  • Mine clearance 
  • General pioneer work.  
I will be representing the platoon with a single BTR 60 PB and trailer although I am tempted to use BTR 60 Ps to provide some variety.

Sapper & Mine Platoon


The third Sapper platoon in the company was also the minelaying platoon. Again these could be equipped with APCs or trucks although in this instance the APCs would be BTR 152s as the PMR 3 or PMZ 4 could not be operated from a BTR 60PB due to the rear mounting of the engine. As well as minelaying this platoon could also undertake general pioneer work, demolitions and cratering.  I am representing this platoon with 1 BTR 152, 1 PMR3 and a ZIl 131 with a UMZ scatterable mine system as discussed above.


The platoon is equipped with a first line scale of 600 mines, minefields consist of 3 rows and at a 4m spacing this load can deploy an 800m 3 lane minefield in 20 minutes. Reloading takes 10-12 minutes although exchanging the towing vehicles can speed this up.  A large minefield would comprise of a number of 200 - 300m blocks with varying orientation and arranged in depth. Blocks could be interspersed with dummy minefields which would just be ploughed. A platoon of 3 Vehicles can lay fairly significant minefields in an hour and smaller ones in 20 minutes.

Road & Bridging Platoon

The Road and Bridging platoon comprised of three sections that primarily manned specialist engineer equipment appropriate to the sections primary task, the three sections covered
  • Route maintenance and support, 
  • Bridging 
  • Obstacle and fortification construction
The Platoon deploys 11 vehicles in total so I am representing it with 4 models


Road Section


The Road section consists of two vehicles only a DIM mine clearance vehicle and a BAT-M, I am representing it with a single BAT-M.

The BAT-M can be used to develop routes using its forward blade which can be configured in a number of ways depending on the task and the onboard crane.  tasks include:
  • Grading
  • Filling Trenches and Craters
  • Clearing rubble and Snow
  • Breaching Obstacles
Whilst not primarily designed for digging work it could be deployed to develop fortifications and ditches if required, in this it would be less effective than the purpose built machinery described below. The BAT-M started to be replaced by the BAT 2 at the backend of the Cold War
  • BAT-M produced 1953 - 1972
  • BAT 2 Late 80s entered service 1988 onward, no significant change incapability
Bridge Section


The Bridge section varied between tank and Motor Rifle Regiments, Tank Regiments had 3 AVLBs and a 4 TMM truck launched bridging unit. The MRR had only 1 AVLB and the TMM unit.

The AVLBs that could be deployed included:
  • MTU-12. 11m class 50, based on T-54 chassis, production 1955
  • MTU-20, 18m class 50, based on T-55 chassis, production
  • MT-55, 18m class 50, based on a T-55 chassis, deployed in 3 minutes, production 1969 - 1983
  • MTU-72, 18m class 50, based on a T-72 chassis. deployed in 3 minutes, production 1974 - 1992
The TMM bridging sections are 10.5 m in length and together could span a 40m gap over rivers with a depth of up to 1.7m/3m depending on version. The original TMM system was class 50 whilst the later TMM3 was class 60. TMM was originally deployed in 1962 and updated in 1974. A 40m span could be deployed in 90 minutes at night. Multiple TMM sets could be applied to span longer gaps.

Regardless of regiment type I am modelling the bridge section as 1 MT-55 and one TMM.

Fortification Section


The Fortification section could be equipped with a few different vehicles in general there was either an MDK-2  or a BTM. the BTM was primarily a trench digging equipment whilst the MDK - 2 could be used to rapidly develop anti tank ditches vehicle scrapes or bunkers.  The rest of the section comprised 3 PZM trench excavators.

Digging rates were:
  • BTM between 250m - 800m per hour depending on trench depth and soil type. Trenches of 1.1/1.5m depth x 1m width could be produced in straight sections, zig zagging or waves.  
  • MDK-2 creates a trench 3.5m x 3.5m at around 30m an hour.  This seems low compared to the others. 
  • PZM can dig trenches of upto 3.5 m depth x upto 3.5m width at rates between 35m an hour to 200m an hour depending on soil type and trench size
I will be representing the section with a BTM, primarily because I have yet to find an MDK-2 in 1/72, which would be my preference, although scratch building one is looking appealing.


Game Concepts

Usually engineer tasks other than deployment of AVLBs sit outside the scope of most games.  The level of automation deployed by the Soviet Army across all task allow this to be challenged. The obvious candidates are the more rapidly deployed capability options;
  • AVLB launched bridge
  • Single/duel Span TMM
  • Minefield breaching
  • Crater filling
  • Wire Breaching
  • Scatterable minefield deployment
In game completion of tasks;
  • AT Ditch deployment
  • initial trench system creation
  • Surface laid minefields
  • closure of gaps in obstacles
  • initiation of demolitions
Consideration may be given to an opening move of longer duration enabling the placement of obstacles at the commanders discretion or multiple moves of engineering tasks before the arrival of the enemy force or indeed the sequenced arrival of that force over a number of moves all of which would provide scope for in game Engineer play given the rate of production described above and the Soviet doctrine of deployment of obstacles on identified enemy lines of advance.  Most of these concepts would need axis of advance or points of entry to be identified to the Soviet commander an activity that could be randomised.


The understanding of the production rates also play to the development of obstacle belts within scenarios. An understanding of the wider scheme of maneuver and the associated time and space issues allow for calculation of what could be produced in the time available or allow for a degree of pre game play as part of an encounter battle for instance.


The Soviets doctrine called for the deployment of obstacle belts in front of maneuvering forces in order to achieve surprise and chemical troops smoke units would be deployed to screen the tasks from the advancing enemy forces.

Models

You need of course to build models to represent the engineer assets and for engineering capability that includes both the equipment and the terrain items that indicate that the work has taken place.  So creation of engineer units and their employment is a reasonably labour intensive task.

The good news is that over the last couple of years the range of models to support the use of Soviet Engineers in 20mm / 1/72 has increased dramatically and includes figure as well as equipment from such companies as S&S and W Models.

A combination of relatively inexpensive resins and plastic kits will buy you the bulk of the capability with the odd high cost rein from W Models rounding out the capability along with a small amount of scratch building and a little imagination its fairly straight forward to deploy the equipment and figures. A reasonably comprehensive list of models and suppliers for this project is outlined in the table below;


To represent the impact you will of course need a range of terrain pieces including:


  • Deployed equipment bridges
  • Minefields, marked and unmarked
  • Wire obstacles
  • Craters
  • AT Ditches
  • Trenches
  • Trench systems
  • Tank scrapes
Whilst engineering activities are seldom a major focus in miniature wargaming, the Soviet doctrine that called for the rapid development of obstacles in the line of an enemy advance and in support of flank protection and the Anti Tank reserve place a different emphasis on them compared to the less dynamic concepts seen within NATO and makes them worthy of consideration for games.


References:

Web:

BTR 60
Pioneer Battalion 11
Soviet Engineer Digging Equipment
Soviet Combat Engineer Support, US Army Institute for Advanced Soviet and East European Studies
Instant Russian Obstacles, FMSO, 1996
Soviet Engineer Equipment
FM100-2-3

Books:

The Soviet Conduct of Tactical Manoeuvre

Other Posts of Interest:

ORBAT - 1980's Soviet MRR and TRR, Part 3 Engineers
TTP - Soviet Advanced Guard and March Security
Wargames Unit - Soviet MRR, Anti Tank Reserve
Review - Model 1/72, S&S MT-55 Bridgelayer

Friday 10 March 2017

Review - Book, Todays Army Air Corps, Paul Beaver, 1987


The first thing to point out about what I think is a very handy little reference is that the title is a complete misnomer.  Written in 1987 the Today in the title very much refers to the Army Air Corps of yesterday and you will certainly struggle to find even a mention of the AH 64 which was a distant aspiration at the time of writing.  What the book does do well is provide a compact overview of the British Army Air Corps This includes:
  • A Short History of Army Flying
  • Structure and Command Arrangements
  • Regiments Squadrons and the AAC Center
  • Aircraft
  • Weapons Roles and Equipment
  • Future Programme
  • Training and Tactics


This book is an excellent snap shot of the Army Air Corps at the backend of the Cold War. The Historical section is too short to do anything but provide pointers to conflicts in which the Army Air Corps had previously played a role.  The real value to the Cold War Gamer lies in less than half the book, primarily in the sections on:
  • Structure and Command Arrangements. This section is a little thin but provides an overview of how the Army Air Corps supports the rest of the Army with both Aviation Advice, staff support and planning functions as well as the broad structure of the units and a view of the organisations that support is provided to essentially BAOR, UKMF, Special Forces and Northern Ireland.
  • Regiments Squadrons and The AAC center. This section is the first of the two absolute nuggets in this book this covers each regiment and independent squadron and in a terse paragraph summarizes location role, equipment holdings and the HQ they report to, which is immensely useful for context and scenario planning if you want to refer to the real units.
  • Training and Tactics. The second nuget is the training and tactics section which is sadly all too short and in a few pages talks through HELARM tactics with Gazelle and Lynx as they would operate in Germany.  This looks at both the Anti Armour and Recce/Air Op roles. It would have been nice to see something on Forward Air Refueling and cross FLOT (Forward Line of Own Troops) operations but the data supplied is enough to give you a basic understanding of how the Aviation assets would be used.  Its easy to forget that other missing items such as JAAT (Joint Air Attack Teams) post date this title, within the British armed forces.
The rest of the books information is useful but can be obtained easily else where, including online sources. For an out of print obscure little book it contains some very useful information. It can be picked up on Amazon, last I looked for .01p, at that price it pays for itself if you can use it to make the gaming table more stable by sticking it under one of the table legs. A thin tome but a worthwhile addition to the Cold War library if you have an interest in British aviation capability at the back end of the Cold War.

Today's Army Air Corps @ Amazon


Sunday 5 March 2017

ORBAT - NATO's Northern Army Group, 1 BR Corps Deployment


The 1 Br Corps deployment zone sits between Hanover in the North to Einbeck in the South. Deployed to the North is 1 GE Corps and to the South covering the more broken terrain of the Harz Mountains and the Saurland is 1 Be Corps.  The detail of NORTHAGs deployment was previously covered here.

The Corps area is dissected by the Rivers Weser and Leine and has the Harz mountains on its Southern boundary and the Teutoburger Wald to its rear.  The city of Hieldesheim sits in the center of the Corps area of responsibility with the ground to the south of Hieldesheim being more broken and to the North more open.  The Corps sits astride an Axis of Advance to the Ruhr industrial conurbation.

The Corps concept of operations saw a covering force fighting a delaying action from the Inner German Border back to a Main Defensive Position that sat forward of the River Weser and across the River Leine.  The covering force battle would buy time for the preparation of the MDP and potentially the deployment of units from the UK if this had not happened in transition to war.  To the rear was the reserve Division with the primary task of launching a counterstroke into the advancing Soviet Armies once the main axis of advance had been identified and this would create the conditions for a counter offensive by the NORTHAG reserve to restore the Inner German Border.


  • The Covering Force was provided by 2 Armoured Reconnaissance Regiments from 1 and 4 Divisions together with 644 Squadron AAC.  The Recce Regiments at this time were 1st The Queens Dragoon Guards and The 16/5th Queens Royal Lancers. They were effectivly under command 1 Br Corps in this phase.
  • The Northern MDP Division was provided by 1st Armoured Division covering the more open ground South of Hanover and North of Hildershiem.
  • The Southern MDP Division was provided by 4th Armoured Division deployed in the Southern part of the corps area covering the more broken around the Sibbessa gap.  
  • The Parachute Regiment Group deployed to Hildershiem in the centre of the area and I would imagine they intended to stay put regardless of the developing situation.  Hildersheim and the Parachute Regiment Group came under command of 1st Armoured Division.
  • Corps Reserve was provided by 3rd Armoured Division. The corps reserve supplied its reserve Brigade to enable the withdrawal of the covering force through the main defensive position by securing crossing points over the Rivers forward of the Leine.  Once the covering force had withdrawn 3rd Division's reserve Brigade would join the rest of the Division West of the Weser and launch its counter stroke.
  • The Corps Rear area was secured by 2nd Infantry Division, which also included 24 Airmobile Brigade which would primarily be used for counter penetration tasks into the forward areas and could be deployed in support of either the MDP or Covering Force Battle. Of Interest during Ex Lionheart in 1984, the German 53 Heimatschutz Brigade reinforced 2nd Division and 24 Brigade (at the time a Mech (W) Brigade) was released for deployment else where.
  • The Rear Combat Zone and Communication Zone sat behind the Corps rear boundary.


Behind the forward deployed Corps of NORTHAG sat III US Corps, once it had completed its deployment from the US it would conduct subsequent operations to restore the line of the Inner German Border.


By the close of the Cold War NORTHAG reserve included a multinational Airmobile division that included:
  • UK 24 Airmobile Brigade
  • Ge 255 Luftlande Brigade
  • Be Para Commando Regiment
Over the duration of the Cold War I suspect this plan changed a number of times but this is what I intend to use as the operational context for games involving my British forces.

The Essentials of the 1 BR Corps plan were therefore:
  • Covering Force - Recce and 644 Squadron AAC Forward
  • Main Defensive Position Battle including Divisional Covering Force and Divisional counter attacks/penetration.
  • Counter Penetration by 24 Brigade (88/89) after formation of Brigade and prior to move to multinational Airmobile Division.
  • Counter Stroke - 7 Panzer Division & 3rd Armoured Division
The unifying purpose being to achieve the destruction of the first operational echelon between the R Weser and the R Leine.
UK based components would deploy during transition to war or in the opening stages of the conflict, these included.
  • 3rd Armoured Divisions Recce Regiment
  • 4th Armoured Divisions 19 Infantry Bde
  • 665 Sqn AAC
  • 2nd Infantry Division


My intent is to set a number of Scenarios within the 4th Armoured Divisions area of responsibility primarily as it had a slightly more diverse force structure than 1 Armoured Division deployed in the more open ground to the North and therefore holds a little more variety in the type of actions and forces that can be used.  19 Brigades deployment area around Bockenem is shown on the map below.


The Divisions were tailored in their task organisation to their areas of responsibility. The 4th Armoured Division included 2 Armoured Brigades and an Infantry Brigade.  The table below outlines exactly what this meant in terms of the detailed composition of the different divisions in 1 Br Corps.


So essentially the 4th Armoured Division was a Mechanised Division with 1 Mech (T) Brigade, 1 Mech (W) Brigade and an Armoured Brigade.  The organisation of the 4th Armoured Division was as follows:


The Unit composition and equipment distribution of the Combat and Combat Support units around 1988/89 were as follows:

  • 16/5th Queens Royal Lancers, Divisional Recce Regiment (CVR(T))
  • 4 Regiment Army Air Corps (Lynx/Gazelle)
  • 45 Field Regiment RA (FH70) 19 Bde (Assumed)
  • 26 Field Regiment RA (M109/Javelin) 11 Bde
  • 49 Field Regiment RA (M109) 20 Bde
  • 35 Regiment Royal Engineers (FV 432)
  • 11 Armoured Brigade; 

  • 5th Inniskilling Dragoon Guards (Chieftain) 
  • 3 Royal Anglian (FV 432)
  • 2 Queens (FV 432)

  • 20 Armoured Brigade; 

  • 15/19 Hussars (Challenger)
  • 4/7th Royal Dragoon Guards (Challenger)
  • 1 Royal Regiment of Wales (FV 432) replaced by 1 RIRISH in 1990 (Warrior)

  • 19 Armoured Brigade; 

  • 1 Kings Own Scottish Borderers, (Saxon)
  • 2 Royal Anglian, (Saxon)
  • 1 Staffords, (Saxon) 
  • Royal Hussars (Chieftain, Less 1 Sqn to UKMF)

  • Engineers and artillery would tend to be attached to the brigades, recce squadrons could be attached to brigades but tended to operate as a divisional asset along with the AAC Regiment. Additionally the division would have a squadron from 32 Armoured Engineer Regiment with troops being attached to brigades as required.


    The Divisions operational concept had the Armoured Brigade and the Armoured Recce Regiment deployed forward as a covering force. The Armoured Recce Regiment being initially under command of 1 Br Corps as a component of the Corps covering force.  The 2 Mechanised Brigades then developed and manned the Main Defensive Position with the covering force withdrawing back into reserve where it would be reconstituted by replacement crews and vehicles from the Armoured Delivery Regiment. The AAC regiment would take a very active role in counter penetration as the ground lent itself well to HELARM anti tank ambushes. I expect it would have been active in both the divisions covering force battle and the MDP battles.


    19 Brigade the Mech (W) Brigade would deploy in the North of the area around the Bockenem bowel at the entrance to the Sibbessa gap and 11 Brigade, the Mech (T) Brigade to the South around Bad Gandershiem and Seesen20 Brigade would provide both the covering force and the reserve.  


    References:

    Web:

    M136 Exercise Picture Archive
    British Army Units since 1945
    Fire and Furry Cold War Orbats and Modern Resources
    Staff Rides 1Br Corps Material and Maps

    Books:

    The Royal Armoured Corps in The Cold War
    The British Army in Germany, an Organisational History 1947 - 20
    British Army of the Rhine,  TJ Gander
    The Royal Engineers, TJ Gander
    Other Posts of Interest: