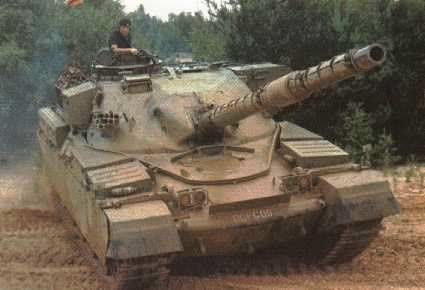
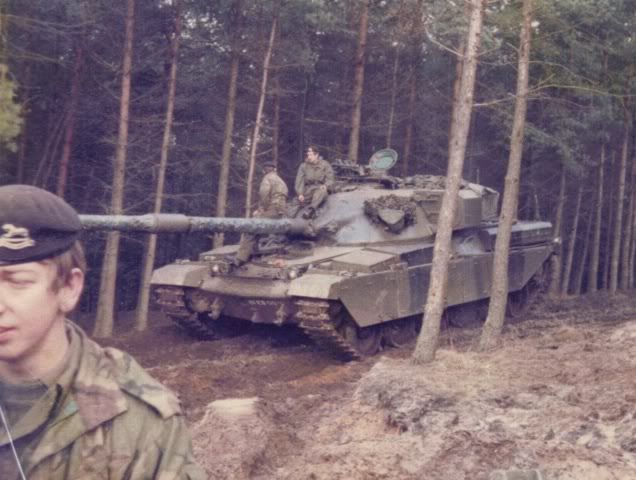
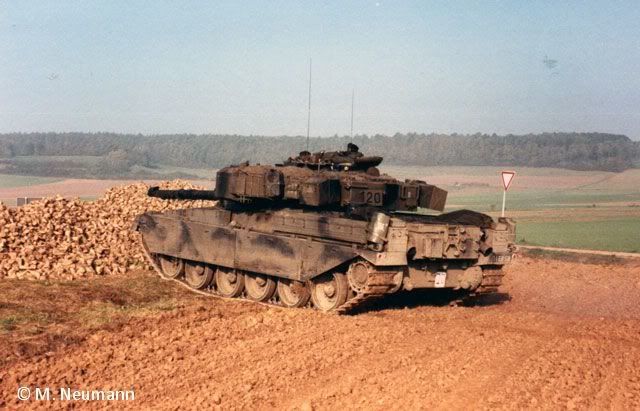
The Britannia Chieftain represents a 1/72 Chieftain mk 5/3 or 6/3 with LRF but no TOGS and no Stillbrew armour so it's great for the early 80s force, less good for the late 80s. Stillbrew came in post 1986 and TOGs for Cheiftain was introduced from 88/89 this is covered in the various 1980s British Battle Group Posts. Other model options for British tanks for battle groups in the 80s Included for Chieftain the Airfix model and Matador do a stillbrew conversion kit . If you want to dodge the Chieftain Stillbrew issue the best bet is the Revell Challenger but this will limit the units you can represent up until the end of the cold war when the last of the Chieftains were retired.

The main armourment, commanders GPMG and the commander are all cast in white metal, with the commander wearing the old US style crew helmet rather than the kevlar crew guard which came into service in the late 80s. All the white metal castings I have received have been of good quality with no flash. The remainder of the vehicle is cast in resin and comprises turret and hull. The quality of the casting whilst adequate can require a fair deal of filling and filling although I have not come across anything that defeats me here. I highly recommend studying pictures of the vehicle to understand the rotational orientation of the barrel, I got three wrong, this is recoverable through covering the barrel with a cam net which look good and was a common practise. The MBSGDUs are much better represented than on the Revell Challengers.
 |
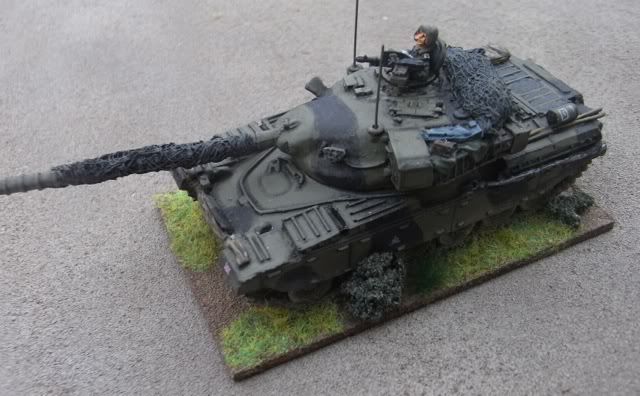
| A model with the stowage in the turret baskets unchanged |
The main draw backs of the model are pre cast stowage and a commanders hatch cast open. Neither are insurmountable problems but if you don't want the whole squadron looking the same they do require some adjustment. either through the addition of extra stowage or the removal of existing stowage. in nearly all cases I have done both. The principal areas for stowage removal have been on the turret baskets where the stowage has been sanded down on one or both baskets before covers made of green stuff have been added. these have later been painted to represent either ponchos or KIP sheets.
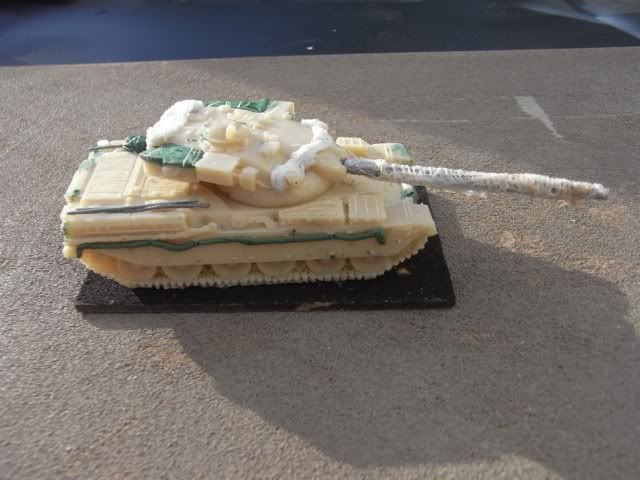
Additional stowage added includes antenna, cam nets on the NBC pack and over the MBSGD, hessian on hull front and sides, cam poles on either side of the back decks, the occasional lube can on the back decks, roll mats on the outside of the turret basket or Jerry cans on the turret rear. On one vehicle I have removed the commanders hatch and have replaced it in the closed position. Webbing around the turret is also a common stowage option as is the bin bag I have put on the back deck.
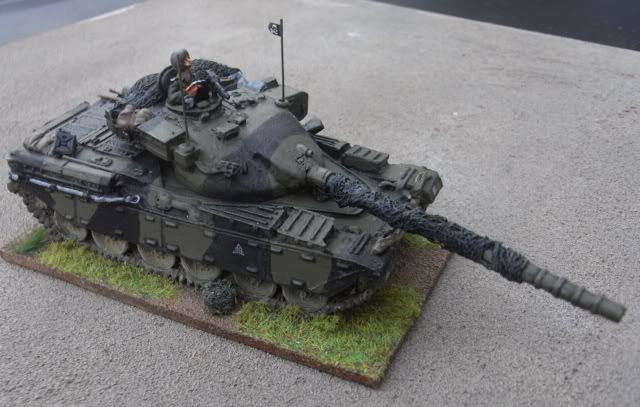
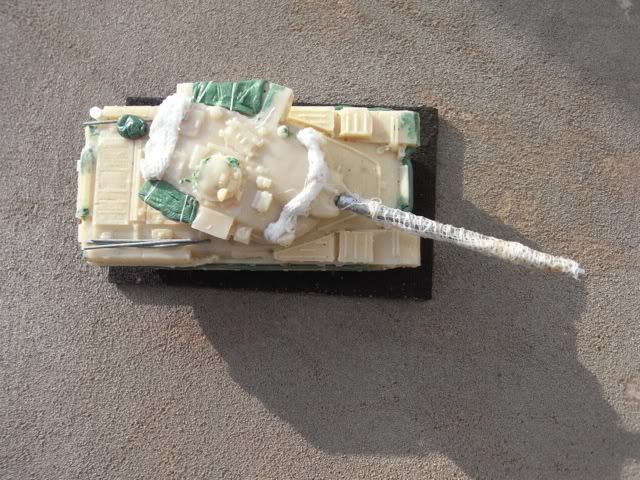 |
| Stowage in the turret baskets removed and covered with green stuff tarpaulins |
The model provides a solid representation of the vehicle, and once you have introduced a bit of variety in stowage it looks great when deployed as part of a unit the look and feel of the beast are absolutely spot on.
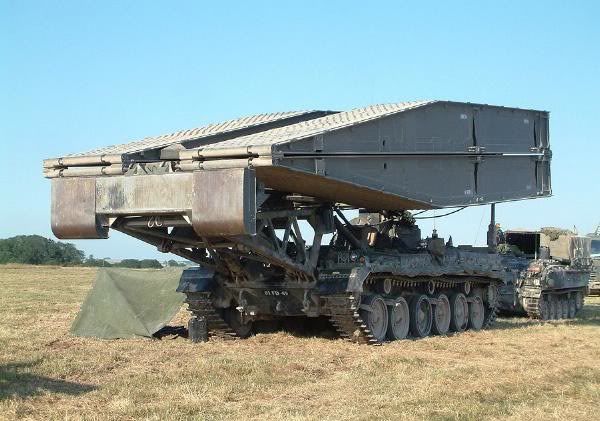
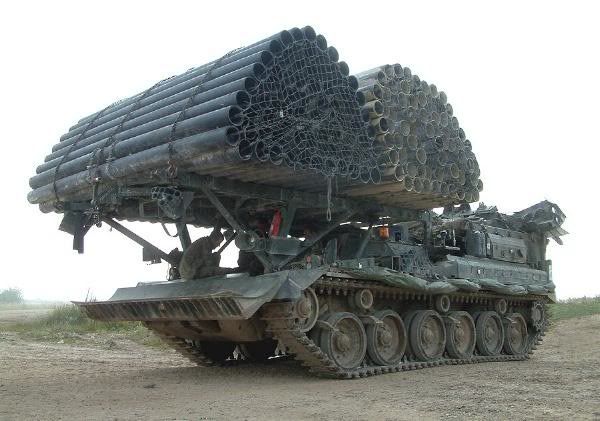
The obvious conversions are into the AVLB and AVRE versions for which a number of available S&S components may be of use notably, the AVRE trailer, the dozer blade or mine plough and the T-55 bridge, which is also a scissors unit. A conversion of the S&S trailer into a Giant Viper is also worth a thought. I think BW also do some bridge units that could also be used, a future project so more to follow.
The model is painted in Vajello Russian Uniform, with the cam pattern marked out with a dilute solution of black before the central component of the panels laying within it are painted in black grey. The remainder of the vehicle is washed with badab black before panels are painted in using the base colour, I then pin wash in badab black and dry brush with a Russian Uniform/Buff mix. Cam nets are Bronze Green highlighted with Russian Uniform. Cam poles are filthy brown from the game colour range, highlighted in buff. Kip sheets are Gunship Green mixed with Buff and ponchos Reflective Green.
The transfers are from TL Modelblau and I gloss varnish the surface before applying them and, varnish the transfer after application. Once dry I apply a matt varnish by brush before weathering. Weathering is completed using washes of Khaki and Khaki Grey, dry brushed with Buff.

Nice review, I have always been curious about this model. I went with the... I'm using Challey 1s for now route haha.
ReplyDeleteWhat do you do for your Camo netting? Looks like medical gauze, but different than the gauze I used. Yours looks a lot better than mine.
ReplyDeleteI use a non elasticated open weave bandage that I wet then cover in white glue (evo stick wood adhesive) hope that helps
DeleteAnother fantastic mini. Thanks for the tutorial.
ReplyDeleteVery useful post and lovely model Andy, although the commander still looks out of scale - too large - for the vehicle; a fault with the manufacturer I might add ;)
ReplyDeleteRegards,
Monty
Looking at those first two pictures I can see your point, thanks for taking the time to comment
Deletebeautiful work done!!!
ReplyDeleteplastic adhesive
Thanks peter, glad you enjoyed it
ReplyDelete