Welcome to Cold War Gamer, a blog I am using to record my Cold War wargaming projects. These range from fictitious Cold War hot projects to historical conflicts that took place around the globe throughout the Cold War era, all modelled and gamed in 20mm. The blog includes links to various resources useful to the Cold War Gamer.

My current projects include: Central Front; British & Soviet. South African Border War; Angolans and South Africans. Soviet Afghan War; Soviets and Afghans

Friday, 6 April 2012

ORBAT - 1980s Soviet MRR and TR, Part 3 Engineer Support


Engineer support was provided to the Soviet MRR and TRR in a number of ways. The engineer company's assets could be grouped with other regimental or divisional assets to produce Manoeuvre Support Detachments MSDs, Mobile Obstacle Detachments MODs and specfic assault river crossing support dependent on the units mission. Engineer and chemical reconnaissance would be provided in support of these functions.


The MOD was covered in the Post on the Anti Tank Reserve and essentially consisted of minelaying capability for rapid obstacle creation in support of such groups as the anti tank reserve, and could include:
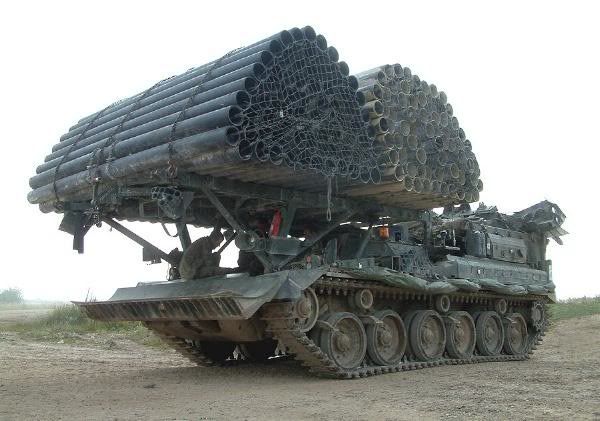
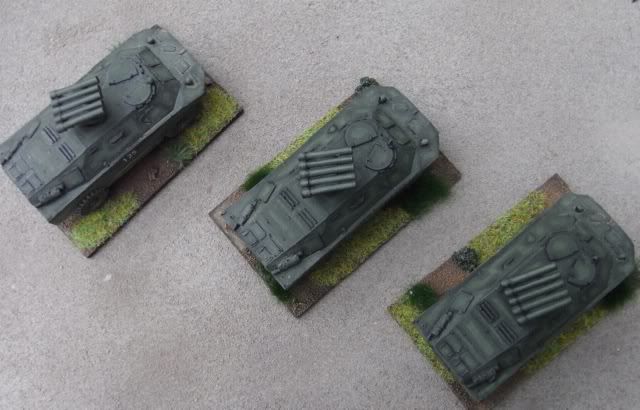
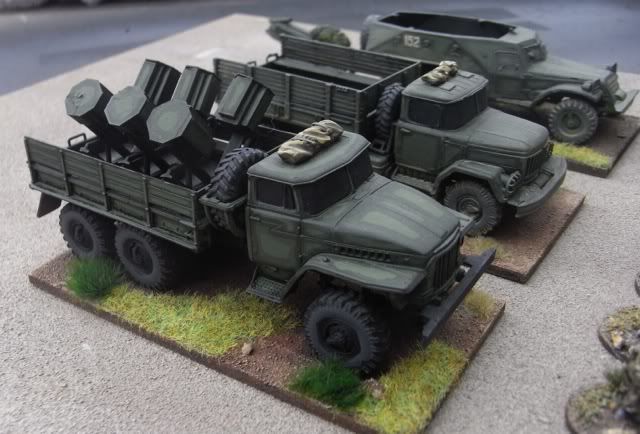
  • The provision of Scatterable Mines from Trucks, Helicopters or MRLS (BM27),
  • Cratering, booby trapping and hand laying of mines or other obstacles from an engineer platoon which could be reinforced by attached MR assets
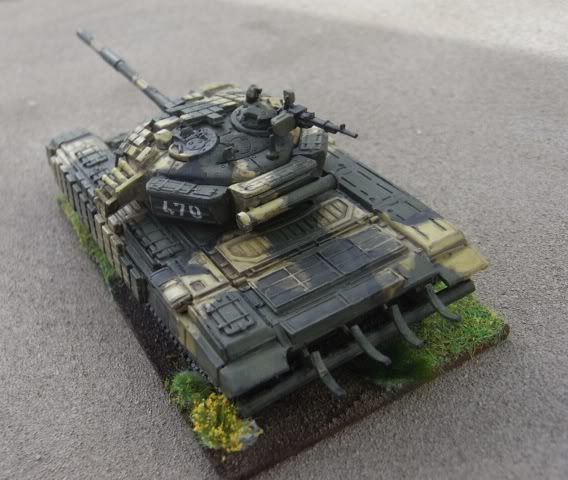
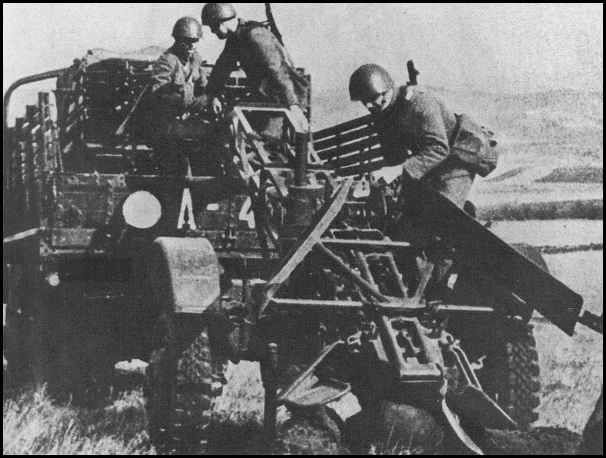
  • The provision of mine laying capability through either towed PMRs or tracked GMZs from division. The rates of laying that could be achieved by these assets make this very gamable. 1000m in 30 minutes by GMZ, 500m in 30 minutes by PMR. 


Interestingly the Soviets include the deployment of persistent chemicals as a means of channelling an enemy and the deployment of them can therefore be considered as part of the obstacle plan. The deployment of the Anti Tank reserve together with the development of obstacles would be triggered by the reconnaissance and march security elements of the unit or higher formation. At my 1:3 vehicle scale the regiment can support the creation of one MOD as can Division further groups could probably be generated from Army and Front assets. Groups would be allocated based on the priority of the mission, units acting as covering forces or dealing with flank protection of key forward detachments could receive considerable support, which makes for some interesting scenario options.

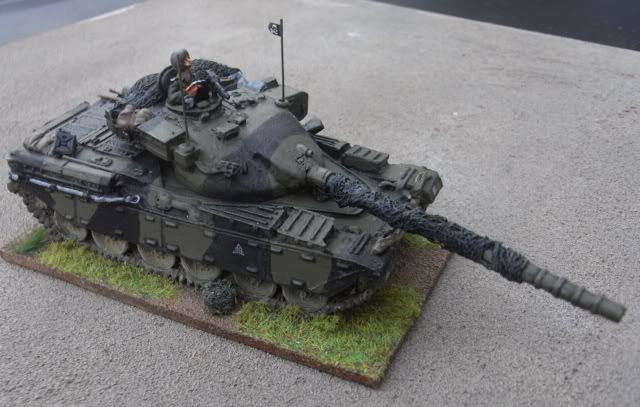
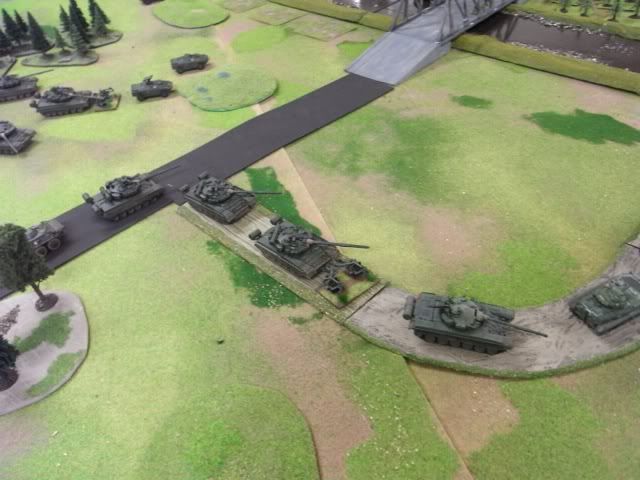
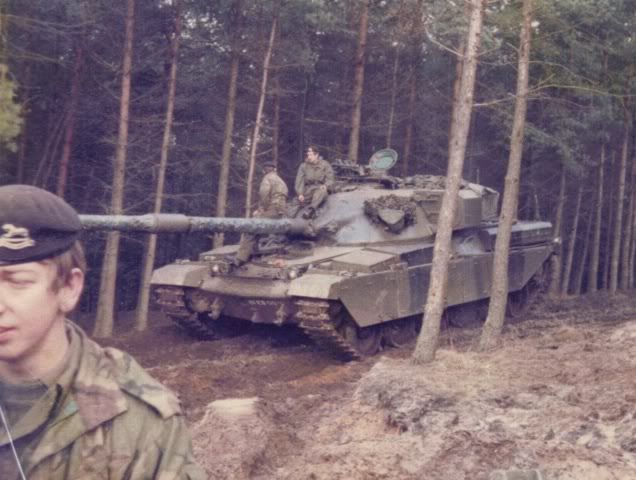
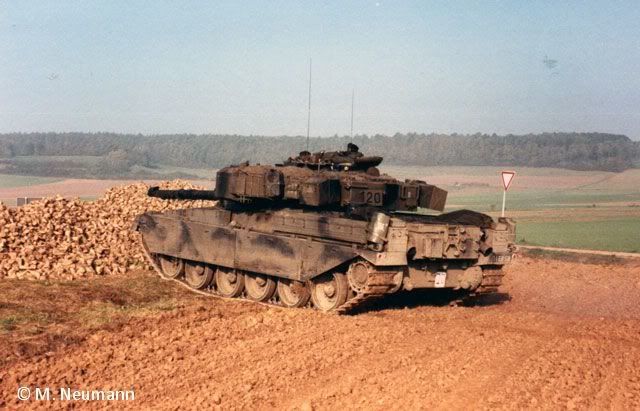
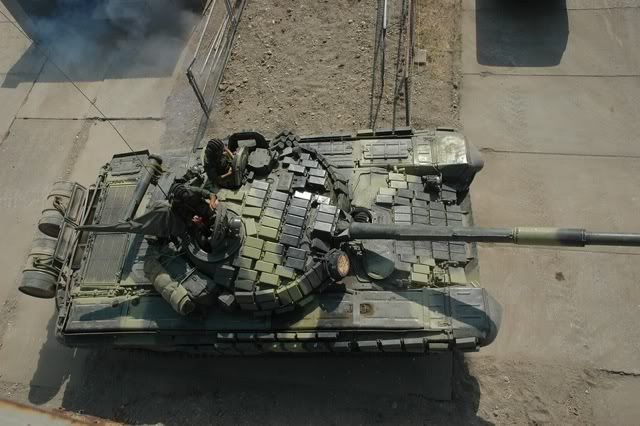
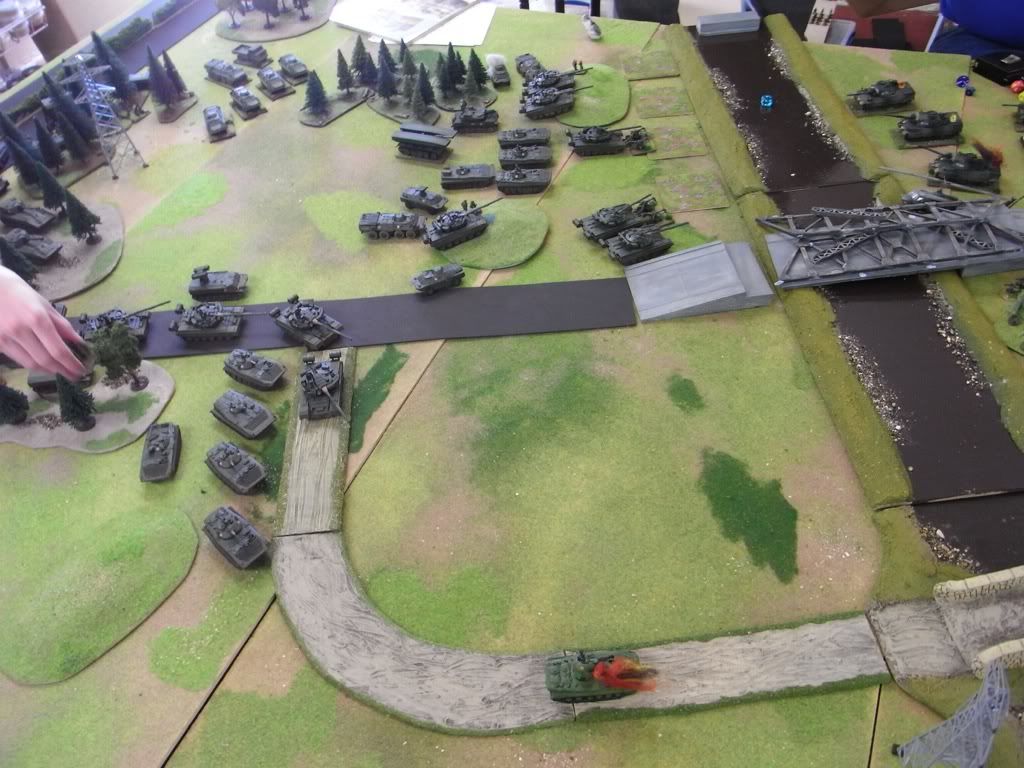
Big Game 2011, Rutgers MRR approaching the River Line
The Manoeuvre Support Detachment

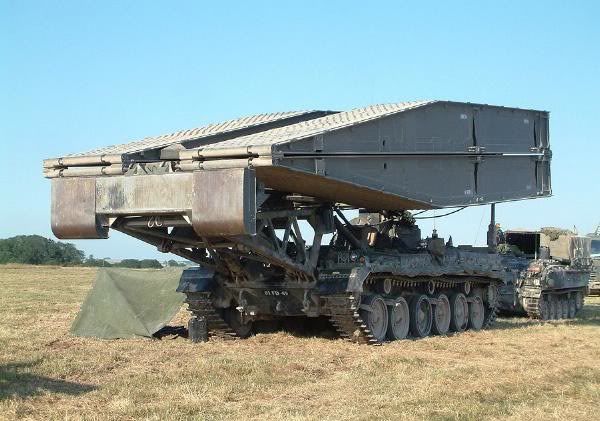
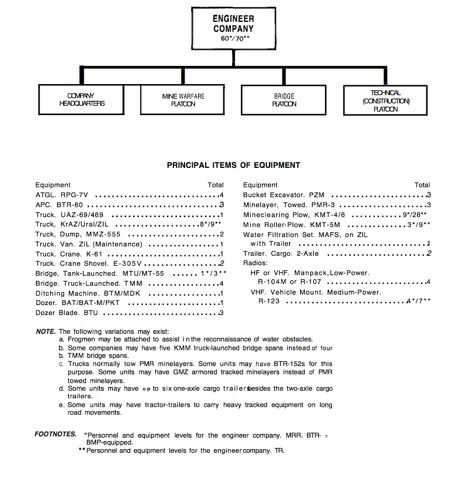
The Manoeuvre Support Detachment was responsible within the MRR for the identification, clearance/breaching and marking of obstacles on the supported units route as well as the provision of route marking capability, the maintenance of the route and an element of its own security.  The detachment would include reconnaissance, security and engineer elements. Bridging capability was limited to small gaps crossable using either truck or armoured vehicle launched bridges from within the regiments own assets.


 The assets that could be drawn on to form an MSB include:
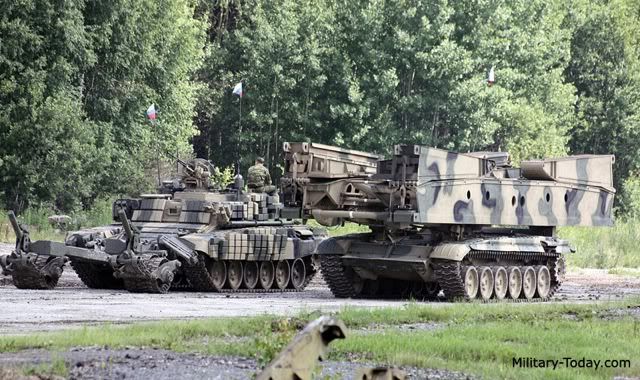
  • AVLBS and VLBs the engineer company in a tank regiment deployed 3 AVLBS either MT - 55 or MTU  in a MRR this was 1.  The VLB being the TMM , this could have included the TMM6 toward the later part of the period but I am unclear on the in service date.
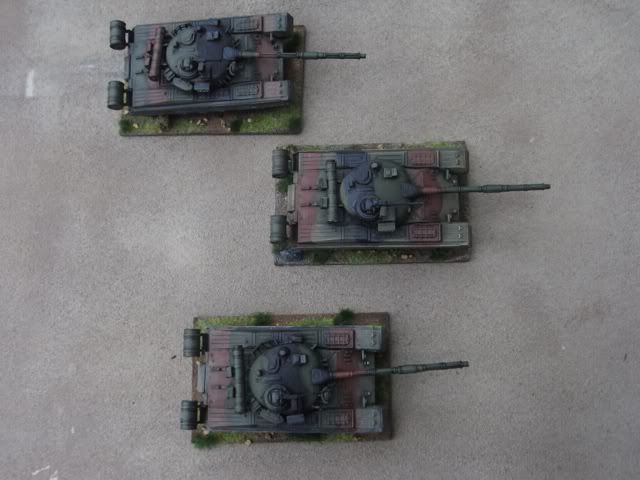
  • Mine ploughs and rollers were the principal method of clearing mine obsticles. The Regimental Engineer company in a MRR could deploy 9 KMT 3/4, and 3 KMT 5 rollers/ploughs for the TR the figures are 28 and 9.
  • Tank Dozer blades. 3 BTU are held at regiment, essential for filling small gaps improving and maintaining entry and exit points from bridging and breaching AT ditches. I will probably use these to represent general earth moving capability as there are limited models available for the other equipment.
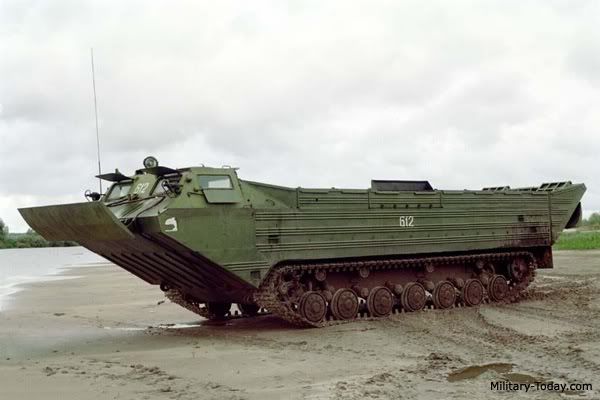
  • Explosive mine clearance devices were available based on T55, BTR 50 (MTK) and 2S1(MTK2) hulls.  The divisional Engineer battalion held between 2-6 depending on source. They had considerable utility on assault river crossings where the BTR 50 and 2S1 elements could swim and therefore begin mine clearance in advance of getting tanks across.
  • Tank platoons/companies could provide both security and clearance assets when equipped with either dozers mine ploughs or mine rollers.
  • Engineer Platoons. The Regimental Engineer Company fielded 2 Sapper Platoons 1 mounted in BTR 60 and 1 mounted in trucks. The divisional Engineer battalion had a further 2.  Against the Orbat shown above these were probably components of the Bridge and Mine warfare platoons, Isbey breaks them out as separate entities.
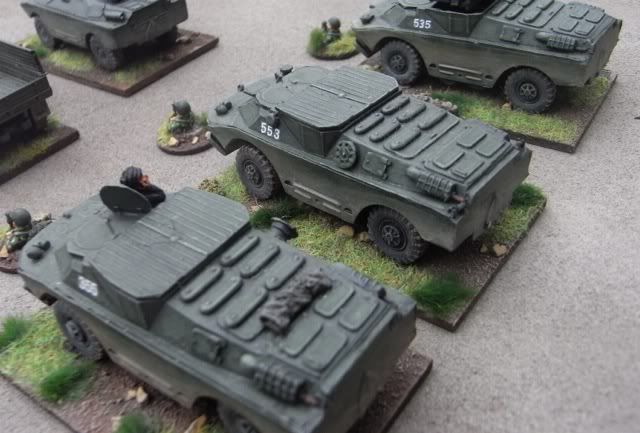
  • Engineer Recce. Divisional engineer Recce fielded 3 BTR 60. The BTR 60 equipped sapper platoons could provide a similar function.
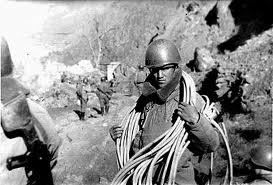
  • Motor Rifle Platoons/Companies, provided security and additional labour for tasks such as hand breaching.
  • Chemical Recce detachments provided chemical recce capability, 3-4 BRDM 2 Rkh existed within the Regimental Chemical Defence Company, and 9 within the Divisional NBC Defence Battalion.
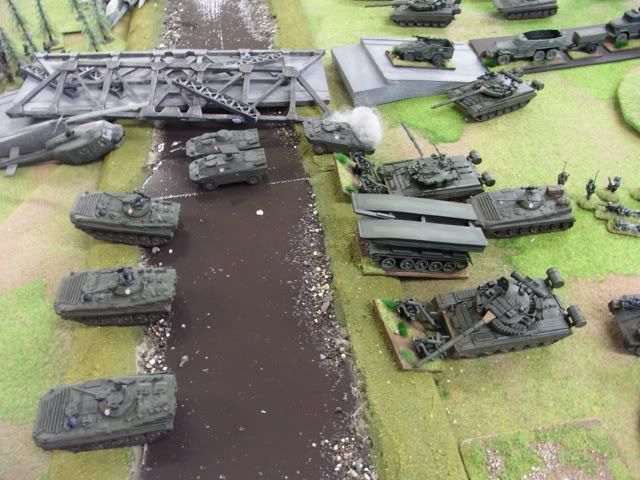
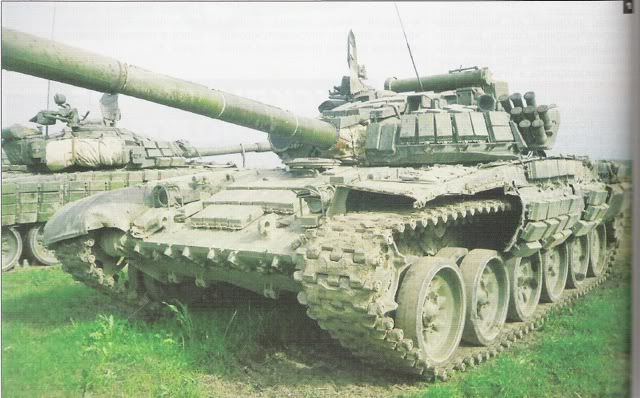
Big Game 2011, Rutgers MRR commences the River Crossing

So for my Wargames MSD I intend to use at 1:3 with some poetic licence to maintain each capability and introduce some interesting models:

Engineer and Chemical Recce (Reinfoirced from Division) 1 BTR 60, 2 BRDM 2Rkh (These will work forward on the main march routes with Regimental Recce and March security elements)
Mine Clearance, 3 Tanks 1 per Company with KMT 3/4/5. The KMTs can be held on trucks (1) and be issued as required to the tank companies. Additionally I'll provide MTK2 to the MSD
Route Improvement Maintainence 1 Tank with BTU Dozer
Route Marking and Security 1 BMP Company.
Bridging 1 MT 55 AVLB
1Truck mounted Sapper Platoon 6 Figures

The Tank Platoon and MR Company will be drawn from the 2nd Echelon Battalion

Assault River Crossing group


If the unit was expected to meet a significant water Obstacle then an Assault River crossing group could be provided from Divisional assets. The composition would probably vary dependent on the type of unit being supported as wheeled MRR would have a lot more trucks because of there towed artillery, particularly in the earlier organisation options.


 The Divisional Engineer battalion had 6 complete GSP ferrys and 12 PTS2 Tracked Amphibious Load Carriers. David Glanz in The Soviet Conduct Of Tactical Manoeuvre sugests a grouping of 3 GSP and 2 PTS, given the numbers I am going for 3 GSP and upto 6 PTS. The assault crossing assets would be grouped with units and sub units acting as forward detachments as these would be the lead element and be responsible for creating the initial crossing of water obstacles.  Deliberate bridging would most likely occur once an initial bridgehead had been established and cleared to the point where the enemy could not bring the bridging site under direct fire.

For Wargames representation of this I will be using 1 GSP and 2 PTS


River crossings make for excellent scenarios as they allow considerable scope for task organising and could include;
  •  An airborne forward detachment drawn from the Divisional or Army second echelon using helicopter insertion, 
  • A ground based MRB strength forward detachment drawn from the divisional second echelon and supported by air and aviation to establish the initial bridge head
  •  The Divisions first echelon MRR which would have the Divisional bridging capability grouped with it and if on the main axis could be reinforced by key divisional assets which could include Recce, anti tank, engineer and artillery. 
I am currently working up a post which will look in detail at the force composition the TTPs and a Scenario that could be played at a few different levels.


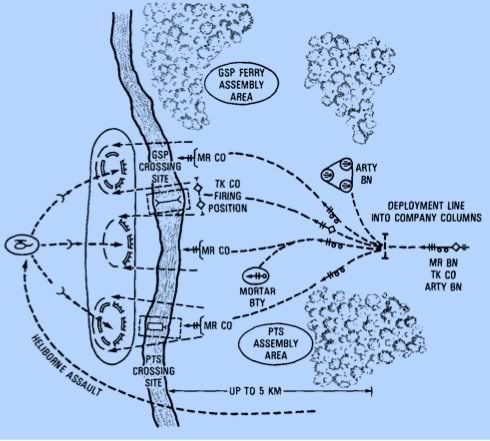
Significant additional engineer assets were held at Army and Front which would allow quite a number of such groupings to be formed if required.  Forward detachments would potentially be created at each level  such that an Army advancing with two divisions in the first echelon each with two regiments BTR in the first echelon, could have across the front two divisional forward detachments of Battalion Strength (BMP) and a regimental Strength Army forward detachment (BTR or BMP), effectively putting 5 Battalion sized reinforced groups across the frontage with the opportunity to put at least one in front of every regiment in the first echelon. Within the scope of the Army and Frontal engineer assets most could have significant MSDs and Assault River Crossing capability, without touching the MSDs of the first echelon regiments.

S&S PTS2 Amphibious Tracked Transporter

This video gives a reasonable impression of the sequencing of an assault river crossing, sadly no GSP ferries.

References:

The Soviet Conduct of Tactical Manoeuvre, Spearhead of the Offensive, DM Glantz
Weapons and Tactics of the Soviet Union, D Isbey
Identify Engineer and Decontamination Equipment
FMSO Instant Obstacles Russian remotely delivered Mines
FM 100 -2-1 The Soviet Army Operations and Tactics
FM 100-2-2 The Soviet Army, Specialised Warfare and Reara Area Security, Chapters on Airborn, Heliborn and River Crossing Operations
FM 100-2-3 The Soviet Army Troops, Organisation and Equipment, Engineer and Chemical Sub Units and Units
Wargames Unit - Soviet MRR Anti Tank Reserve
Wikipedia Military Engineering Vehicles
ORBAT- 1980's MRR and TRR, Part 1Part 2, Part 4


Tuesday, 3 April 2012

Review - Model 1/72, Britannia FV 4201 Chieftain


The Britannia Chieftain represents a 1/72 Chieftain mk 5/3 or 6/3 with LRF but no TOGS and no Stillbrew armour so it's great for the early 80s force, less good for the late 80s. Stillbrew came in post 1986 and TOGs for Cheiftain was introduced from 88/89 this is covered in the various 1980s British Battle Group Posts.  Other model options for British tanks for battle groups in the 80s Included for Chieftain the Airfix model and Matador do a stillbrew conversion kit .  If you want to dodge the Chieftain Stillbrew issue the best bet is the Revell Challenger but this will limit the units you can represent up until the end of the cold war when the last of the Chieftains were retired.


The main armourment, commanders GPMG and the commander are all cast in white metal, with the commander wearing the old US style crew helmet rather than the kevlar crew guard which came into service in the late 80s.  All the white metal castings I have received have been of good quality with no flash.  The remainder of the vehicle is cast in resin and comprises turret and hull. The quality of the casting whilst adequate can require a fair deal of filling and filling although I have not come across anything that defeats me here.  I highly recommend studying pictures of the vehicle to understand the rotational orientation of the barrel, I got three wrong, this is recoverable through covering the barrel with a cam net which look good and was a common practise. The MBSGDUs are much better represented than on the Revell Challengers.

A model with the stowage in the turret baskets unchanged

The main draw backs of the model are pre cast stowage and a commanders hatch cast open.  Neither are insurmountable problems but if you don't want the whole squadron looking the same they do require some adjustment. either through the addition of extra stowage or the removal of existing stowage.  in nearly all cases I have done both.  The principal areas for stowage removal have been on the turret baskets where the stowage has been sanded down on one or both baskets before covers made of green stuff have been added.  these have later been painted to represent either ponchos or KIP sheets.


Additional stowage added includes antenna, cam nets on the NBC pack and over the MBSGD, hessian on hull front and sides, cam poles on either side of the back decks, the occasional lube can on the back decks, roll mats on the outside of the turret basket or Jerry cans on the turret rear. On one vehicle I have removed the commanders hatch and have replaced it in the closed position.  Webbing around the turret is also a common stowage option as is the bin bag I have put on the back deck.

Stowage in the turret baskets removed and covered with green stuff tarpaulins
The model provides a solid representation of the vehicle, and once you have introduced a bit of variety in stowage it looks great when deployed as part of a unit the look and feel of the beast are absolutely spot on.


The obvious conversions are into the AVLB and AVRE versions for which a number of available S&S components may be of use notably, the AVRE trailer, the dozer blade or mine plough and the T-55 bridge, which is also a scissors unit. A conversion of the S&S trailer into a Giant Viper is also worth a thought.  I think BW also do some bridge units that could also be used, a future project so more to follow.


The model is painted in Vajello Russian Uniform, with the cam pattern marked out with a dilute solution of black before the central component of the panels laying within it are painted in black grey.  The remainder of the vehicle is washed with badab black before panels are painted in using the base colour, I then pin wash in badab black and dry brush with a Russian Uniform/Buff mix. Cam nets are Bronze Green highlighted with Russian Uniform. Cam poles are filthy brown from the game colour range, highlighted in buff. Kip sheets are Gunship Green mixed with Buff and ponchos Reflective Green.


The transfers are from TL Modelblau and I gloss varnish the surface before applying them and, varnish the transfer after application. Once dry I apply a matt varnish by brush before weathering.  Weathering is completed using washes of Khaki and Khaki Grey, dry brushed with Buff.


Tuesday, 27 March 2012

Review - Web Resources, Air Power Australia


I found this web site the other day whilst looking for some information on Soviet Air Defence Systems. It covers both aircraft and air defence systems with some very well researched and analysed articles and some excellent imagery including either satellite or air photos of air defence installations.  Most cold war Soviet systems are covered and it includes equipment that hadn't quite entered service when the Soviet Union collapsed. Key equipments covered include all the SAMs  from 2 -22 they also cover PLA deployed systems both in terms of description and performance analysis.

If your into the technology it covers that off at a level of detail, and has some superb articles on static SAM sites 

Slightly off topic in the Historical section it has some great pictures of current Australian military vehicles.


The web site offers an open and independent source of information primarily on Air and Air Defence topics with a mass of data that will be of interest to the cold war gaming community and to those historically interested in the period or Air Defence in general. Just what the Internet was made for really, sharing.


Sunday, 25 March 2012

Review - Model 1/72, ACE T-72B


The T72B first appeared In 1985 it provided a significant armour upgrade over the T72A, giving higher levels of protection to that fielded on the T80B.  Numerous supplementary upgrades were also included such as the new pattern road wheels, gun stabilisation and a bigger engine. Shortly after its introduction into service the smoke grenade dischargers units mounted on the turret front  were moved to the turret side although a version fielding ERA was not seen until 87/88 following fielding on the T72A.  Around 1987/88 the vehicle was upgraded to fire the AT11 Snipper missile those not so equipped were designated T72B1. There are fairly extensive web resources available on the T72B a number of which are listed at the end of this post.


As discussed in earlier posts on the Soviet MRR the deployment of T72s in the Wesrern TVD was mostly confined to the CGSF in Chezecslovakia and the Soviet Military Districts of the TVD where they were used in the group of Tank Armies for the third echelon.  I will be using mine in a 1988 - 1990 Motor Rifle Regiment, which I am hopping will give NATO a fairly hard time as the Soviet armour technologies probably had the edge over NATO ATGWs at this point in time. The US forces started to deploy TOW 2A/B in 1987/88 but improved versions of other missile systems, HOT and Milan did not appear untill the 1990's.


To deploy T72Bs in your army of choice you are either kit bashing (Revell/Ace), scratch building, using  aftermarket resin (Model Trans), buying resin (S&S) or going down the ACE route.  This is the story of the ACE route, which is one of the cheaper but not necessarily the quickest option. The 1/72 scale kit could probably be used to represent a wide range of variants from a late model T72A onwards so is very flexible. It is only fair to warn you that I like ACE models and feel that they are worth the additional effort that is requiered. In general with ACE kits you have to be prepared for a bit of extra effort filling, fileing and checking fit. In this particular case part fit is generally good and filling minimal. 

My overall impressions is that this was  a lot less painful than some of their other kits that I have made which is just as well with 11 more to go. The major area of frustration on this model were the tracks and smoke grenade dischargers.

Putting together the hull and the running gear are very straight forward for an ACE wagon, with only minor issues around hull top and base fit as long as you get the tracks aligned with the hull correctly.  I used part of  the BMP track fit procedures to ease the pain of fitting fitting the tracks, essentially removing the teeth from the drive sprocket over the arc covered by track, which worked.  Road wheels drive sprocket and top roller alignment is critical to getting the track guards on later.


The link and length track is much better formed than usual with little flash, but they do require a fair bit of work around the gaps between the teeth in order to get a reasonable fit so a deal more effort than the Revell kit.  There are no specific instructions for putting the track together so some thought is requiered.  I started from the back with three teath upper most but there are very good pictures of the track in reference 5.

The hull top requires a fair bit of knife work with the front fenders on the hull top haveing to be removed and replaced which adds an element of fun with a file to get the part fit right and in addition the V shaped splash plate needs removing to allow the ERA to be fitted.  This represents a fairly major threat to ones fingers.


A number of people have done kit bashes around the Revel T-72 hull and the ACE turret and ERA components whilst this will produce a cleaner result and speeds up the process it is a fairly whacking expense.  The difficult bits are largely hidden and are therefore quite tolerant of some radical make it work approaches, so for me the decision hangs on how many you want.

The Turret assembles easily with some filler required around the add on armour but with little real pain.


The construction of the smoke grenade discharger unit is the critical bit on the turret with regard to having a model that looks good as miss alignment of the barrels stands out and is easily acheieved.  I drill into the mounting plate a little and allow each row to set before starting the next. In addition the fit of the stowage boxes needs a bit of thought.


As ever with ACE the end result is good and provides an excellent representation of the vehicle.  The extensive web resources mean that there are lots of images available so getting stuck with the instructions on part placement is easily resolved. The Alex Clark models in particular provide a superb reference.


There are few pictures showing any form of external stowage cam nets and tarpaulins on top of the turret boxes and pictures from the Chechen war demonstrate a fairly relaxed attitude to deck and turret stowage, given the nature of the conflict which did not involve sweeping tank manouver, I tend to view the extreme cases as unrepresentative. I have added the odd camouflage net and tarpaulin to provide a degree of variation.  Damaged side skirts would also appear to have considerable scope judging by some of the exercise photos.


A current Russian T72 demonstrating likely
stowage options on the turret bins


I have decided to field my late 80s battle group in the three tone dark green, sand and black camouflage scheme which started to be used by the factories at about this time.  This fixes the vehicles to late Soviet and post Soviet use but the ERA is also a bit of a limitation in that respect.  Green is also good as are corruptions of the cam scheeme to two tone which apparently occurred as troops repainted the vehicles.


For the Green I used Vajello Russian Green, washed with badab black with the panels picked out in the base colour, and on the upper surfaces further lightened using Sand Yellow. Dry brushing was a mix of Russian Uniform and Sand Yelow.  For the Sand Grey I Used a mix of Khaki Grey and Sand Yellow which looks to me quite a good match perhaps a little yellow. This was washed with delving mud before following a similar procedure to the green.


References:

  1. On The Way Models, T-72 Model comparison
  2. On The Way Models,Modelling The T-72 Family
  3. On The Way Models, ACE T-90
  4. Armorama, ACE T-72 B thread
  5. Army Recognition T-72A datasheet
  6. Army Recognition T-72 Overview Part 1
  7. Army Recognition T-72 Overview Part 2
  8. T-72 Main Battle Tank 1974 - 1993, Osprey
  9. Alex Clarks Inspirational T-72B
  10. Alex Clarks Inspirational T-72M1
  11. Missing Lynx T-72B1 Thread

Saturday, 24 March 2012

Review - Books, First Clash, K Macksey


First Clash 1985, Kenneth Macksey.  Kenneth Macksey is an ex armoured core officer who served in WW2, he wrote first clash as a training publication for the Canadian DOD.  The book deals with the deployment of 3 Royal Canadian Regiment (3RCR) Battlegroup as part of a 4 Canadian Mech Brigades defensive battle plan and the attack against them by 290 Motor Rifle Regiment and 301 Tank Regiment. The book covers the organisation and rolls of the various sub components of a Canadian Armoured Battle Group.  The Battle Group comprises 3 Mechanised Companies, Anti Tank Platoon, Recce Platoon, Morter Platoon, a Tank Squadron, a Battery of Guns and an Air Defence section of Javalin.  In addition it covers support from the brigades Helicopter Squadron and the use of Engineers to create an obstacle plan. It considers the preparation for and deployment to the defended locations, the sequence of the battle preparation and the detail of the occupation of the defence, then the actions against the two Soviet units which includes their engagement of 3RCR's covering force elements followed by the main action and the sequence of arrival by the Soviets onto the RCR positions.  It closes with the 4 Canadian Mech Brigade  withdrawing covered by the Royal Canadian Dragoons (RCD) Squadron Group comprising 2 Troops of armour and a mechanised platoon from the Royal 22e Regiment (R22R) together with two sections of anti armour weapons and support from the RCD Recce platoon in Lynx supported by the Brigades Artillery Regiment and unit morters.
  

It covers the subject well having been written in conjunction with the Canadian DoD and not only provides some excellent orbat data for the Canadians but also provides a real flavour of what NATO trained for and to some extent expected to happen.  It lays out the procedures for the whole action with the intent of providing instruction for Junior Officers, so not necessarily the most exciting read but a great book none the less if your interested in the cold war on the central front in the 1980s.  I am currently collecting the components of a canadian battle group and hope to get on with it in more detail later in the year or maybe next year so more to come on the Canadians.

First Clash: Combat Close-Up in World War Three  @Amazon

Other Book Reviews

Soviet Air Land Battle Tactics
The Military Balance
Encyclopaedia of the Modern British Army
The Soviet Conduct of Tactical Manoeuvre
The Third World War
The British Army in Germany

The Cold War Bookstore contains links to over 60 Cold War titles covered in my book list

Sunday, 18 March 2012

Wargames Unit - Soviet MRR Anti Tank Reserve


Anti -Tank reserves In a MRR and a MRD tend to be task organised groups structured around the relevant anti-tank battery or battalion. Regular attachments to the anti-tank elements include an Engineer Mobile Obstacle Detachment (MOD) or armour but can also include aviation and artillery.


The MOD is a task organised engineer grouping that can be created using a MRR or a MRD's engineer assets. In principal Army and Front assets would be grouped in a similar manor to deal with specific tasks at their level or to cascade elements to the divisions and regiments.


The Divisional Anti-Tank Battalion has already been covered in an earlier post. The Regimental Anti Tank battery consists of:
  • 3 platoons of 3 vehicles firing either AT3 or AT4/5 and A BRDM 2 command vehicle that will coordinate the platoons actions, provide supporting fires with its 14.5mm MG, and illuminate targets at night.
  • The battery HQ is an additional BRDM 2 command vehicle, equipped with a range finder
  • 3 trucks support the unit carrying additional missiles.
Soviet MRR Anti Tank Battery, ACE BRDM 2 AT3, S&S BRDM2, ICM Truck,
figures by Liberation Miniatures

The MOD can include:
  • Regimental mine laying assets, PMR 3 , 
  • Sapper platoon/section in either BTR 60 or trucks.
  • Assets from the divisional engineer battalion like the GMZ tracked minelayer and UMZ scatterable mine layer.
  • Engineer Recce in either BTR60 or BRDM2.
In terms of performance the towed assets are capable of laying 500m of minefield in 30 minutes whilst the tracked assets can lay 1000m in the same time frame, clearly such times are quite condition dependent. Towing vehicles for the PMR include BTR 152, 60 and Zil 157 or Ural 375. Scatterable mines either AT or AP can be deployed from MRLs (BM27), helicopters, trucks and by sapper sections these could enhance existing obstacles or create new ones .

Soviet Mobile Obstacle Detachment, ICM Trucks and BTR 152, Liberation Miniatures
BTR 60 PB and Figures, S&S BRDM 2. PMR 3 and UMZ scratch built

In addition to the engineers and anti-tank assets allocated, fires from MRL and ATGW armed helicopters from the divisional helicopter Squadron can be included and the reserve could also incorporate tanks.

T-80 Company attached to the MRR anti-tank reserve, Revell T-80

Within my current wargames unit at a vehicle scale of 1:3, I represent the MRR battery as:
  • 1983 - 1985 MRR 1 BRDM2 and 3 BRDM2 with AT3
  • 1987 - 1990 and 1990 - 1993 1 BRDM2 and 3 BRDM2 with AT4/5
The AT4/5 capability entered service in 1974, was first identified at a Moscow parade in 1977 but never completely replaced the AT3 capability before the end of the cold war.


BRDM 2 AT3 by ACE, figures by Liberation
BRDM 2 AT4/5 by S&S

Either version of the Anti Tank BRDM2 provided a capability for remote operation from up to 80 meters away, allowing fire units some level of concealment, bear in mind the missiles on launch took some time to get under control so we are talking minimising exposure rather than complete concealment.


The MOD is represented by:
  • A BTR 60PB carrying 6 Sappers who can undertake cratering and obstacle construction tasks,
  • A UMZ on the back of a truck which dispenses AT and AP scatterable mines,
  • A BTR 152 towing a PMR 3,
  • A truck to carry additional mines
  • A BRDM 2 engineer recce vehicle and 2 Figures.


Trucks and BTR 152 by ICM, PMR3 and UMZ scratch built,
BTR60 and figures by Liberation

I will aim to outline the activities of this type of task organised unit in a later post.

References:

FMSO Instant Obstacles Russian remotely delivered Mines
FM 100 2-3
FM 100 2-1
Weapons and Tactics of the Soviet Army, Isbey
Soviet Divisional Anti-Tank Battalion Part 1