Welcome to Cold War Gamer, a blog I am using to record my Cold War wargaming projects. These range from fictitious Cold War hot projects to historical conflicts that took place around the globe throughout the Cold War era, all modelled and gamed in 20mm. The blog includes links to various resources useful to the Cold War Gamer.

My current projects include: Central Front; British & Soviet. South African Border War; Angolans and South Africans. Soviet Afghan War; Soviets and Afghans

Sunday, 23 February 2014

Review - Figures, Elhiem 20mm, Cold War British


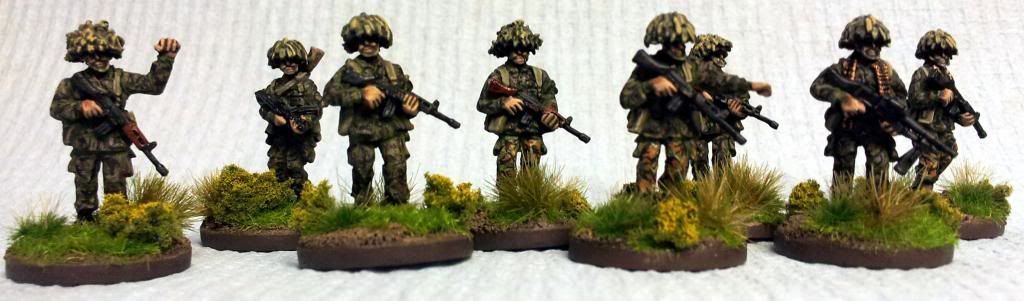
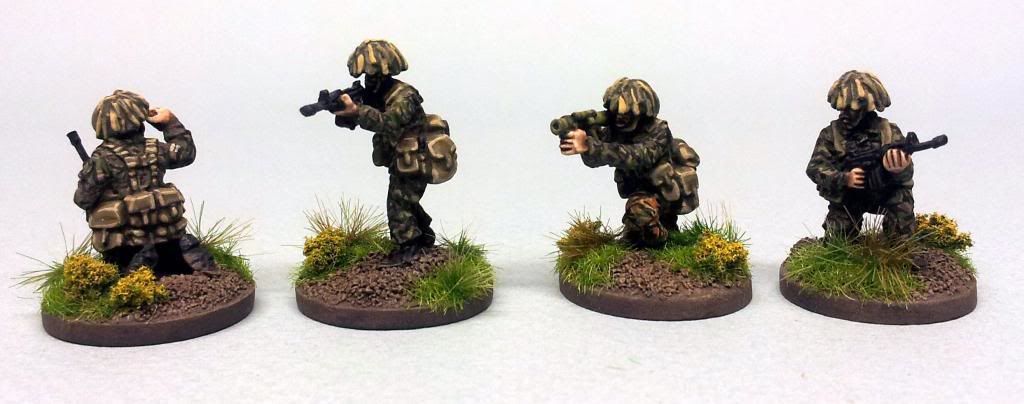
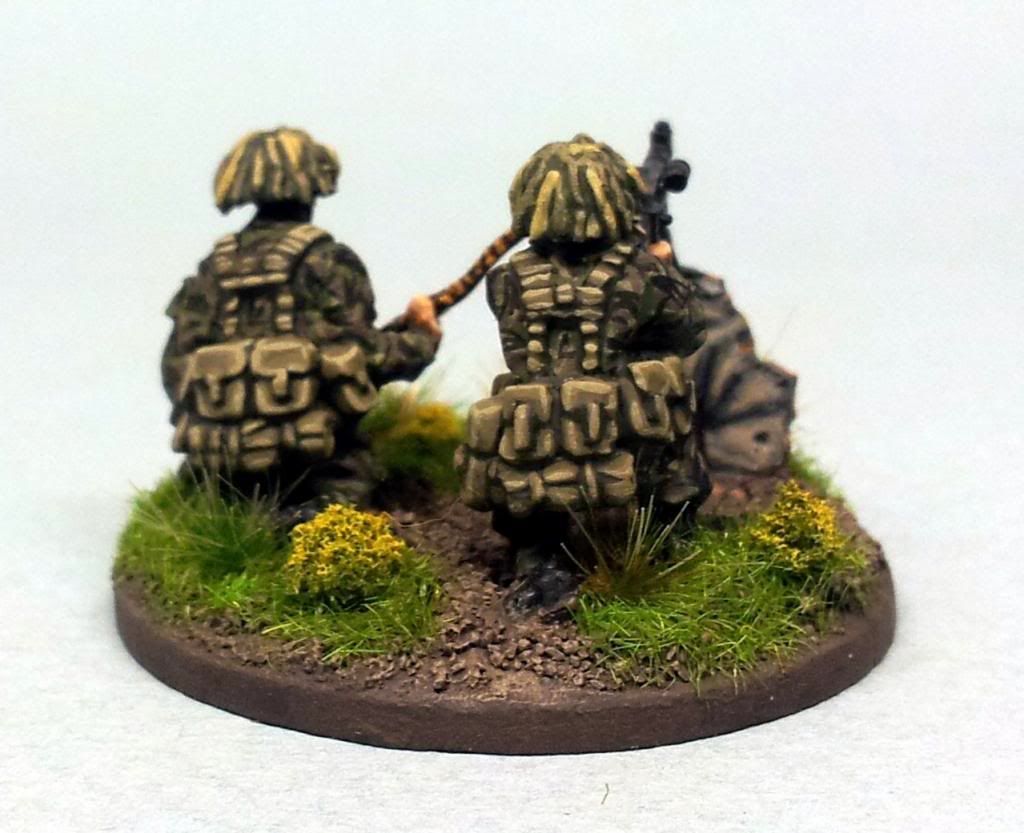
Elhiem figures released their Cold War British Range last year. I think this is one of the more comprehensive figure ranges for Cold War British on the market. The figures are presented in 58 pattern webbing, with respirators cases and without large packs and Bergens. They carry SLR and GPMG and are warring well scrimed Combat Helmet Mark 4s.  They cover the British Infantry effectively from the 60's through to the 90s.  The introduction of the Mk 6 helmet, SA 80, LAW 80 and PLCE occured between 1987 - 1990.  This makes them ideal for NATO British Mechanised and Armoured Infantry but they will  also work for the Falklands and Northern Ireland.


The figures are reasonably chunky and can easily be mixed with the Britannia and Liberation ranges. Mine all arrived in fine shape being well cast with minimal flash so clean up is done in next to no time.  As usual Matts attention to detail on weapons, uniforms and equipment is excellent there is a degree of variety in the webbing and some really great figures as with all Matt's ranges the posing of the figures is always very life like.    As an added bonus Elhiem Figures service and turn around on orders is also first class.


As most of the figures I have finished have been diced up to man trenches Iain R from the Guild kindly gave me permission to use some of the pictures of figures from his collection to illustrate this post. His very talented interpretation of Matts lovely sculpts really illustrate what can be achieved with this range.  If you like Iains work he posts regularly on two blogs and he is well worth following for the quality of his work, his blogs are:


Having lived through this I really think that Matt has captured the look and feel for the period very well.  The Infantry platoon is well catered for with packs containing patrolling and skirmishing figures.  The patrolling figures provide a complete section within a single pack, whilst in the skirmishing set the rifle and gun groups are in separate packs.


The range includes Section and Platoon Weapons primarily from two packs one with a 3 man gun group with GPMG deployed in the light role and the other containing a Light Mortar, Carl Gustav, 66mm anti tank rocket and Blowpipe MANPAD. The inclusion of the light mortar and Blow Pipe with the 66mm and Carl Gustarv mean you will probably end up with a few spares.


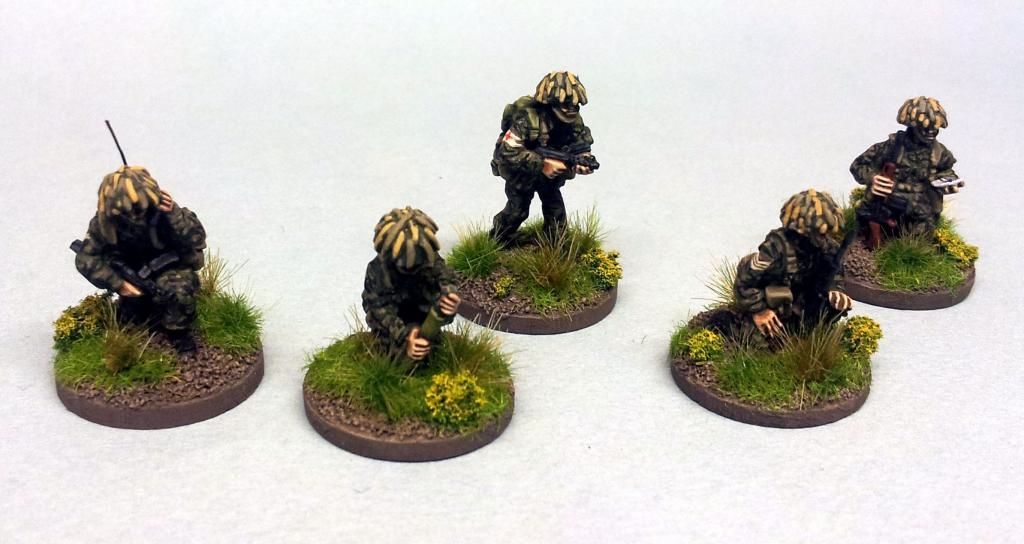
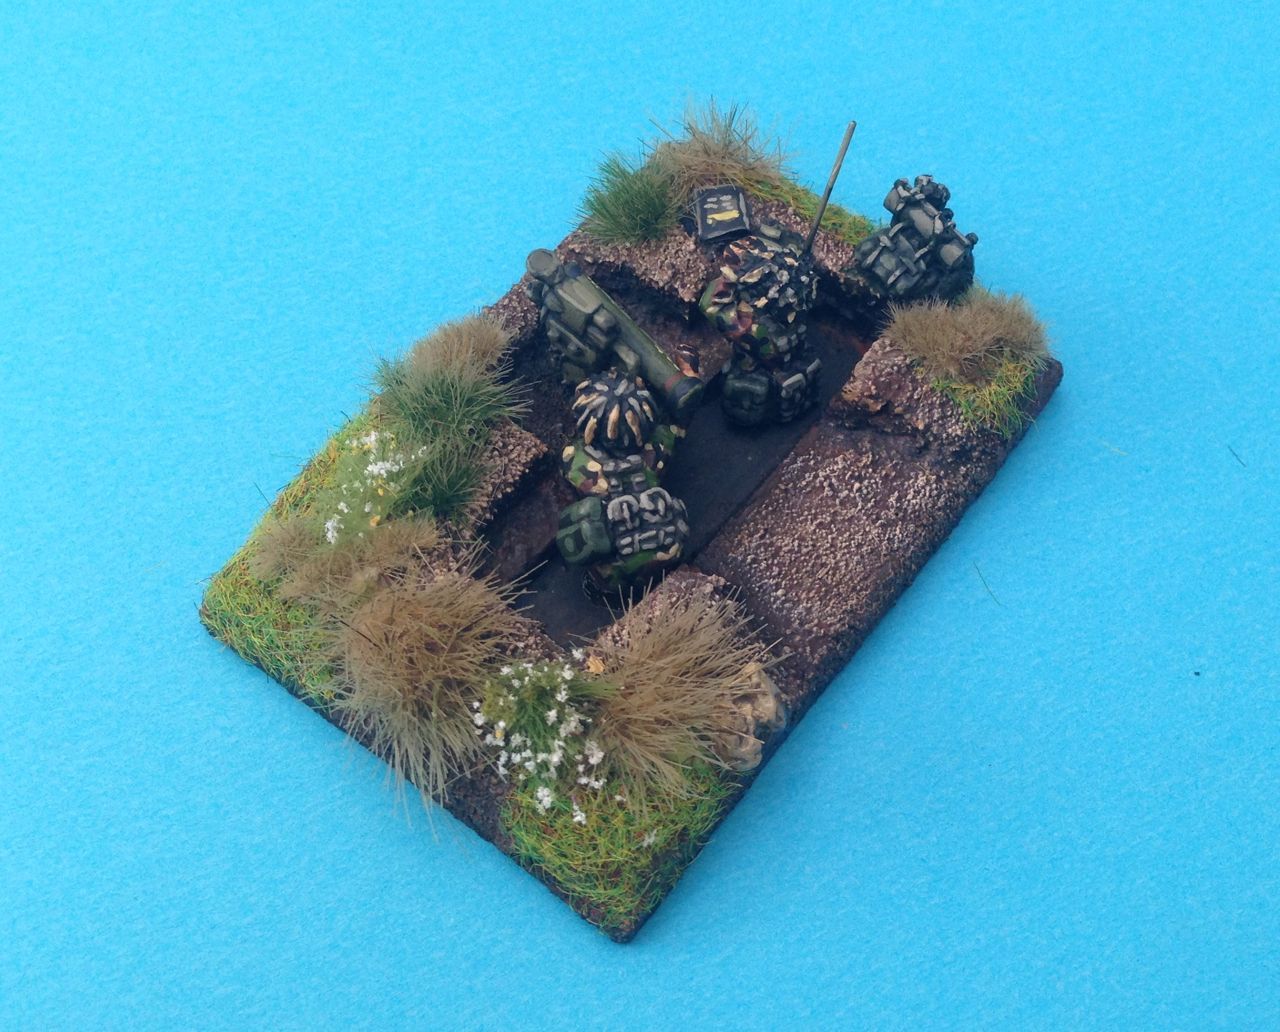
The Platoon HQ pack contains a Medic with a day sack and SMG, a Signaller with a Clansman 351, an officer with a map and an SLR equipped figure with a CWS, which is one of my favourites.


An OP and special optics pack provides a Radio operator an Observation Officer and two SLR equipped soldiers with trilux sites useful for Northern Ireland. I think the Radio operator is also particularly well done a beautiful figure.


As well as a comprehensive representation of the Platoon and its support weapons Matt has also covered all the battalion support weapons with the exception of the Sniper Rifle.  The Support weapons all come with three man crews.


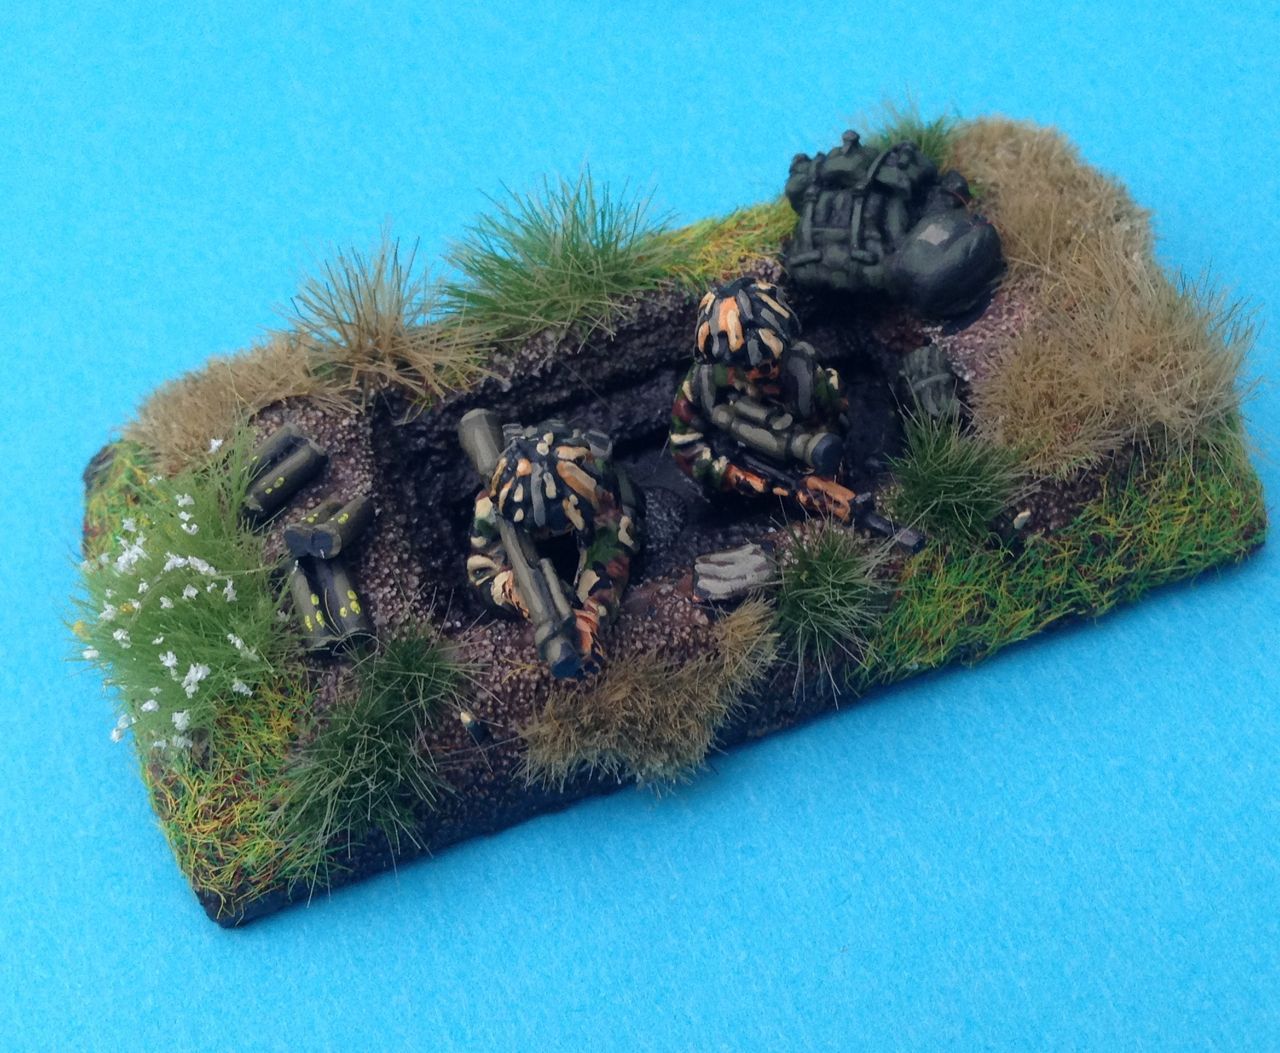
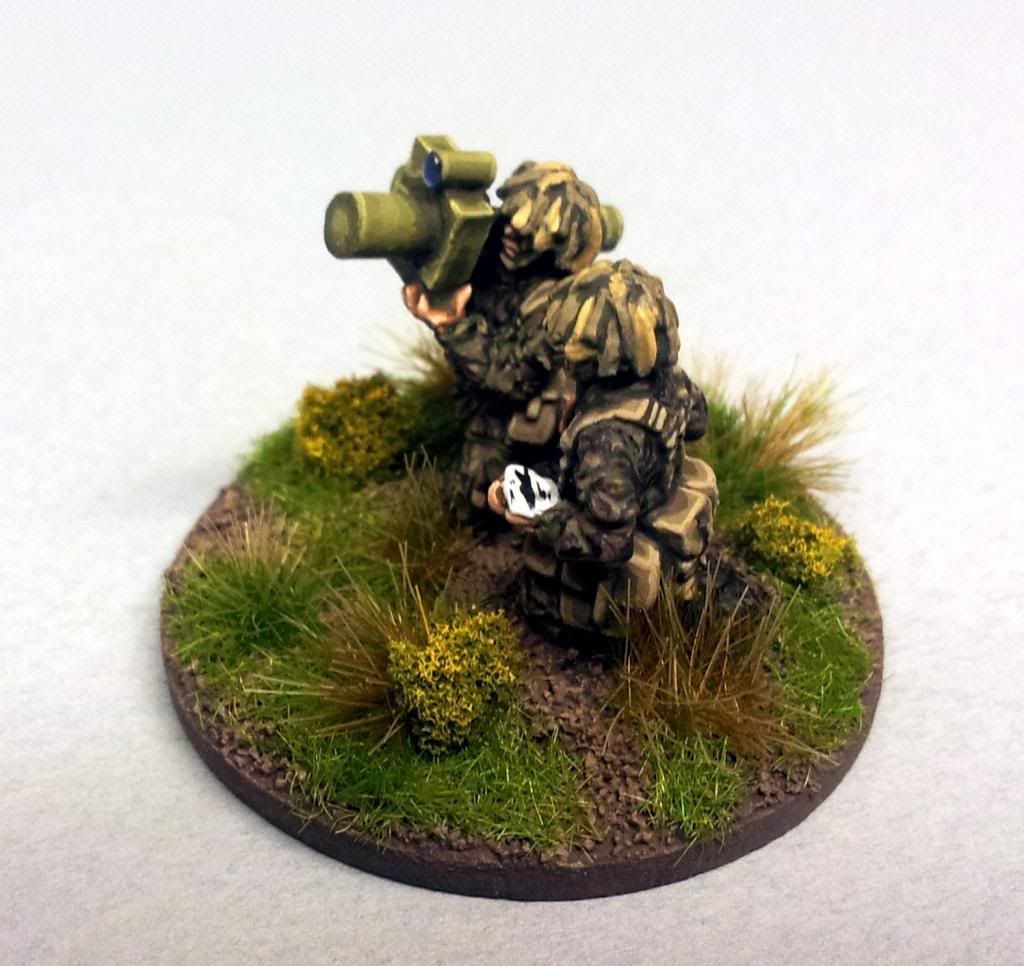
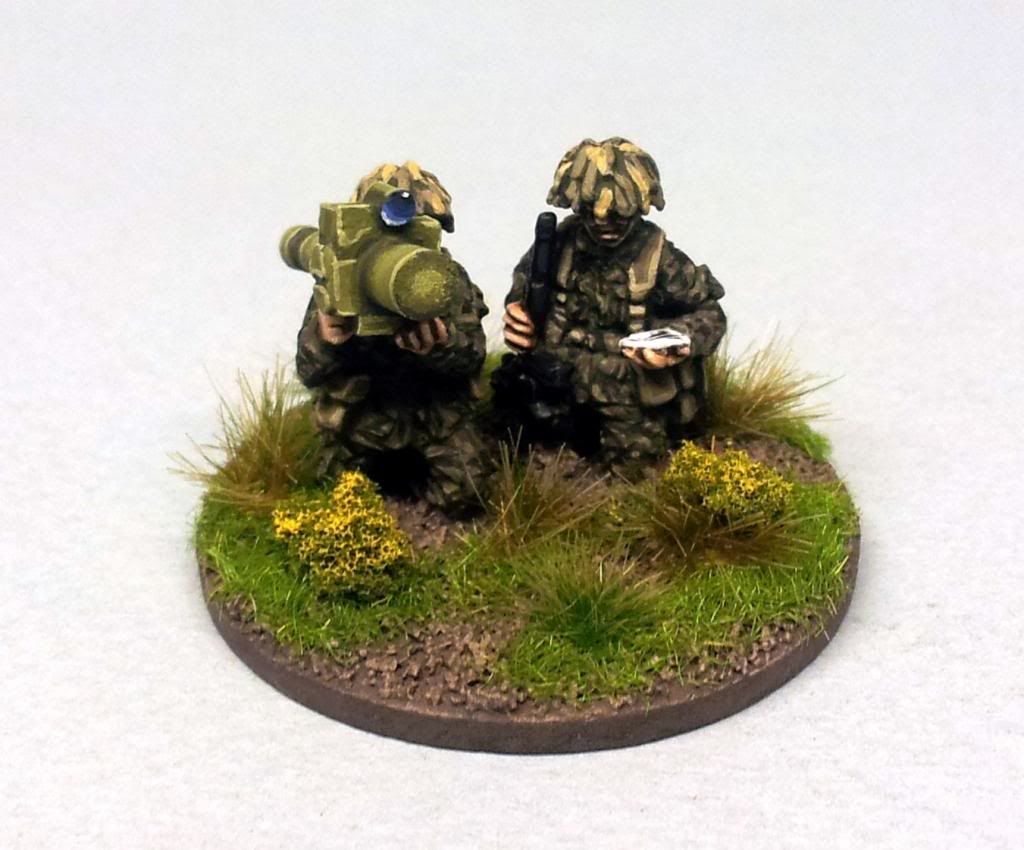
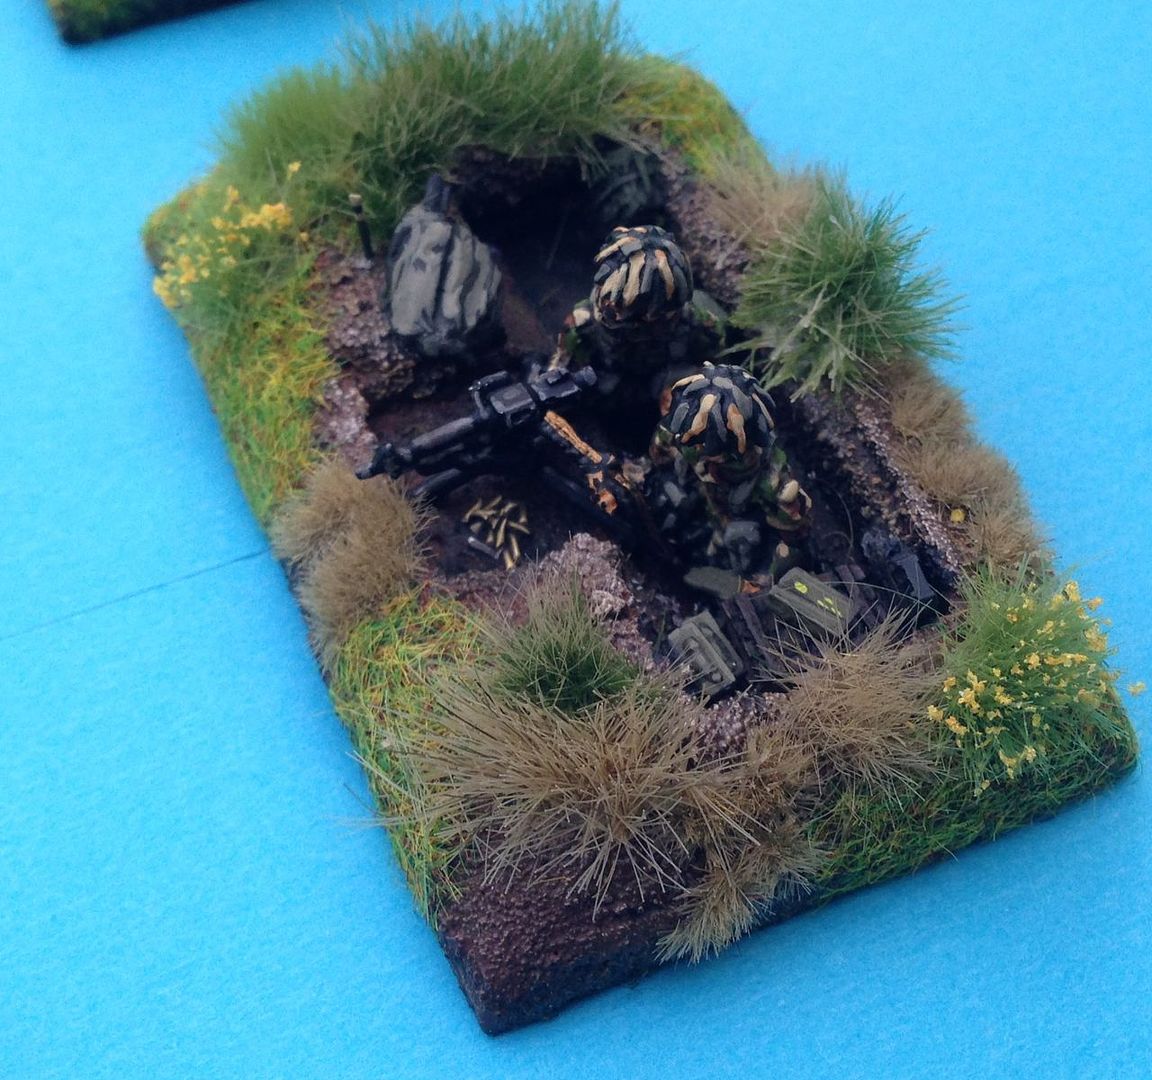
I really like what Matt has done with the Milan team in particular and have bought a large number for my army as I intend to represent a 24 or 6 Airmobile battalion at some stage.  The Milan is equipped with the MIRA thermal sight which I believe is post 1982, the weapon system is also available without MIRA in the NATO sets.


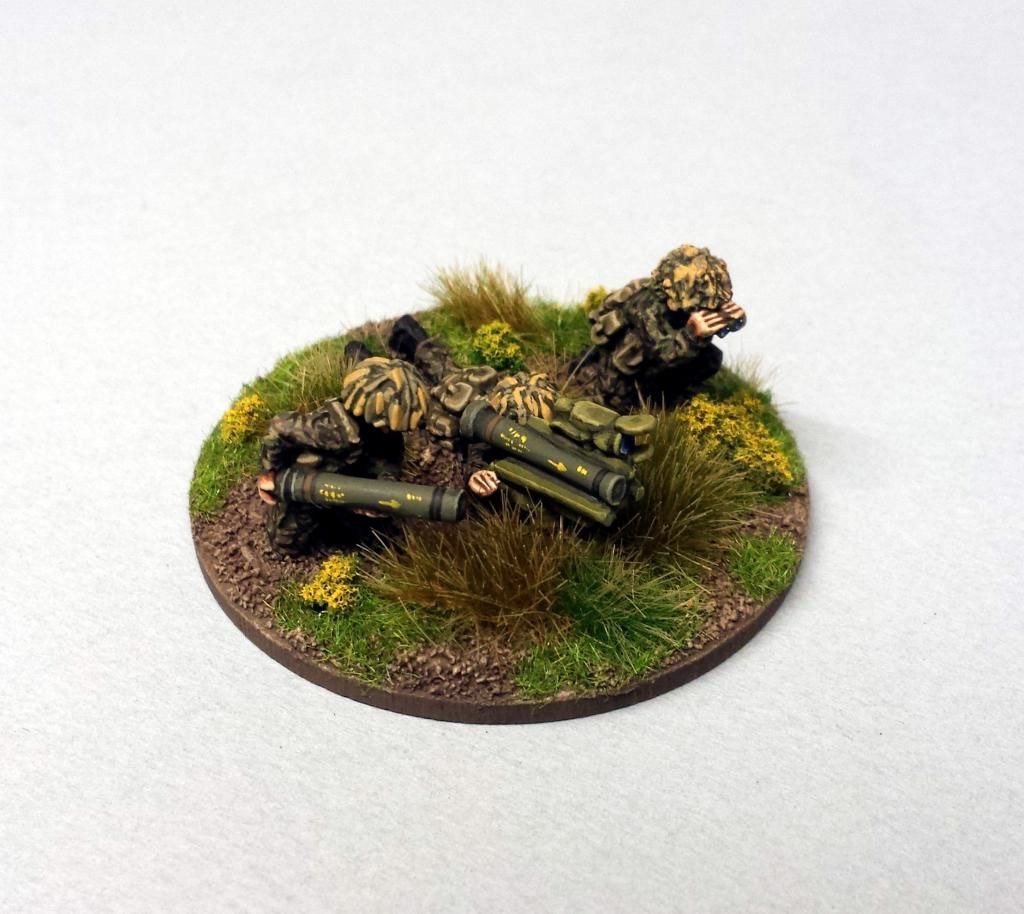
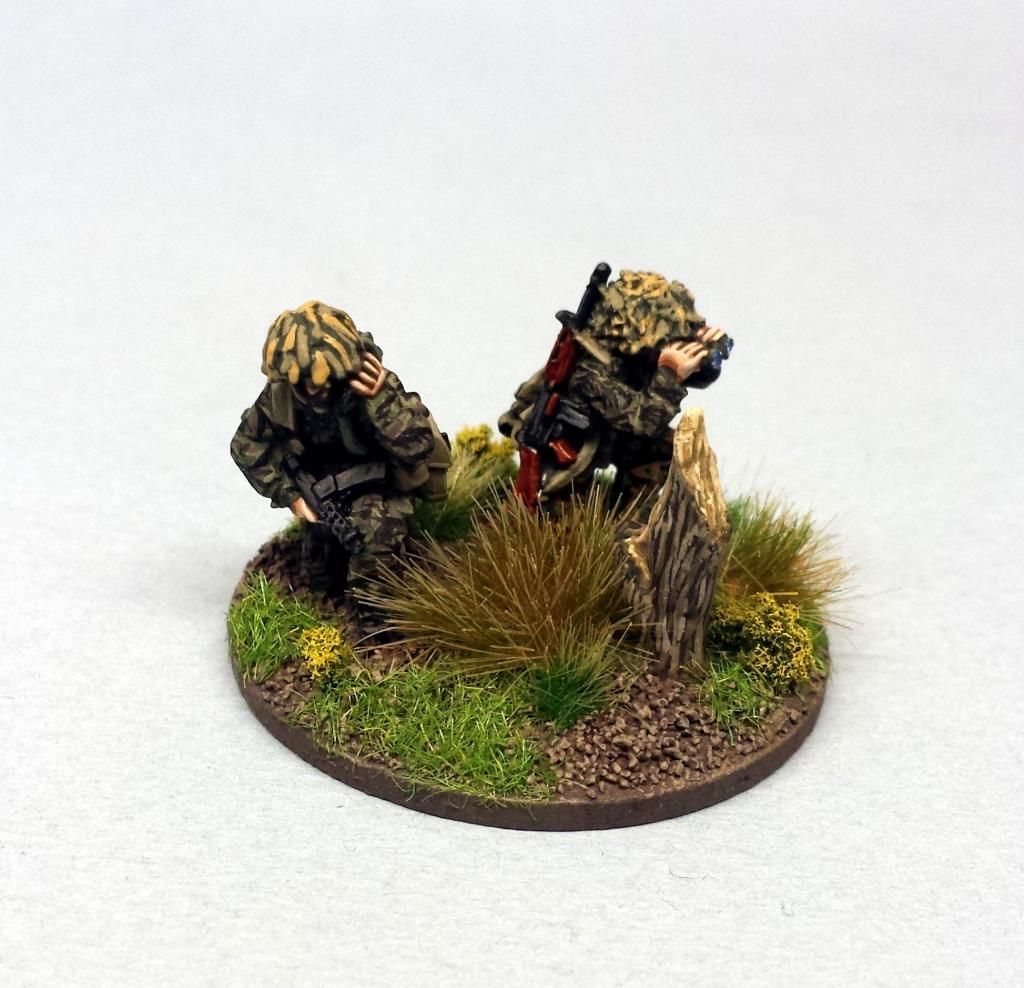
The other two figures are either involved in reloading or observing with Binoculars, no other weapons are carried so you can get away with using them post 1990, a head swap for a Mk 6 Helmet and some Green stuff around the webbing would be a fairly straight forward conversion.


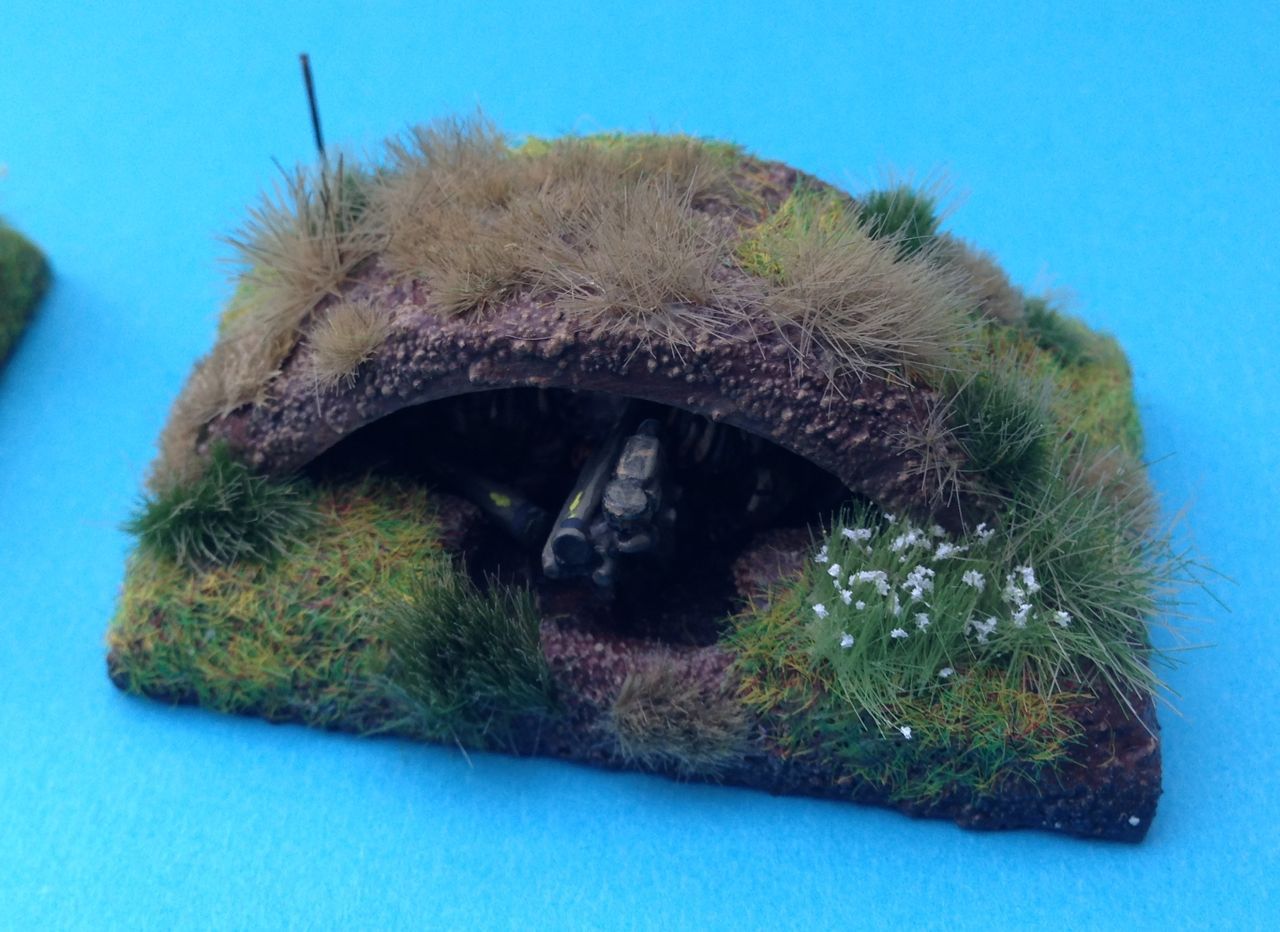
The GPMG in the SF Set is a work of art as is the tripod although mine got somewhat butchered as I wanted to do it in the low mount for use from a trench.  The range is rounded out with an 81mm Mortar Team and the patrolling section in NBC kit.   As I said at the start a very comprehensive range,  one that provides just about everything you will need for a cold war British army and is very evocative of the period. 

Thanks to Iain for the use of his pictures and Matt for creating such a great range.

Related Posts of interest:
  
ORBAT 1980s British Battle Group, Part 1Part 2Part 3Part 4Part 5Part 6


Saturday, 15 February 2014

ORBAT - Soviet Late 80's, Breakthrough Capability Part 1, Overview


I have really been struggling with this post primarily because it got way too big as I started working through the problem.  So I have decided to split it into a number of posts each addressing a different aspect of the capability deployed.  By the Cold War the Soviets didn't really refer to units or the operation as Breakthrough but effectively the units and more specifically the ammunition natures that will be covered in these posts would have been used to support attacks against entrenched and fortified positions.


Soviet Doctrine largely trys to avoid dealing with a formed defence through a series of disruptive operations, flanking movements and a pace of advance that should give the enemy little time to prepare.  I had never given much credence to the attack from the line of march theories against a prepared defence as we used to put a fair amount of effort into our defensive works.  If they did not deploy from the line of march, the next point of call for Soviet Doctrine would be a more considered assault launched from a position of close contact. So I decided to spend a bit of time investigating what they would do if forced to attack a formed defence.


A critical component of any Soviet attack would be the massive destructive power that they would want to bring to bear against developed defences before launching any form of ground strike. V G Rezniichenko, editor of Tactics, has a great diagram showing an attack from the line of March by a Soviet Motor Rifle Battalion against a company in defence, at H -12 minutes they drop a 10 Kiloton War Head on the reserve Platoon. Given that fire plan, I as well as the Soviets would have a degree of confidence in carrying that attack.


Because of the effective range of small arms fire it would be quite rare to site platoons much over 500m appart as UK defensive doctrine called for an interlock with rifles which had an effective range of 300m and an overlap of fire with SAWs (GPMG Light Role or LSW) which had an effective range of 600m.  As such a quick look at any of the numerous references on the blast effects of Nuclear weapons will give you an idea of the outcome. Wikipedia has some useful data points for a 1kt device air burst at 200m as follows:
  • Blast, 20 psi to 200m 5 psi to 600m
  • Heat, Firestorm to 500m, second degree burns to 800m
which will do a lot of damage to the defenders either through blast, burns or asphyxiation as the heat effects will remove most of the oxygen over the area covered by the firestorm.  a number of these effects will casually disregard the fact your in a trench.  So the reserve platoon has gone and I would imagine you have a number of problems in the forward platoons as well.


Throughout the 80's the Soviet doctrine shifted and become much more focused on conventional munitions rather than nuclear. Their aim being to keep the conflict non nuclear for as long as possible  in order to increase NATO decision making problems around nuclear release as the Soviet army became entangled with NATO armies and the German population. I have always struggled to believe how conventional weapons could achieve the same or similar effects to Nuclear Weapons.  Now having looked at it in some detail it is interesting to consider the array of assets they could have deployed to achieve this.  These included:
  • Massed conventional artillery fire.
  • Precision guided, Thermobaric munitions from large calibre mortars.
  • Thermobaric munitions from large calibre MRLs in the indirect fire roll.
  • Precision guided, Thermobaric bombs from Aircraft.
  • Direct Fire Thermobaric MRLs - the modern flame thrower.
  • Direct Fire Thermobaric man portable munitions from hand held rocket launchers and ATGWs.
  • Smoke Generators.
  • Thermobaric munitions deployed by ballistic missiles.


You can spot the general theme, the Soviets classified Thermobaric systems as WMD, but given the pervasive nature of the deployment of the munition it was fairly clear they intended to use it and viewed it as having a much lower release threshold than Nuclear weapons.  The effects of Thermobaric systems are fairly well documented and a not disimilar story to nuclear as the killers are destructive blast waves, over pressure, heat and a lack of oxygen.


Effects are however much reduced and dependent on size of device, distance from detonation and level of confinement.  The elements that make them more effective and more interesting here as a replacement for nuclear capability  are:
  • Deployment through MLRS systems which would start to extend the area covered fairly effectively. 
  • The direct fire aspects of the missiles and rocket launchers which puts the warhead in your trench.
  • Precision guidance which meant the devices could be sufficiently accurately placed to achieve the desired effects.


These systems would be deployed from a number of arms of service including:
  • Frontal Aviation.
  • Artillery at Divisional, Army, Front and Strategic Reserve level.
  • Chemical Troops primarily at Army and Front level.


a lot of this remained a relatively closely guarded secret and there is little evidence that I have been able to find that lays down the composition of the Chemical troops units, which were the principal providers of the direct fire support.  Evidence from both the Chechen Wars and from Afghanistan clearly outlines the capabilities, the equipment and there utility.  The assumption is similar capability if it existed would have been deployed in a European conflict.  


A reasonably significant amount of data exists on the weapons and when they were first fielded though a couple of assumptions need to be made in order to credibly employ some of the capabilities.
  • For economic reasons the later part of the cold war was marked by a shift in Soviet focus to a more defensive posture, what if this had not been the case.
  • The reasons and period over which the Soviets were transitioning to war could make a difference to the capabilities deployed particularly where these existed and were not necessarily required in large numbers.
The next few posts in this series will look at the various arms of service and the capability they could deploy in order to influence the Breakthrough battle and some concepts about what the organisations were that fielded the capability and how they might be represented on the Wargames table.  Some time this summer if all goes according to plan we may see it in action.

References:

Jane's Armour & Artillery 2002/2003
Red God of War: Soviet Artillery and Rocket Forces , C Bellamy 1986
The Soviet Afghan War, How a super power fought and lost
Tactics, a Soviet view VG Reznichenko, 1984 DTIC PDF

A 'Crushing' Victory: Fuel-Air Explosives and Grozny 2000,
Technology and the Second Chechen Campaign: Not all new and not that much by Lester W. Grau
The highly-accurate mega-mortar
Soviet Air to Ground Missiles
Soviet Air to Ground Guided Bombs
SU 24
SU 17
Mig 27
ORBAT - 1980's Soviet MRR and TRR, Part 4 Artillery

Other Posts of interest

Tuesday, 28 January 2014

Review - Book, Air Battle Central Europe, Alfred Price, 1986


Richard C over on Cold War Hot Hot Hot gave this such a glowing review that I felt an overwhelming desire to acquire one. It s quite literally another of the Cold War Classic must have titles, given that you are interested in gaming the Air Land component. For me that was one of the critical aspects of warfare in this period, playing the period without it would be like wargaming Afghanistan with no representation of ISTAR, you would be missing one of the key enablers.

Why is this book a gem it explains all facetes of the air battle with amazing clarity, the author an ex officer in the RAF brings both his own experience to bear and the experience of those he interviews. Each of the chapters focuses on a different aspect of air warfare and is underpinned by the knowledge of a serving officer currently flying in that role, which brings with it a fantastic level of detail.

I found the whole thing riveting, despite its association with the Boys in Blue and read it pretty much cover to cover. Having said that the structure of the book with each chapter focusing on a different role makes it a very effective reference vehicle and I have been back to it on numerous occasions since that first read.

The chapters cover:

  • The view from the top - Commander 2 ATAF
  • Integrating the land air battle a soldiers point of view - G3 Air Staf, HQ NORTHAG
  • The air defence battle - F15C, 32 Fighter Sqn USAF
  • The long punch - F111E, 79 Tactical Fighter Sqn USAF
  • The bridge Droppers - F111F, 494 Tactical Fighter Sqn, USAF
  • The Airfield Bashers - Tornado GR1s, 17 Sqn, RAF
  • The Carpet Bombers - Tornados, Jagschwader 31, German Air Force
  • The Jump Jet Dimension - Harriers, 3 and 4 Sqn, RAF
  • The Battlefield Brusiers - A-10, 509th Tactical Fighter Sqn, USAF
  • The Intelligence Gatherers - US RF-4C Phantom Recce, 1st Tactical Reconnaissance Sqn, USAF
  • The Tank Swatters - British AT Helicopter Regiments, 635 Sqn, British AAC
  • The Electronic Foxers - EF 111 Raven, 42 Electronic Combat Sqn, USAF
  • The Wild Weasels - F4G and F4E Phantoms of 52 Tactical Fighter Wing, USAF
  • Guardians of the Baltic shore - Tornadoes and F104s, Marine Flieger Geshwarder 1 and 2, German Navy
  • Protecting the lifeline - No 11 Group, RAF Fighter Command
  • Air Battle Central Europe an Overview - This pulls together the information from the preceding chapters in a coherent summary.

I would say this is the most digestible book I have read on the subject, it's sadly the only book I have read and the only one I feel I need to read so comprehensively and effectively does it address the topic. There are some highly useful books on operations and warfare that are right dull reads, this isn't one, if you have an inkling to understand the Air Land dimension in the later stages of the Cold War you need to read this book.  The red covered version is the US release published 1987 and the Blue the UK published 1986, bizarrely I have both but have yet to compare the content.

Richards Review on Cold War Hot Hot Hot is a little more comprehensive than mine and provides an equally ringing endorsement, it's worth a read as well . If you can land a copy on or below £4 its a steal, to be frank its worth a lot more than the second hand price.

 Air Battle Central Europe @ Amazon

Other Book Reviews:


Saturday, 25 January 2014

ORBAT - The RAF in Germany in The 1980s


The aim of this post is to provide an overview of RAF Germany in the mid to late 80's. It will be part of a series of posts that starts to examine the NATO context of Air Land warfare, developed in the Air Land Battle and the Follow on Forces Attack doctrines of the late 80s. Without  consideration of these you are not really representing warfare as it would have manifested on the Central front at this time. The aircraft of RAF Germany contributed to 2nd Allied Tactical Air Force (2ATAF), this included Dutch, German, US and Belgian Squadrons.  In addition to the forward deployed units the aircraft strength would have been increased in time of War by reinforcement from France, the UK and US.


During the period Squadron size varied between 10 - 18 aircraft organised in flights of 4 although this did vary. Actual squadron size would appear to have been follows:
  • Harrier Squadrons in Germany 18 aircraft, from 1977, prior to 1977 12.
  • Puma Squadrons, 16 aircraft,
  • Chinook Squadrons10 aircraft,
  • Tornado, Jaguar and Phantom Squadrons, 12 aircraft.
There were originaly 3 Squadrons of Harriers 3, 4 and 20, each of 12 aircraft. 20 was disbanded in 1977 and the remaining aircraft distributed amoungst the other two Germany based Squadrons.


The principal Aircraft deployed and their primary missions were:


Whilst this was the RAFs contribution, air superiority aircraft could come from any of the National Air Forces supporting 2nd Allied Tactical Air Force.  Equally strike and Close Air Support would be drawn from other NATO nations as part of the 2ATAF plan and the RAF could also end up supporting other nations.


Having said that for my British Forces I'll be using Harrier GR3's for CAS with some Tornadoes GR1s mixed in for Air Mobile operations in Depth. I'll use a Phantom FGR2 for my Air Supeiority marker and look to incorporate US F-4G Wild Weasel Phantoms and A10 Warthogs as part of the overall CAS/BAI package. 


108 A10s were forward deployed with the 81st Tactical fighter wing which had 6 18 Aircraft squadrons in the UK but would have forward deployed to Germany in time of War, with 3 Squadrons supporting 2 ATAF.  This could included working from dispersed locations and they were a significant element of the Allied Anti Tank effort.


The F-4Gs belonged to the 52nd Tactical fighter Wing which comprised 3 Squadrons each consisting of 8 F4G and 16 F-4E Phantoms, their primary role being the destruction of enemy air defence assets


Prior to the Tornado entering service in 1980 RAF Strike aircraft would have been Jaguars and Buccaneers and CAS/BAI provided by Harrier GR1 with the Hunter being the CAS/BAI platform of choice prior to 1969.


So for my NATO air land battle component I intend to put together a package that looks like:
  • 2 Flights Harrier GR5
  • 2 Flights A10
  • 1 Flight F-4G Wild Weasel
  • 2 Flights Tornado
  • 1 Flight Phantom FGR2
  • Army Air Corps Aviation Regiment
 This I imagine will take a while.


The A10s here are from the collection of the Guilds Panzerfaust 200 and were snapped in action as part of this years Waidhaus Gap game.

Other Posts of Interest


References:

Squadron History of Current Squadrons
Air Land Battle, Center for Naval analysis