Welcome to Cold War Gamer, a blog I am using to record my Cold War wargaming projects. These range from fictitious Cold War hot projects to historical conflicts that took place around the globe throughout the Cold War era, all modelled and gamed in 20mm. The blog includes links to various resources useful to the Cold War Gamer.

My current projects include: Central Front; British & Soviet. South African Border War; Angolans and South Africans. Soviet Afghan War; Soviets and Afghans

Sunday, 17 November 2013

AAR - Storming The Waidhaus Gap, Part 1 Ground and Deployment


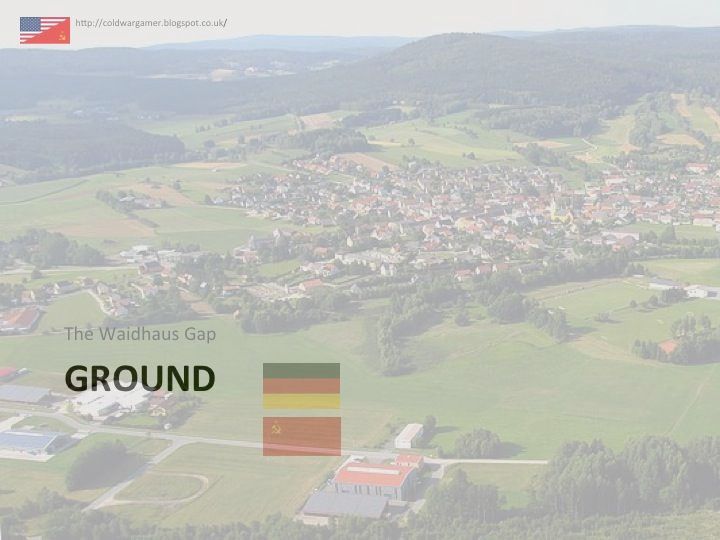
The Waidhause Gap sits on the German Czech border and is one of two more obvious routes through the ring of mountains and forests that form the boundary between Germany and Czecheslovakia. These run from the Ore Mointains in the North through the Bohemorwald or Bayerischerwald down to the Alps in the South. On the 17th of August 1988 it was the scene of the initial crossing into West Germany by leading elements of 1 Chezchslovakian Front led by the Soviet 22 Obchevoyskovaya Armiya (CAA).


Once Clear of the wooded highlands that dominate the Czech side of the border, more open country is encountered but the broader valleys remain dominated by high hills and ridge lines and the towns and villages of the region together with its densely packed pine forests created a tactical challenge for the troops of 18 Gvardejskij Motostrelkovaja Divizija (GdsMRD) whoes mission was to storm the border town and exploit west towards a crossing of the river Naab at Wennberg before pushing on towards Nurenberg as one of the opening moves of World War three on Europes Central Front.


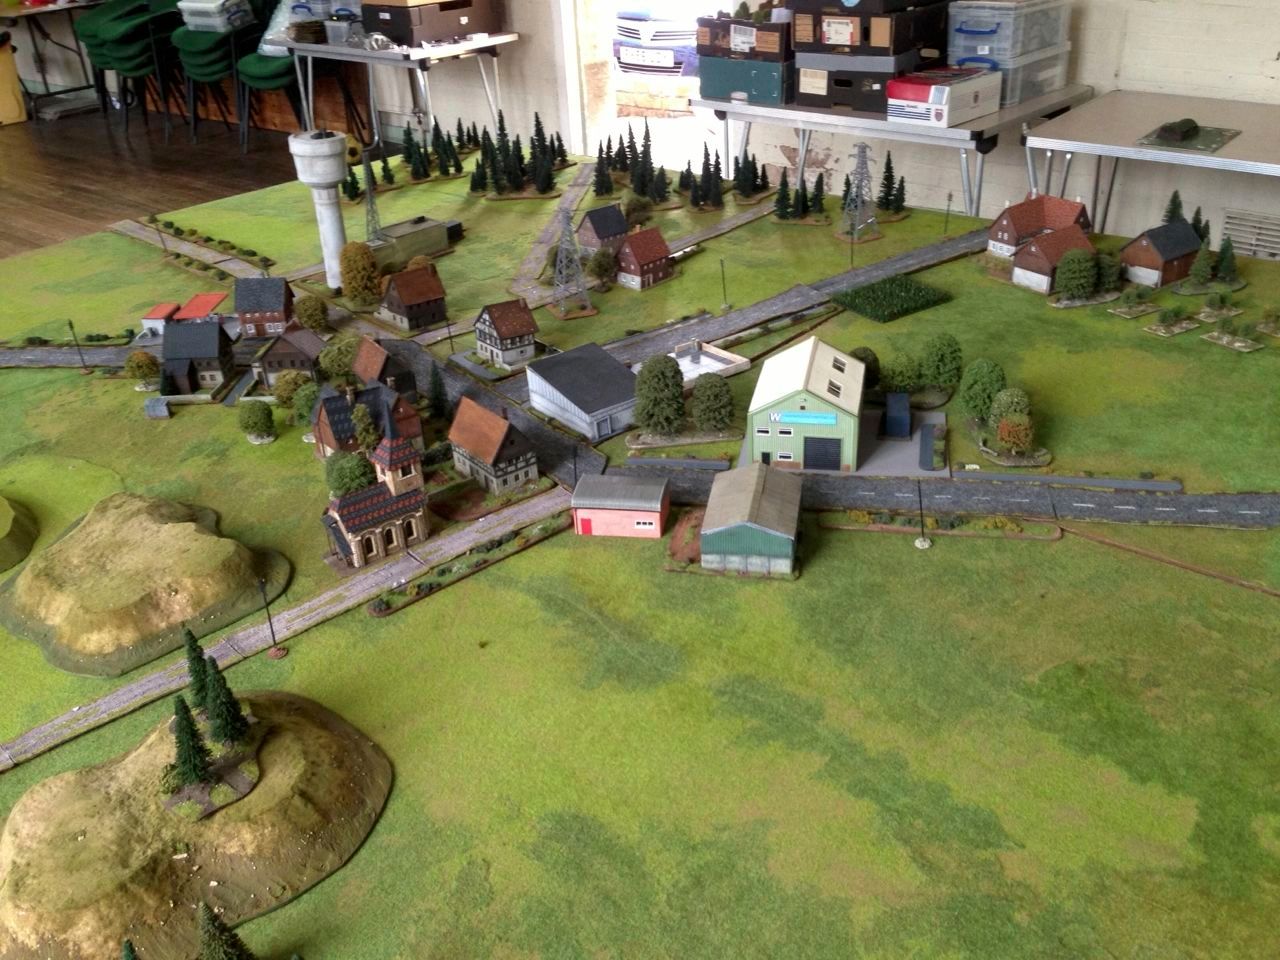
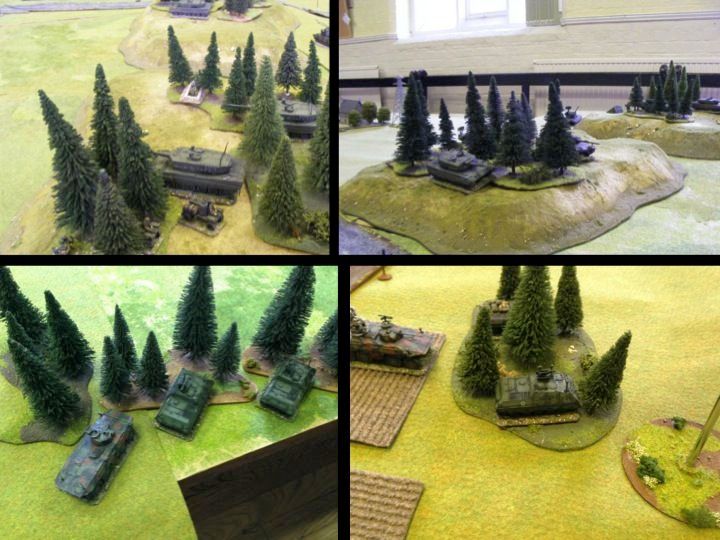
The view of the Haggenwald Ridge looking east towards the Czech border beyond the town of Waidhaus, taken by elements of Panzerbrigade 12 as the recced fire positions in early August 1988.


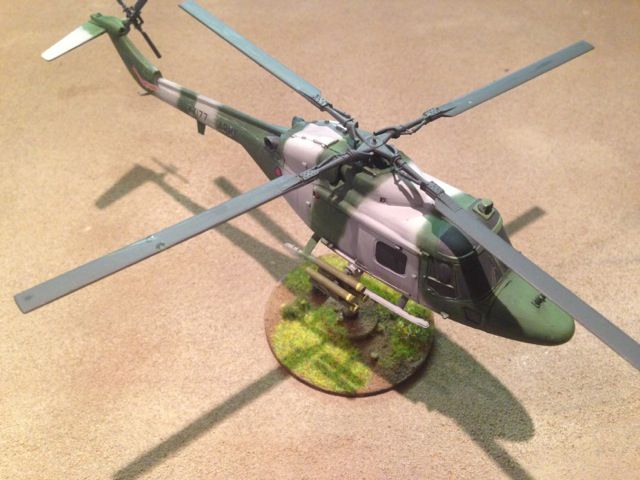
The Same area taken from an MBB105 of Panzerabwehregiment 26 which gives a better impression of the Haggenwald ridge line west of Waidhaus that dominated the border crossing points and exits from Waidhaus into the more open terrain beyond.


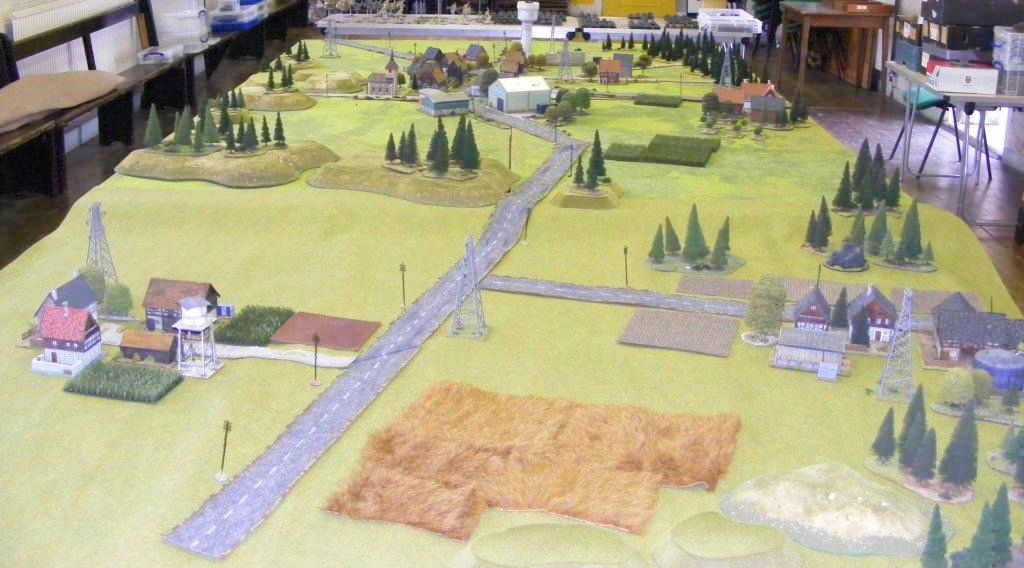
The View that would be presented to 468 Motostrelkovyj Battalion as they cleared the more deeply incised ground around the Czech border and looked west towards Waidhaus and the wooded ridge line of the Haggenwald.


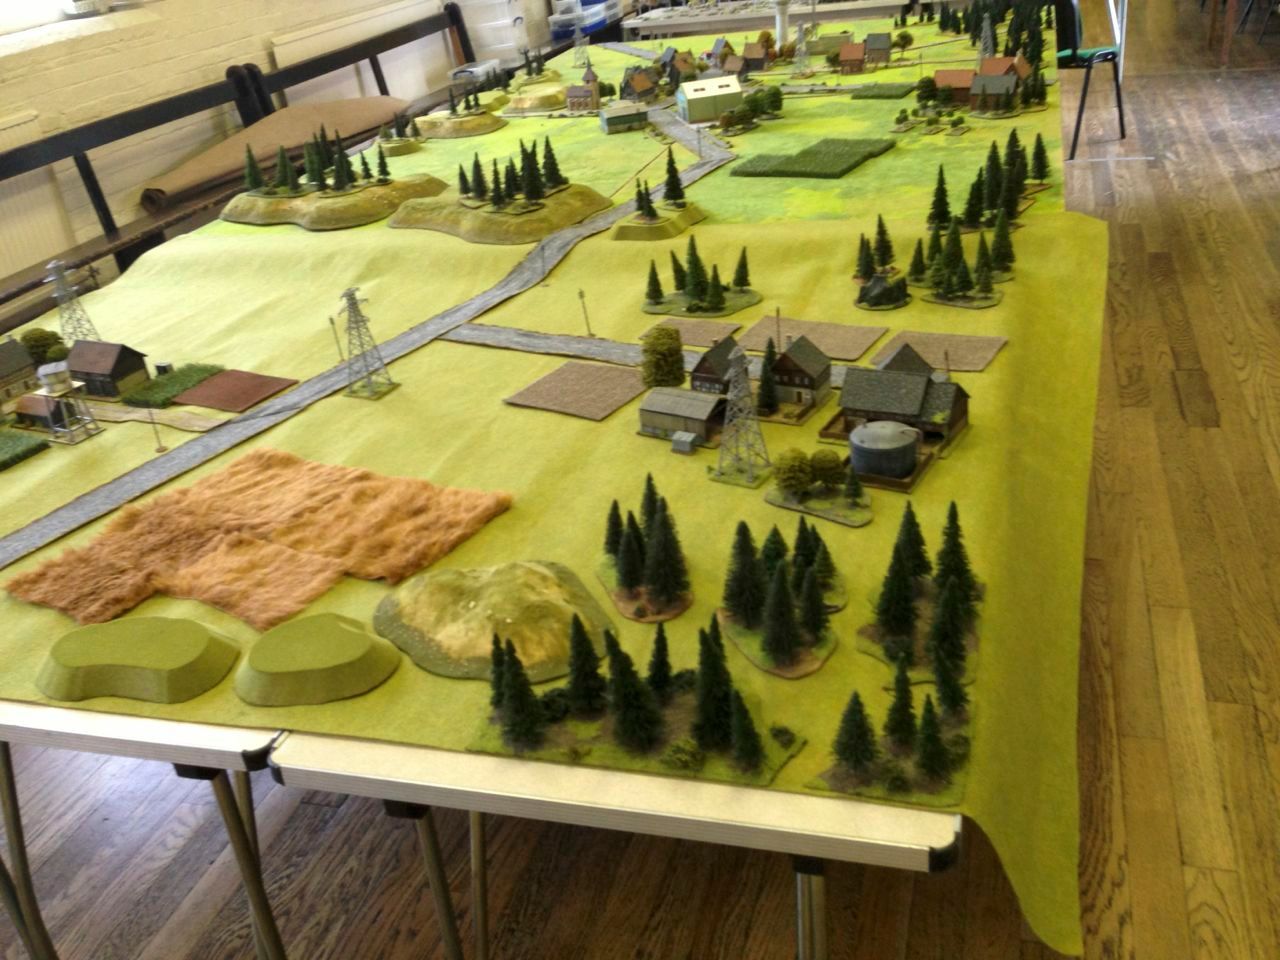
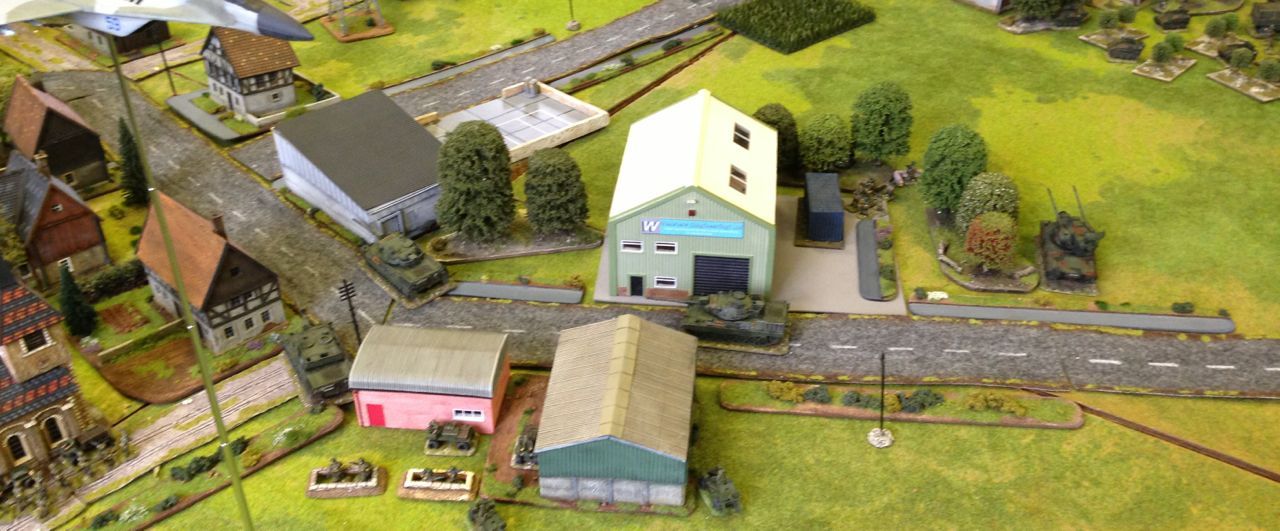
A view from the North East Eastern end of Waidhause emphasising the challenge of manoeuvring armour through the constraint created by town, wood and ridgelines. In the far distance beyond Waidhaus can be seen the area of the Schwalmwald which would be occupied during the opening stages of World War 3 by elements of Falschirmjagerbattalion 251 who together with Panzeraufklärungsbataillon 4 provided the bulk of the force deployed to blunt the tip of the Soviet Spear Waidhaus.


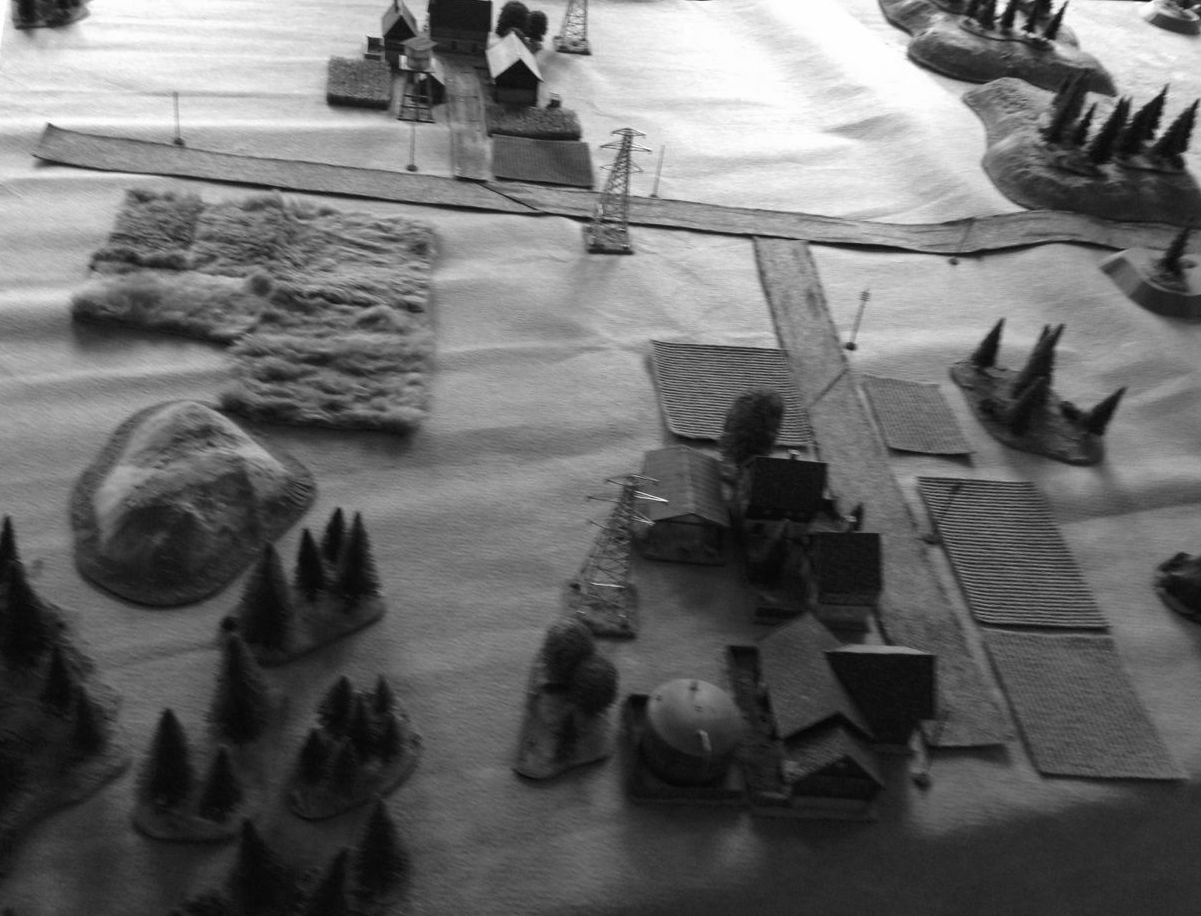
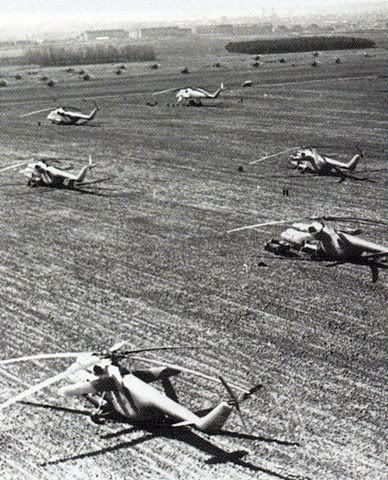
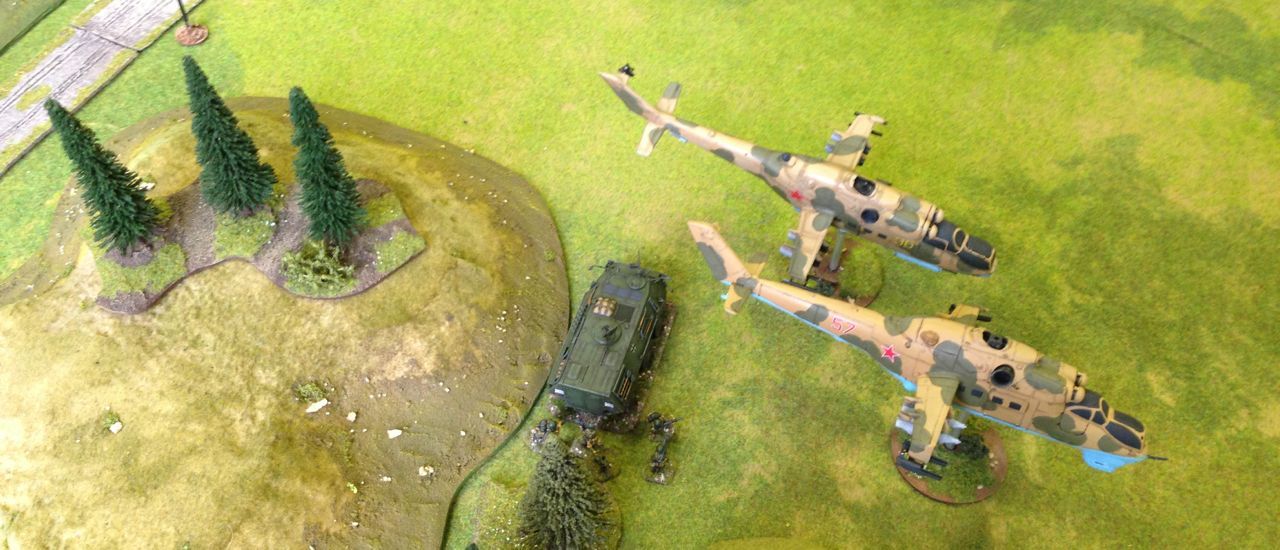
An image from a photo reconnaissance Phantom R-F4E of Aufklrungsgeschwader_51 that overflew the area late on the 16th of August, this image shows the landing zone for 901 Otdel'nuju Desantno-Shturmovye Batal'on (Air Assault Battalion) who were to attempt an insertion beyond Waidaus and the Haggenwald to secure the flanks of the lead division as it passed through the area and to clear the Haggenwald in support of468 Motostrelkovyj Batal’on, (MSB) the Army forward detachment tasked with Storming the Waidhaus gap.


The Initial Deployments of the German Defenders have been subject to much historical speculation but thanks to the exhaustive research carried out by Proffesor Gerht Halmer for his book, Breaking down the Door the first 6 days of the Campaign against CENTAG, there is now a degree of clarity.


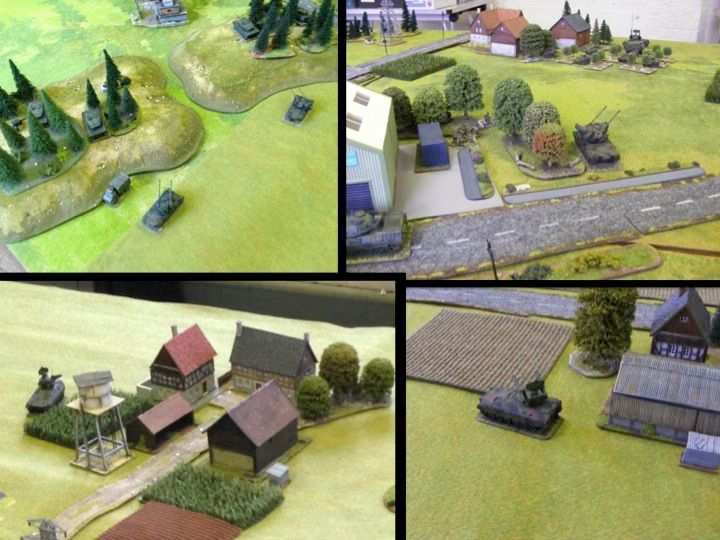
The Germans Deployed three Anti Aircraft Batteries at Waidhaus, Two Gepard/Redeye batteries from Flugabwehrregiment 4 and one Rolland Battery from Heersflackbrigade 2's Flugabwehrregiment 200. One of the Geppard Batteries covered the Leopard 2s deployed on the Hagegenwald and the open ground to its West. The other battery sat forward around the Western end of Waidhaus and the Farm complex immediately to the South of the town that sat within the area of the Schwalmwald. In addition to the Flak Batteries each of the two Luftlandepanzerabwehrkompanie deployed two 20mm armed Weisels, these deployed within the Schwalmwald itself covering low level transit routes South of Waidhaus.


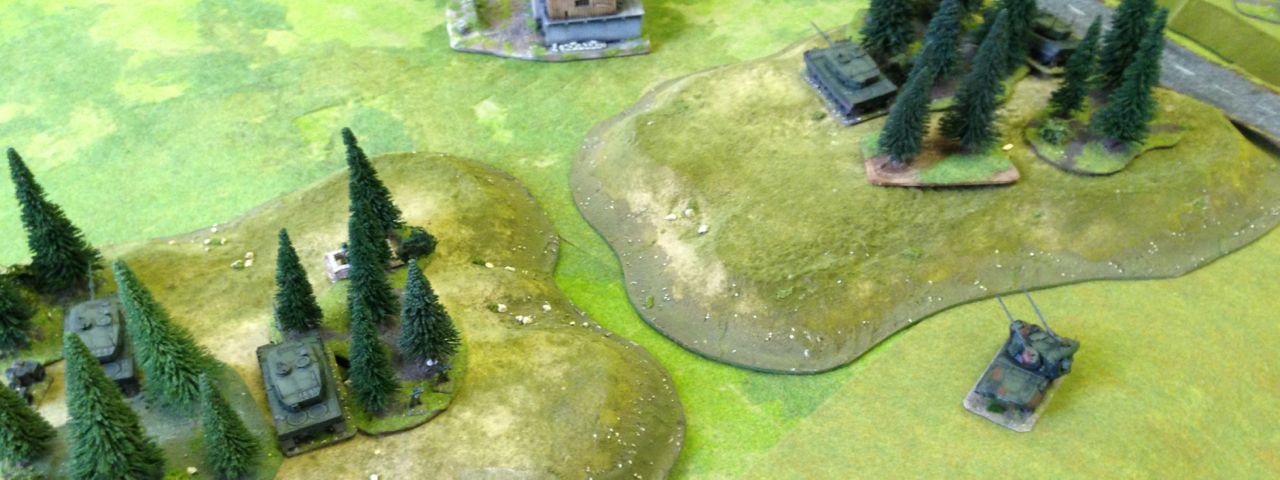
Panzerbataillon 123's Kompanie 1 occupied a dominating position on the Haggenwald, where it was co-located with anti tank elements of Falshirmjagerbataillon 251. West of the Haggenwald around the small areas of woodland sat the forward elements of Brigadespähzug 10 and Panzerjagerkompanie 100 which were the forward deployed elements of Panzergrenadierbrigade 10. The German forces West of the Haggenwald would find themselves subject to intense Air attack in the opening moments of the war in the preparatory attacks that cleared the way for 901 Otdel'nuju Desantno-Shturmovye Batal'on's air assault.


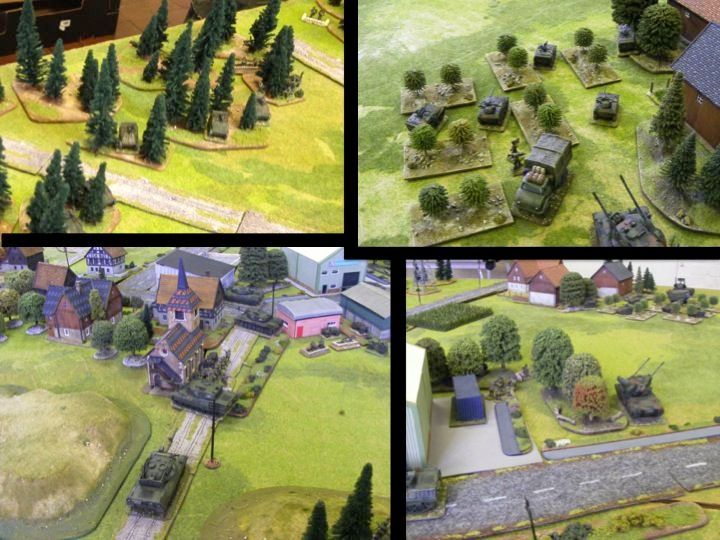
East of the Haggenwald deployed around the Schalmwald and the town of Waidhouse were the elements of Panzeraufklärungsbataillon 4's Kompanies 2 and 4. Kompanie 2 covered the northern edge of the village and Kompanie 4 the southern. Fallschirmjägerbataillon 251 and its reinforcing Kompanie, Dug itself in around the Northern edge of the Schwamwald and the Western edge of Waidhaus. Both the Luftlandepanzerabwehrkompanie deployed along the Northern edge of the Schwalmwald giving their TOW and 20mm armed Weisels good arcs of fire into the flanks of any vehicles or aircraft trying to bypass Waidhaus to the South.


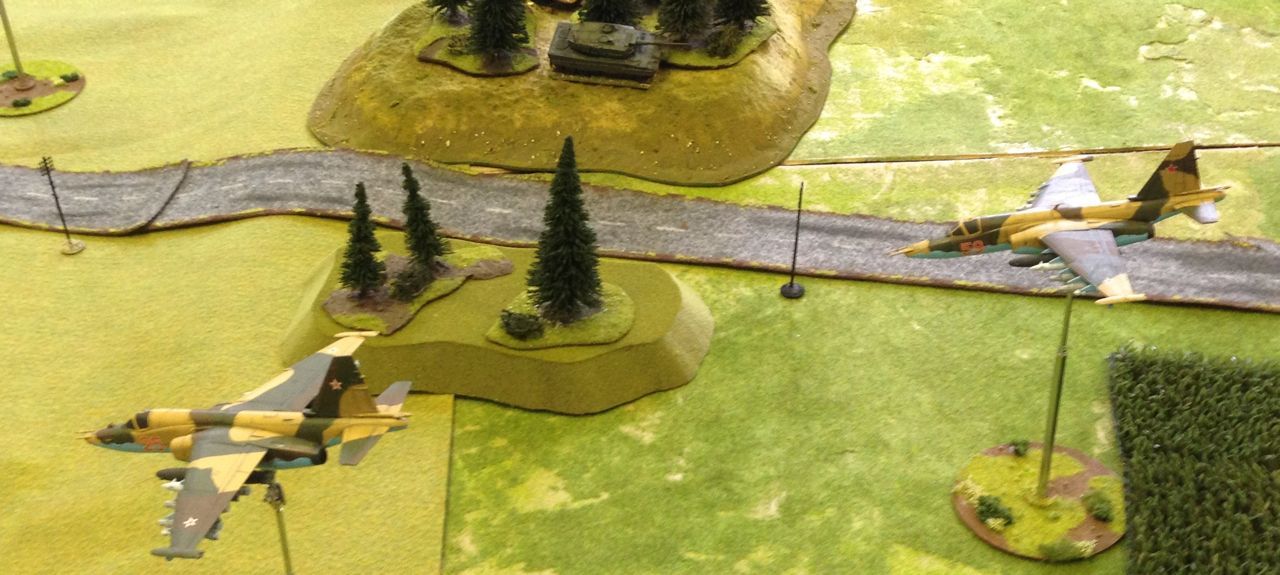
At 05:00 on 18th August 1988 Sukhoi 25s and Mig 27s of 10 Air Army thundered across the border at Waidhaus, followed closely by 490 Otdel'nyy Boevoy Vertoletnyy Polk (independent Combat Helicopter Regiment), World War 3 had come to Waidhaus.


References:

Breaking down the Door the first 6 days of the Campaign against CENTAG

Related Posts:

TTP


Thursday, 14 November 2013

Review - Model 1/72, ACE BMP 2 Re Release


One of the projects I have been working on is the construction of a reinforced Soviet Motor Rifle Regiment for the late 80's period this has been stalled for some time due to a lack of a BMP2 model on the market that would fit well with the first two battalions that were all ACE BMP1Ps and BMP 2s. I had managed to accumulate 2 old BMP 2s and 2 BMP1s and when ACE re released the BMP 2 saw an oppourtunity to complete the project and promptly bought two more allowing me to complete the Regiments third Battalion.


Having just built all 6 I thought it might be worthwhile reporting on the differences between the old and new kits. The new kit is much more than just a re release it is completely re tooled and molded from a slightly harder plastic compound than we are used to from ACE.

The Principal areas of improvement are:


  • The hull, The hull base is more riged and conforms well to the track sides and hull top removing considerable effort in construction, although cleaning the spru attachment points is still a must.  The improved fit can clearly be seen in the pictures as can the net saving in filler required when compared to one of the originals.

  • Road wheels, return Rollers and sprockets, The running gear is also much improved more cleanly and consistently molded with much better attachments for the Sprockets and considerably reduced effort on clean and fit.
  • The tracks, The tracks are vinal, of a good length and they readily stick to the road wheels. This reduces construction time by hours compared to link and length.
  • Smoke Grenade Discharger.  The smoke grenade discharger units are much more cleanly moulded, with a lot less flash needing to be removed and are of a more consistent and accurate shape ensuring that fitting them to the turret is far more straight forward

All up a significant improvement in the kit which now has a significantly lower level of effort required to complete the build, and correspondingly can be built much quicker.  This can only be good news as once built and painted ACE are one of the better BMP options out there.  They have I believe done the same with the BMP 1 kit.

References:


Sunday, 10 November 2013

Review - Models 1/72, Airfix Harrier GR3


The Harrier is another of those Cold War design icons a bit like the BMP. The Harrier's role in RAF Germany was to provide Close Air Support to 1 BR Corps and it did this from dispersed hides in the German country sides making it relatively immune from the predictable Soviet onslaught onto the NATO airfields. The Aircraft was designed in the 50s and the GR1 entered service in 1969 with the modeled version, the GR 3, entering Service in the mid 70s with an uprated engine and the addition of automated tracking and target lock on through laser designation both on and off board.


At £13.95 it's not the cheapest representation of this platform, but it is readily available. Other options include Hasegawa, Italeri and Matchbox check out Scalemates for a fuller list. There are a variety of after market accessories provided for the older kits although I have yet to find anything specific for this platform. The kit is supplied with decals for two aircraft based on Number 1 Squadron in UK supporting UKLF and Number 4 Squadron in Germany supporting 1 BR Corps.


I fancied doing mine as a 3 Squadron aircraft and managed to get hold of a set of their 2012 centenary celebration decal set. 3 Squadron operated the GR 3 from March 1977 - March 1989. The decal set is superb it not only includes the squadron markings but all the roundels as well, with the kit supplied markings and some thought you could probably press out 2 - 4 Harriers. In addition 8 Colour A4 sheets show how to mark up the many aircraft that the markings are supplied for. If you do WW2, Cold War and Modern Brits you would get a lot of use out of this set, very useful.


The model is a much uprated and retooled version of the original Airfix GR 3, crisply molded and very straight forward to assemble, with an excellent solution to the wheels up wargamer option and a variety of alternate parts, these are the source of my only complaint. I think the kit can pretty much be assembled as a GR1 or GR3, I say I think because there is nothing that tells you. Equally their are two settings for the airflow control ducts at the back of the air intake but nothing to tell you when these would be open or shut. Minor grips really for what is an excellent kit.


My final point is common to a range of aircraft kits and manufacturers, why are aircraft which have a primary role of Close Air Support and or Battlefield Air Interdiction, always supplied with a pair of drop tanks and some sidewinder missiles and only a single option for munitions more appropriate to Close Air Support (CAS) or Battlefield Air Interdiction (BAI). The Harrier had 5 hard points and could deploy a number of the following items of ordnance:
After market munitions options are provided by a range of manufacturers including Hasegawa which offer a selection of US ordnance that was also used by the UK including the laser guided pave II systems. However I quite fancied the BL 755 CBU which was included in the Airfix RAF/NATO Weapons kit along with versions of Laser Guided Munitions, the kit was released in 1992 and is OOP but occasionally pops up on eBay.


I wanted to represent an aircraft from the mid to lates 80's from Germany so have used Tamiya XF-24 as a representation of BS 638 Medium Sea Grey and Tamiya XF-27 to represent BS 641 Dark Green.  Decals used were from the kit with selected items from the aftermarket decals set for No 3 Squadron. The aircraft was airbrushed using Tamyai XF-24 over a preshade of black. The disruptive pattern was added using Tamyai XF-27, the Canopy exhausts and jet nozzles were completed using, Vajello Black Grey.  As ever they are mounted on CorSec engineering flight stands, which I have a plentiful supply of, so I am just buying the mounting pegs now @ $0.55 a shot, which is both cost and time effective.


Nice Kit 

References:

Brit Modeller Harrier GR1 very similar kit quality


Friday, 18 October 2013

Review - Book, A History of Soviet Airborne Forces


Whilst the bulk of the book talks to the evolution of Soviet Airborne organisation and use throughout WW2, it illustrates effectively the type of operations talked to in the post war doctrine whilst highlighting the somewhat hazardous nature of delivering Airborne units by parachute into the enemy's rear. The operations presented are comprehensively researched and presented with supporting maps that enable the reader to understand the operational points being made.


The last 100 or so pages talk through the development of the modern force set against the wider evolution of Soviet Doctrine, from manoeuvre in nuclear war to the defensive postures of the late 80s. The arrival of the Helicopter and its wide spread employment by the US in Vietnam clearly influenced Soviet military thinking in this space providing more predictable means of delivery and support for airborne envelop ment and manouver.

The Author charts this evolution of both organisation and doctrine in some detail, but sadly to my mind has not covered the contemporaneous evolution of the Air, Aviation, and Artillery Forces that were the fundamental enablers of the concepts discussed but which sat outside the scope of the title. A better History might have been of Airborne Forced, Operations and Doctrinal concepts which could have caught these missing elements.

Whilst the book does cover operations in Afghanistan which reflect the Soviet experience of air mobility this is done with a fairly superficial look at formations undertaking the role rather than a look at the operational context, which was significantly more difficult to come by in 1994 when this book was published. This is better covered in the Bear went over the Mountain, chapter 3, Tactical Air Assault published 1996 and the Soviet Afghan Wars sections on Air Assault and Army Aviation, published in 2002.


Having said that the chapters on the Modern Airborne force and the evolution of the Air Assault arm set against the evolving doctrine is extremely useful, and the detail on the organisational structures of the VDV and DShV adds significant value.  For the Modern gamer I am not convinced that the content justifies the current price of £45, If your interested in WW2 or If you can score a cheaper second hand copy then its definitely worth having.
A History of Soviet Airborne Forces (Cass Series on Soviet Military Theory & Practice) @ Amazon


Other Book Reviews:

Soviet Tactical Aviation
Armies of NATO's Central Front
Red Thrust, Central Front
The Soviet Afghan War, How a Super Power Fought and Lost
Weapons and Tactics of the Soviet Army
Soviet Air Land Battle Tactics
The Military Balance
Encyclopaedia of the Modern British Army
The Soviet Conduct of Tactical Manoeuvre
First Clash
The Third World War
The British Army in Germany

The Cold War Bookstore contains links to over 60 Cold War titles covered in my book list


Tuesday, 15 October 2013

Review - Model 1/72, Airfix Lynx AH1


The Lynx AH 1 entered service with the British army in 1977 with the TOW armed Attack Helicopter version first making an appearance from 1981. It remained the principal Attack Helicopter in the British army until 1988 when it was replaced through upgrade by the AH1GT and the AH7 with their distinctive burp tipped rotor blades. The conversion to AH 7 was completed in 1994, but AH1s recieved the engine and rotor mods from 1991 to become the AH1GT so TOW armed AH1 aircraft didn't quite make it to my end date of 1993. The BURP tipped rotor blades can be obtained as an aftermarket purchase form Pavla so AH1GT and AH7 variants can be modeled.

The aircraft principally served in the Attack Helicopter Squadrons of the Army Aviation regiments attached to each of the 3 Armoured Divisions in Germany although it was also deployed by UKLFs 7 Regiment, and The Royal Marines. It was also deployed as an unarmed aircraft for troop transport.


The kit is now sadly OOP but they are not difficult to get hold of either on eBay or from Model Shops. I have managed to pick up quite a few. I have built mine as the TOW armed version of the AH1 that served in BAOR from 1981 - 1991 although at a stretch you could run them onto 1994.


There are numerous air/aviation focused modelling reviews which will lay down every missing rivet, some of them are brilliant. The kit itself assembles easily and is quick to build if your painting out the windows. The only really fidly bit is the rotor head assembly and that is not that difficult.

The biggest failing of the kit from a wargames perspective are the missile mounts, whilst the mounting points are correct I am not convinced Britain ever deployed a 6 missile armed AH 1 Lynx all references and pictures that I can find show 8 missiles mounted in a two by two block either side. Having said this its a pretty straight forward problem to fix as long as your not after a high level of detail fix.


The Kit supplied mounts shown above need to be adapted to carry 4 Missiles in a 2x2 block, I also reduced the distance of the missiles from the mount although you could easily skip this step.

  • The missile mount is separated from the Aircraft mount
  • The third missile mount is removed
  • The inboard arm of the missile mount is shortened.
  • The mounting points are shortened and squared off
  • 8 15mm plastic rod lengths are cut to represent the TOW tubes

  • The 4 Tubes are then attached to the missile mount,
  • The missile mount and aircraft mount are reattached to each other
  • A mounting hole is drilled in the A/C hull bellow the door frame and above the mounting point
  • The completes unit is attached to the aircraft

I have made the rotor blades removable so can play with and without depending on the size of the Scenario.
Two primary paint schemes have been used by Army Air Corps AH1s. From 1977 to 1986 the images of Lynx AH1's show a black and green camouflage pattern. From 1987 the light grey and green pattern seems to have been introduced but not implemented immediately across the whole fleet. This is based on analysis of images in the Air Britain Photographic Images Collection that cover Lynx AH1. I have Chosen to do this one in the light grey and green scheme which makes it a late period bird.


The aircraft was airbrushed in Tamya XF-19 Sky Grey then the camouflage colour was added, Tamya XF-26 Deep Green, the whole was then washed in badab black before being highlighted in the original colours and a pin wash applied. TOW tubes were painted Vajello Russian Uniform and rotors, windows and exhaust Vajello Black Grey. Decals were from the box with different registrations being applied by re-aranging the numbers. They were mounted using Corsec enginiering flight stands on existing bases.


I found Airbrushing the aircraft quite difficult and you may wish to consider leaving rotors and missiles off the aircraft untill you have the airframe painted, however it was quick, I think the kit builds into a wonderful representation of the Aircraft and they look just like I remember them, an enjoyable build just as well as there are a few more to go.

Reference:

Avistar: Westland Lynx
Air Britain Photographic Images Collection
Prime Portal Lynx AH 1 Walk around
Aviation Images - Aircraft in Detail, Westland Lynx
Scalemates Westland Lynx
British Military Helicopters, 1986, J Everett-Heath
Today's Army Air Corps, 1987, P Beaver
Kit Review

Related Posts:

ORBAT - 1980's British, Army Air Corps Aviation Regiment