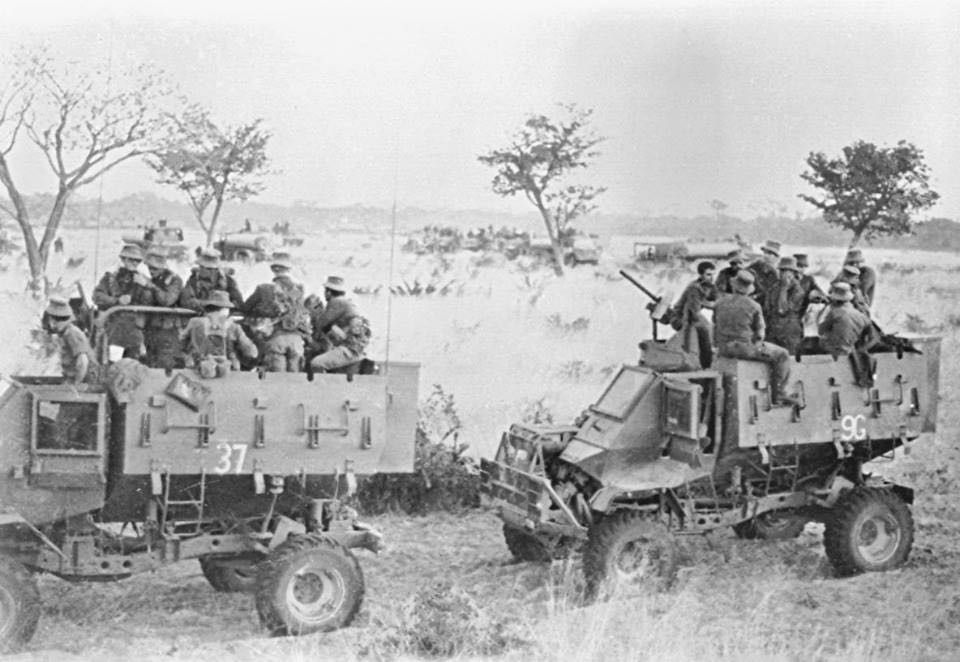
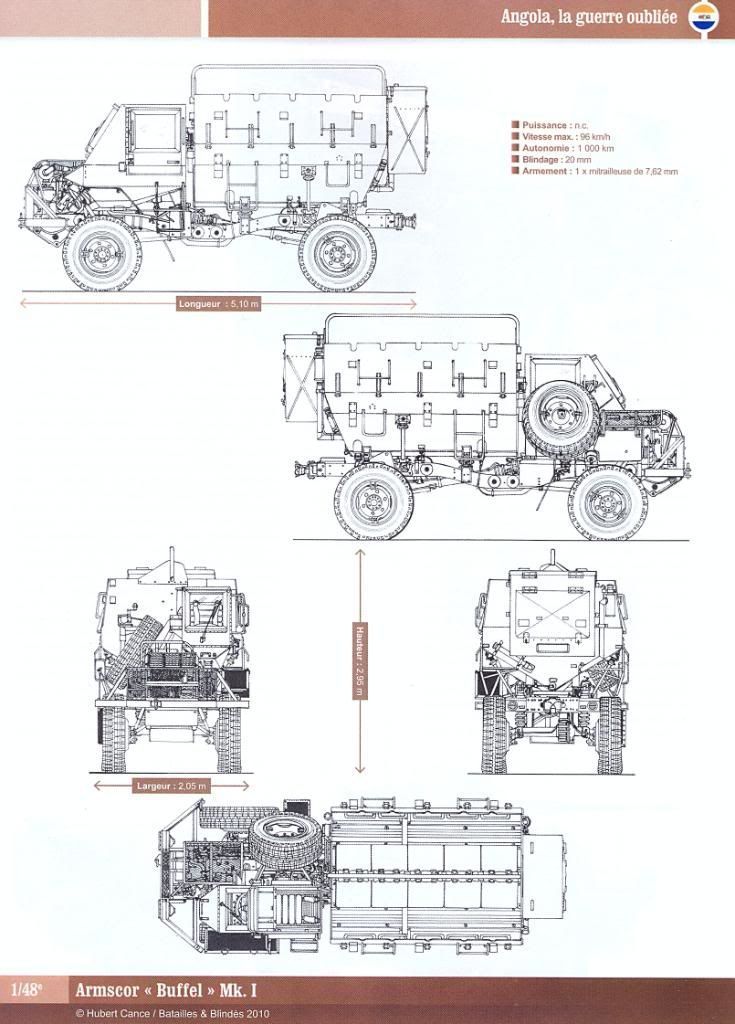
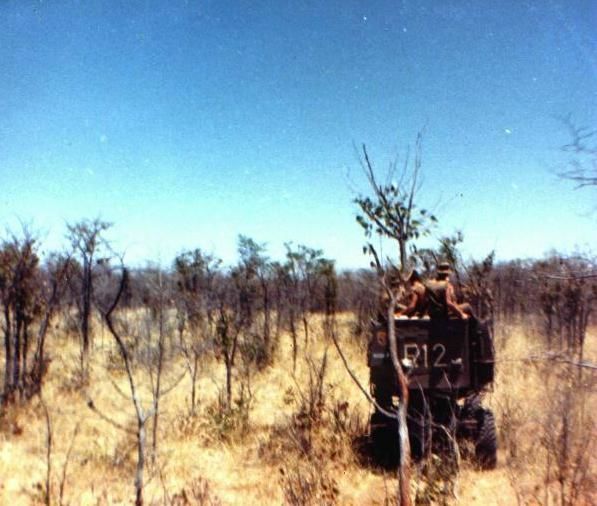
The Buffel was introduced into the SADF in 1978 to provide mine protected transport. They were used within mechanised units to transport support elements such as pioners and in the non mechanised units they provided a basic transport capability for the rifle companies whilst support weapons traveled in a mix of Buffles and soft skin vehicles. They were used by units of 44 Para Bde, and equiped, the Modular and SWATF, battalions as well as 32 Battalion. 6 Buffels took part in Op Reindeer in May of 78 as part of Task force Julliet and they saw extensive service on both internal and external operations throughout the remainder of the War.
The vehicle is quintessentially Border War so much so that personally I don't see the point in gaming the conflict with out it. It was an evolution of the ideas from the early mine protected vehicles deployed in Rhodesia and its heritage lives on in the wide variety of MRAPs used globally today.

For years the only representation of this in 20mm was produced by Bax Models which comes in at £27, costly if you want to deploy them in reasonable numbers and a time consuming build. In January this year Shaun at S&S had one mastered by AMBN Modelisimo and a couple of weeks ago I got my hands on 4 pre release versions.
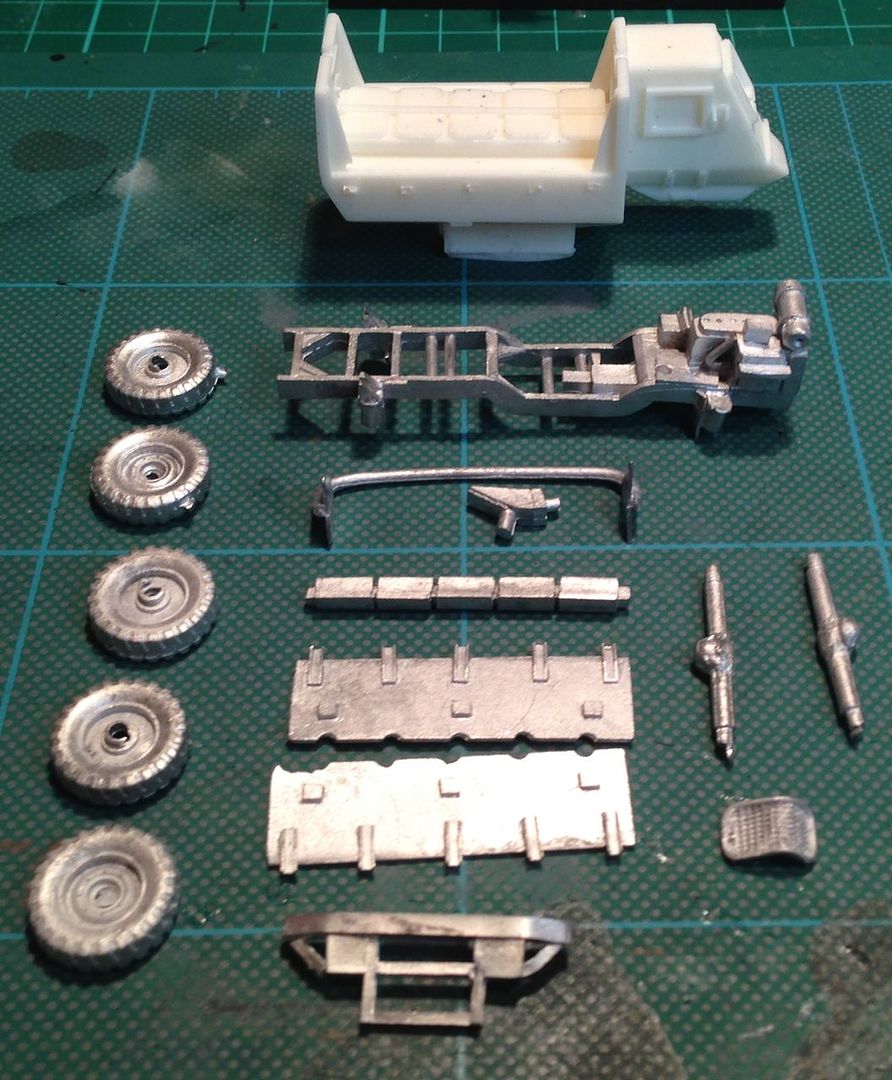
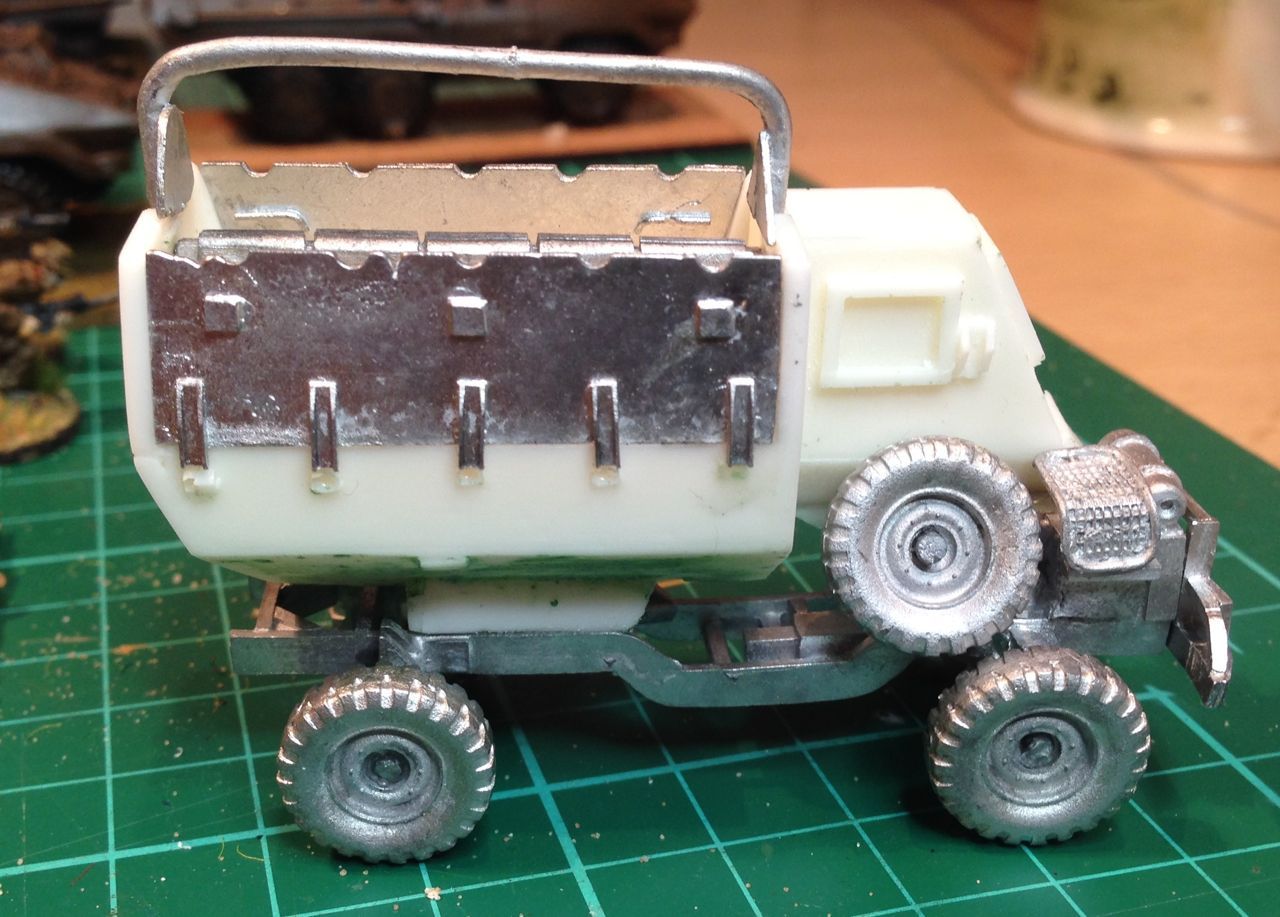
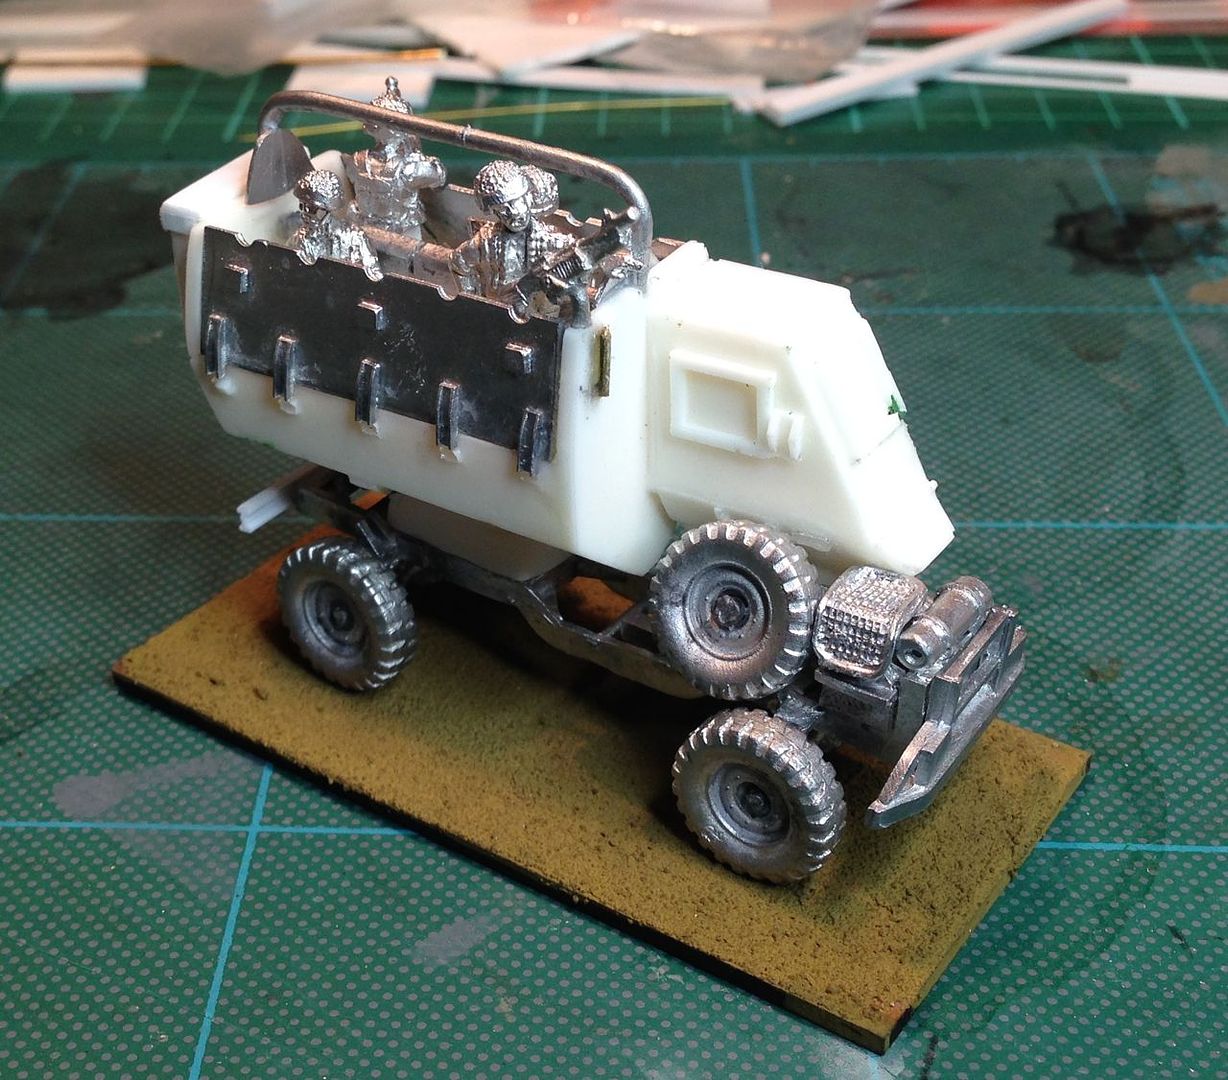
The model is a resin and white metal kit that builds into an excellent representation of this vehicle. A difficult task given the very open nature of the underside of the vehicle and one which has been put together extremely well by the team at AMBN Modellisimo and S&S. Essentially the hull is modelled in resin less the side access panels, seat rests, role bars and the chassis which are cast in white metal.
The white metal components were well cast with little to no flash and the hull side panels are very finely cast. The underside of the resin hull has some pin and sink holes but these are easily filled whilst the upper structure is generaly excellent.

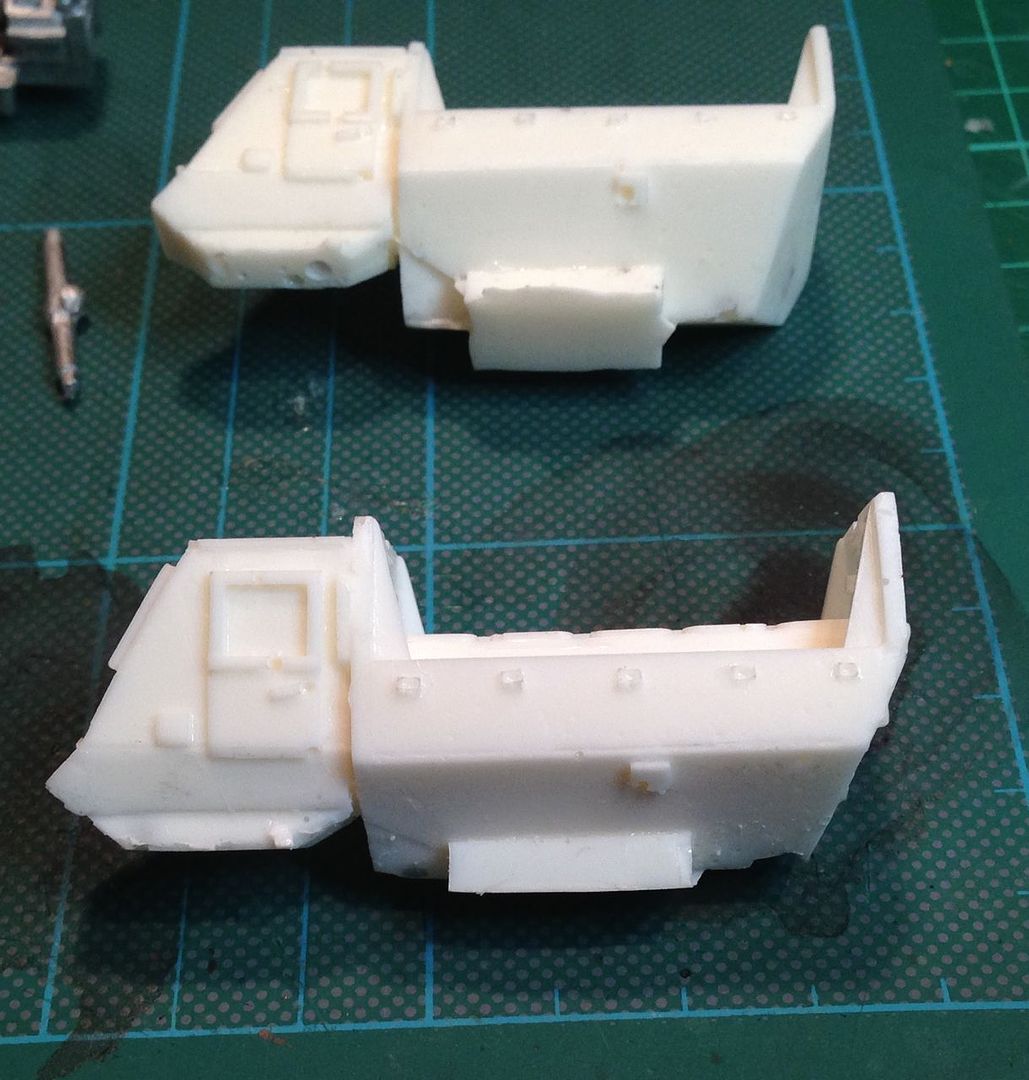
The effort on putting this baby together comes in the need to reduce both the length and the thickness of the plinth at the base of the V Shaped hull that allows the vehicle to sit on the chassis. I Had a number of goes and have got to a reasonably satisfactory state but will probably try and do better next time round.
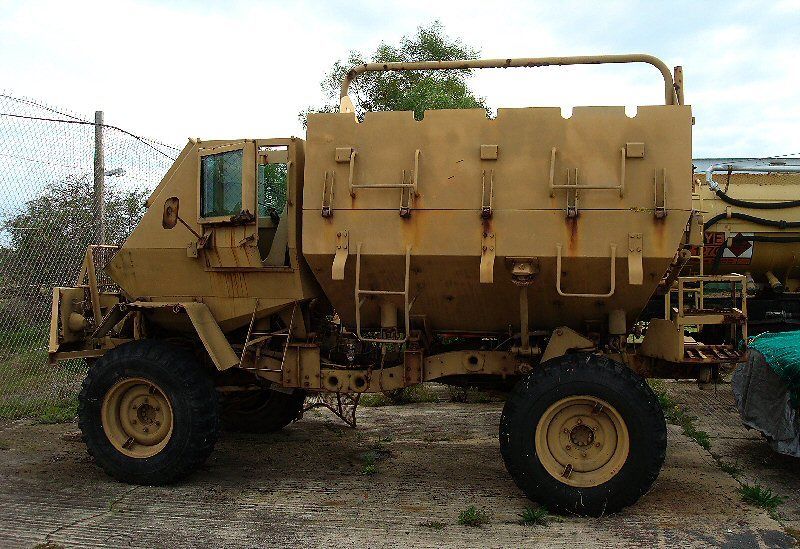
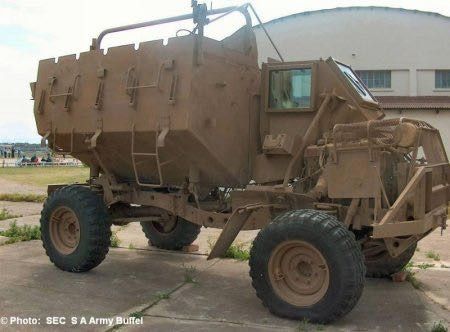
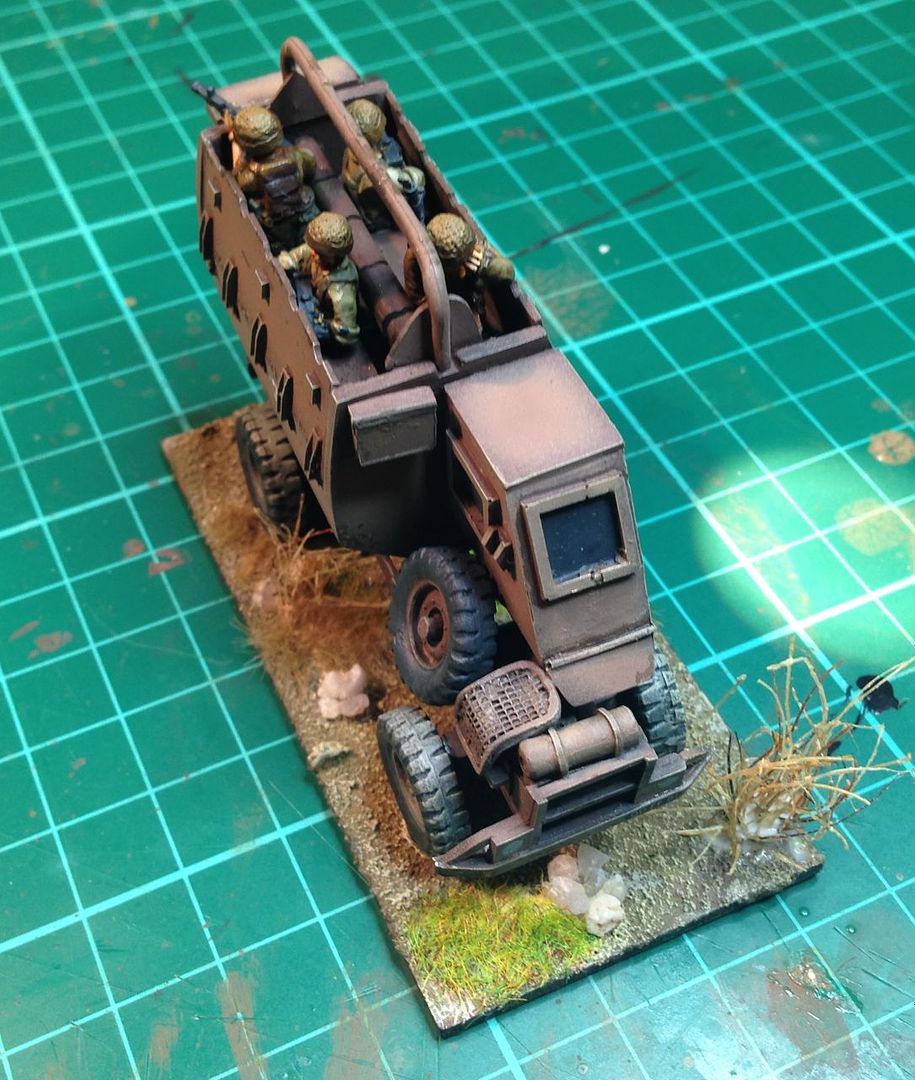
The hull of the vehicle sits just above the chassis and the nose of the hull almost touches the bush guard. in this position, the spare wheel is close to the troop compartment and the rising slope of the rear hull panel starts close to the rear axle, Prime Portal has a useful walk round guide. I would recommend the following approach to assembly:
- Fill lower hull defects
- Assemble chassis less spare wheel and engine cover
- File hull base plinth under hull and driver cab (Electric Sander and Mask are useful)
- Fit hull to chasis
- Fit remaining chasis parts, spare wheel and engine cover
- Fit Hull parts, Seat Back, Roll Bar,
- Fit Side panels last
- Admire
This provides time for the various bits to dry and reduces the chance of damaging the white metal parts on the hull. Adding the side pannels last prevents them getting bent whilst you attempt some of the other tasks.
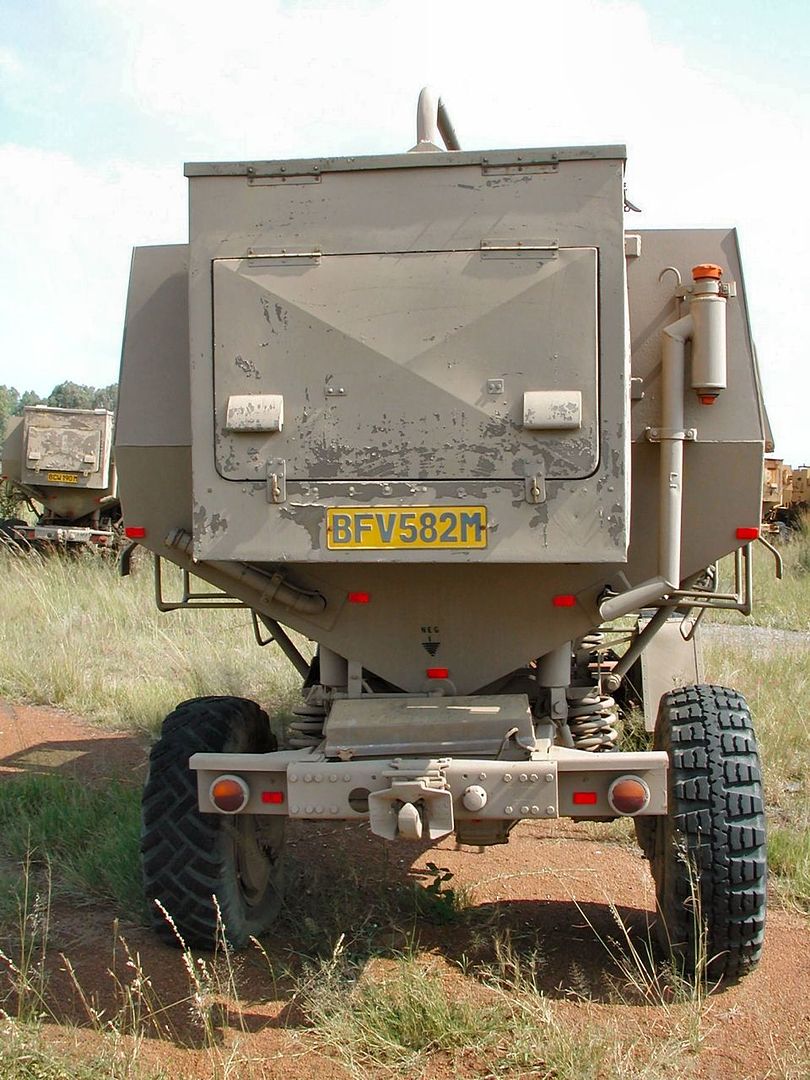
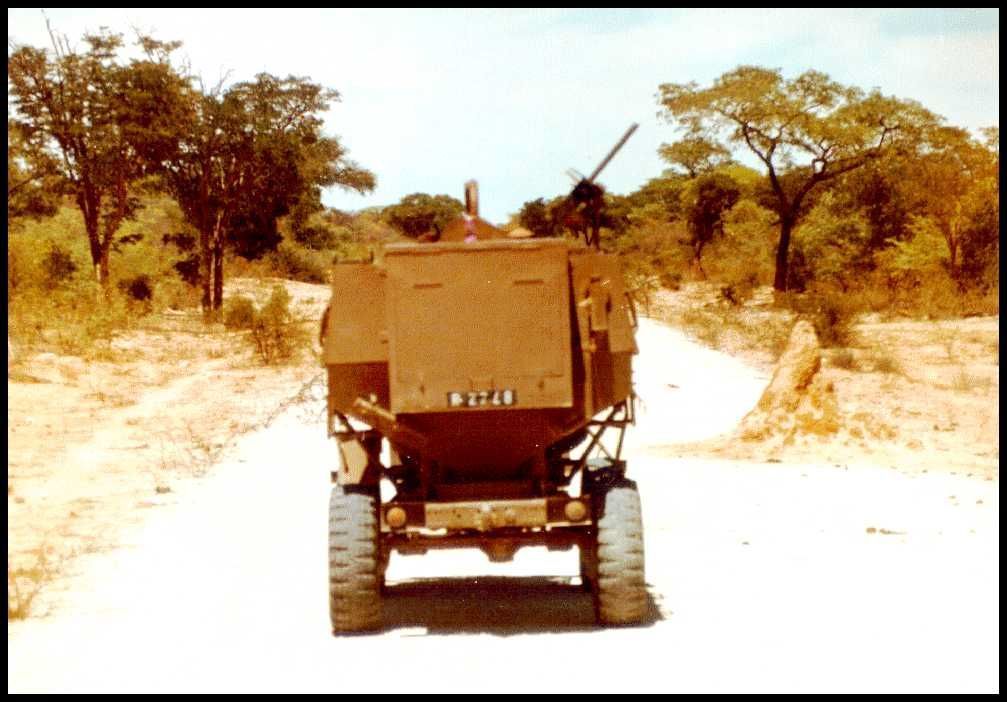
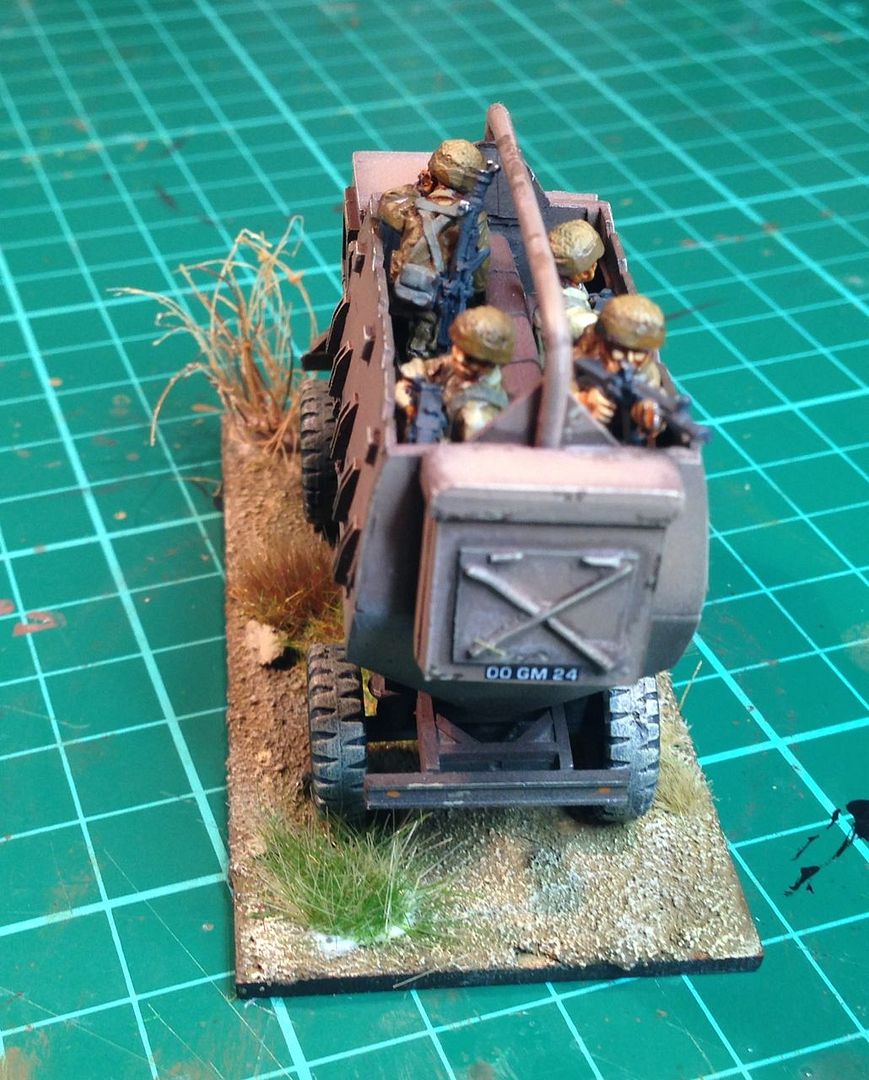
I could find no standard reference books but there are plenty of images and references on the web. In service pictures of the vehicle show a few things worth adding as part of stowing and crewing the wagon. I have seen no real evidence of significant external stowage as there were few places to locate it and plenty of oppourtunity for it to get removed whilst driving through the Bush. The vehicles had a 100 Liter Water and 200 Liter Fuel tank - so no jerry cans needed. and the large rear panier looked like it held the bulk of the sections kit.
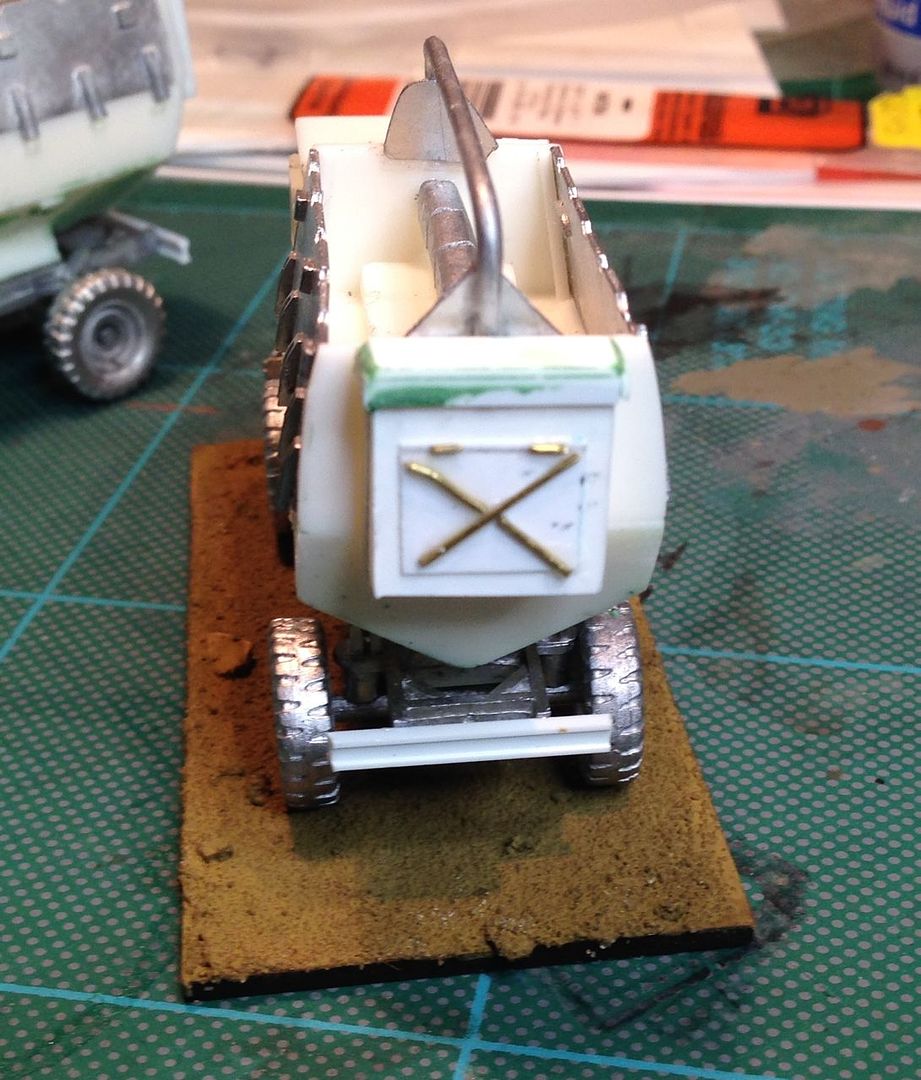
I have added the rear panier to all my vehicles and built this from plasticard and brass rod.

Ammo boxes seem to be added to the front and some vehicles support an MG either a .30 Cal Browning or an FN Mag, Brownings are seen with and without shields Elheim make a very useful .30 which can be used for this.

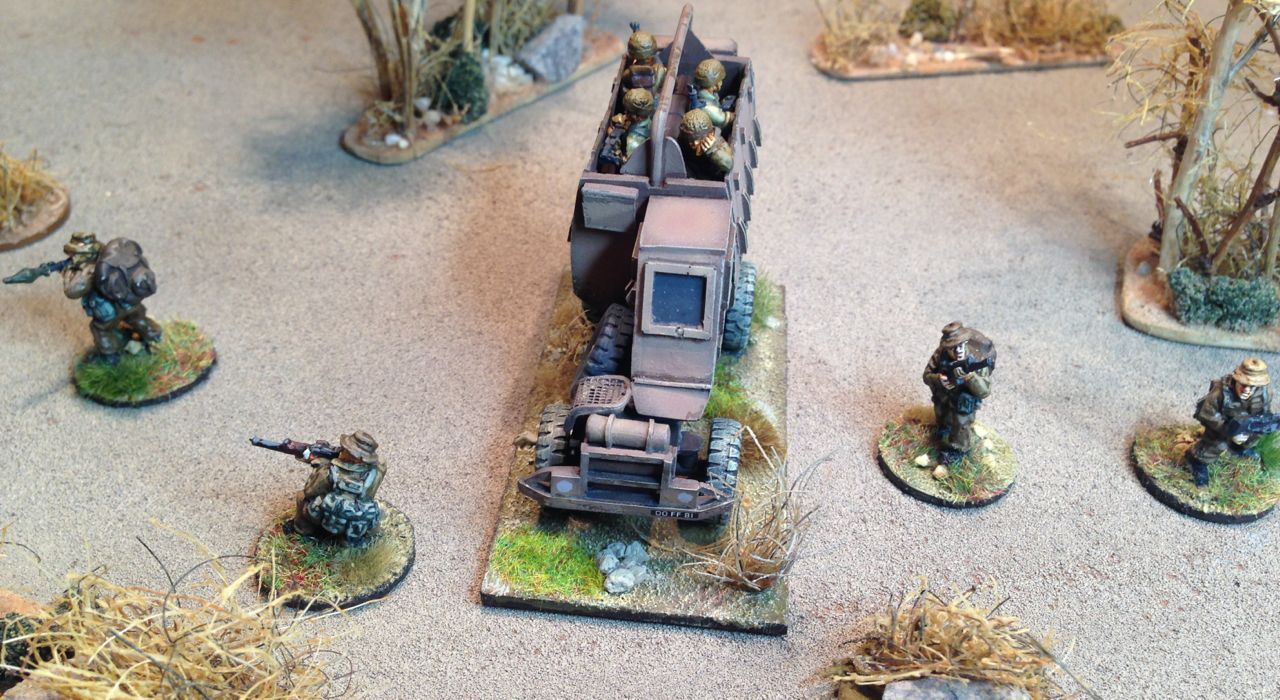
Crewing open topped vehicles looks good when the troops are mounted and can look a bit silly when they are dismounted.
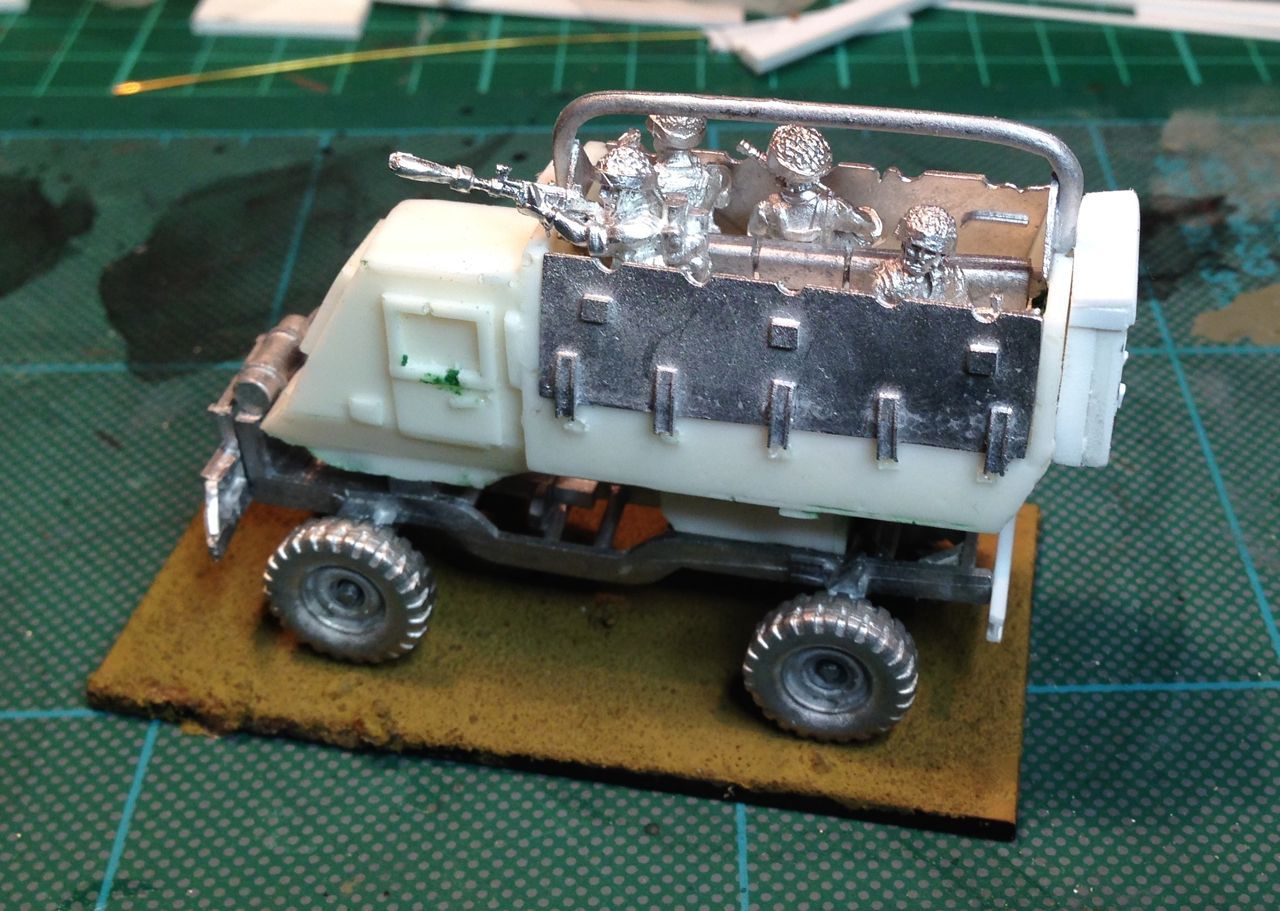
I have gone for sabot bases for my crew allowing them to be removed handy for painting and gaming.
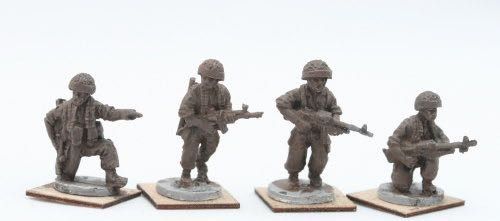
I used Elhiems IDF figures part of the Middle East and Africa range which are very good for 80's SADF being armed with the Galil (R4/5 many thanks Mike!) and wearing the kevlar helmet with no body armour. Crew figures are a handy use for the Uzi armed figures which would otherwise be bound for the bin. The challenge with Matt's figures is cutting them in half as the alloy used is quite hard, a saw and vice are a little essential.
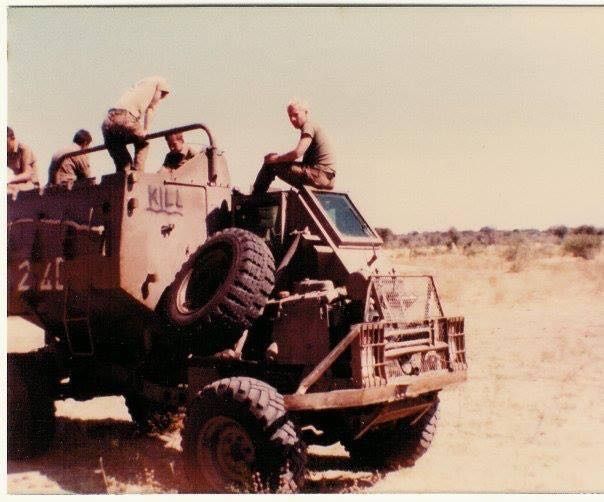

For Markings I am using various sets of white numbers and letters which can be seen applied on the front sides and rear of vehicles although size and location seem inconsitant, I assume these are the vehicles Radio C/S. Other obvious markings include vehicle registration numbers front and back which appear generaly as white letters/numbers on a black back ground.
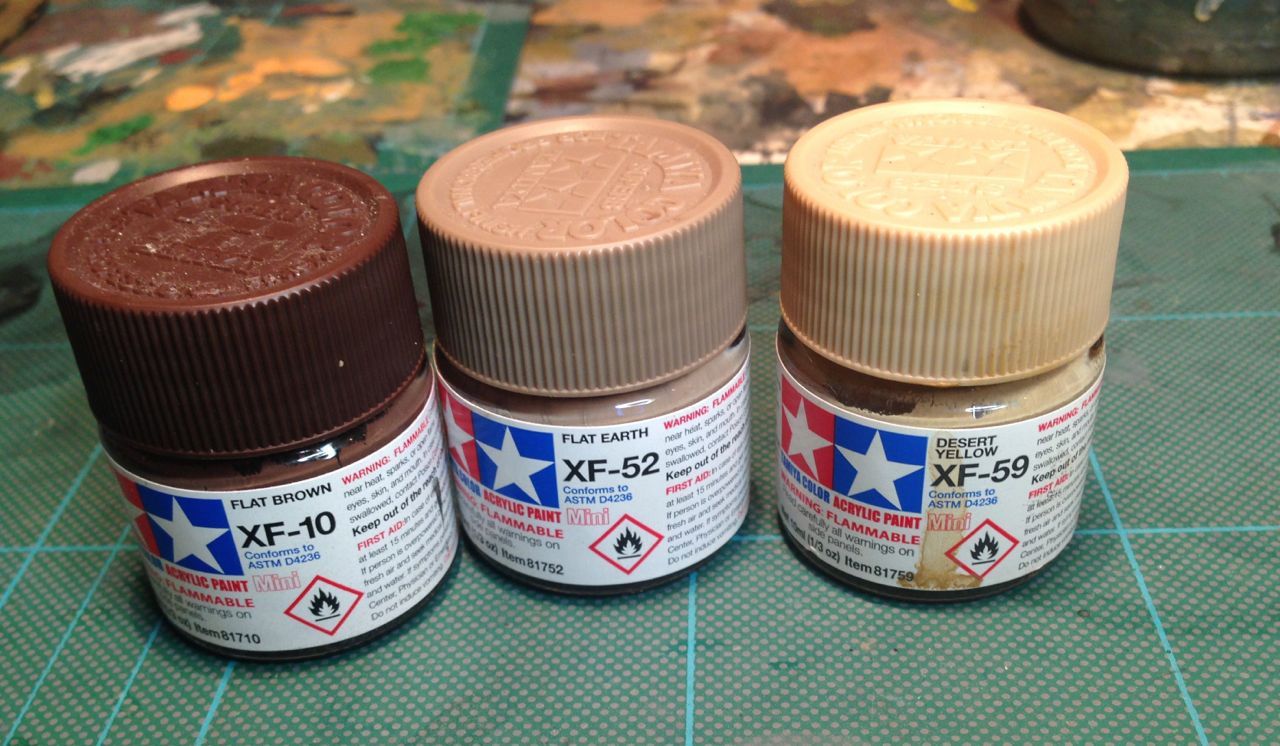
The vehicles are painted an Earth brown which always looks lite in tone in pictures due I assume to the amount of light on the subject and the effects of dust. I have used Tamiya paints starting with a heavy black pre shade on the lower hull followed by Flat Brown over the whole vehicle, the panels are picked out in desert yellow before overspraying the whole hull in Flat Earth which is a good colour match.


The tyres and windows have been painted with Vallejo Black Grey. The Tyres being washed on the sides with buff and dry brushed on the tops by a mix of Vallejo Khaki and Buff following Mig Jemez's rather handy tyre painting guide. The Pin wash used Humbrol Dark Brown Wash and the Vehicle was dry brushed using Vallejo Buff.

The Vehicle is based on a pre cut MDF base from East Riding miniatures which has been covered in sand and white glue and painted in a yellow ocher colour before drybrushing with a range of Vallejo Buff and Mid Stone. The critical bit with the base is to create a different colour to the wagon, the challenge being with the all brown palette is to get sufficient tonal variation to make it all look interesting. The woody brush plants are created using Horse Hair which has been threaded into holes drilled in the base glued then trimmed.
The Buffel model is an excellent edition to S&S's growing Bush War range of vehicles and fills a mutch need hole in the list of available affordable war-games models for this conflict and one I have been waiting to see for at least 4 years if not longer, Top job :)
References:
Web;
Army Guide Buffel
SA Transport Buffel
Fine scale modeller 1/35 Scratchbuild Buffel
Modelling Guides:
How to Paint Wheels
Paint Chipping
Army Guide Buffel
SA Transport Buffel
Fine scale modeller 1/35 Scratchbuild Buffel
Modelling Guides:
How to Paint Wheels
Paint Chipping
Very cool. The kit is impressive, I notice you didn't need much filler. Excellent model. :)
ReplyDeleteI am glad you like it, if you are into the border war or even African wars its a handy kit
DeleteThe SA license build of the Galil was the R4. R5 is the shortened carbine version which I think the Paras used. SADF also used some Uzis, although I have never seen them in pics of the Border War. Perhaps only a few test weapons?
ReplyDeleteno I have seen no pics of uzis either, thanks for the correction always useful when people do that, it improves the blog
DeletePS - Your modelling and painting is excellent. The SADF Nutria Brown is a hard colour to get right but you are almost bang on.
ReplyDeleteThanks appreciated
DeleteThanks for the review.
ReplyDeleteI am glad that you like the model.
First idea is make only one for me but Shaun have a good idea.....
More Rhodesian stuff to come.
Regards from Portugal.
AmbnModelismo
Antonio, No problems, love the model and you have filled a major gap in the 20mm Model market, I suspect it was there because getting the Hull and Chassis looking right is a challenge as well as the thinness of the side panels, you have produced a top model. Hope the Ystervarks progressing :)
DeleteGreat review.
ReplyDeleteI know what I'll be adding to my next S and S order.
Cheers,
Pete.
The Ystervark is almost finished along with a Rhodesian Puma truck.
ReplyDeleteI must make the canonand side panels.
Best regards.
Superb, will certainly be grabbing a couple of those :)
DeleteWonderful tutorial ,I'm a impatient modeler so your tips will help. they look great.
ReplyDelete